Part I
- Identity provider
- WARP and device posture
- Cloudflare Tunnel
- Access and Private Network
- In-browser SSH terminal
Integrate Cloudflare Access with an Identity Provider using SAML.
As part of this lab, we created a SAML-based IdP named TS² (Trusted SAML Server). TS² is designed to mock a small organization.
Let’s integrate Cloudflare Access with this IdP.
Login to Cloudflare & navigate to the Zero Trust dashboard
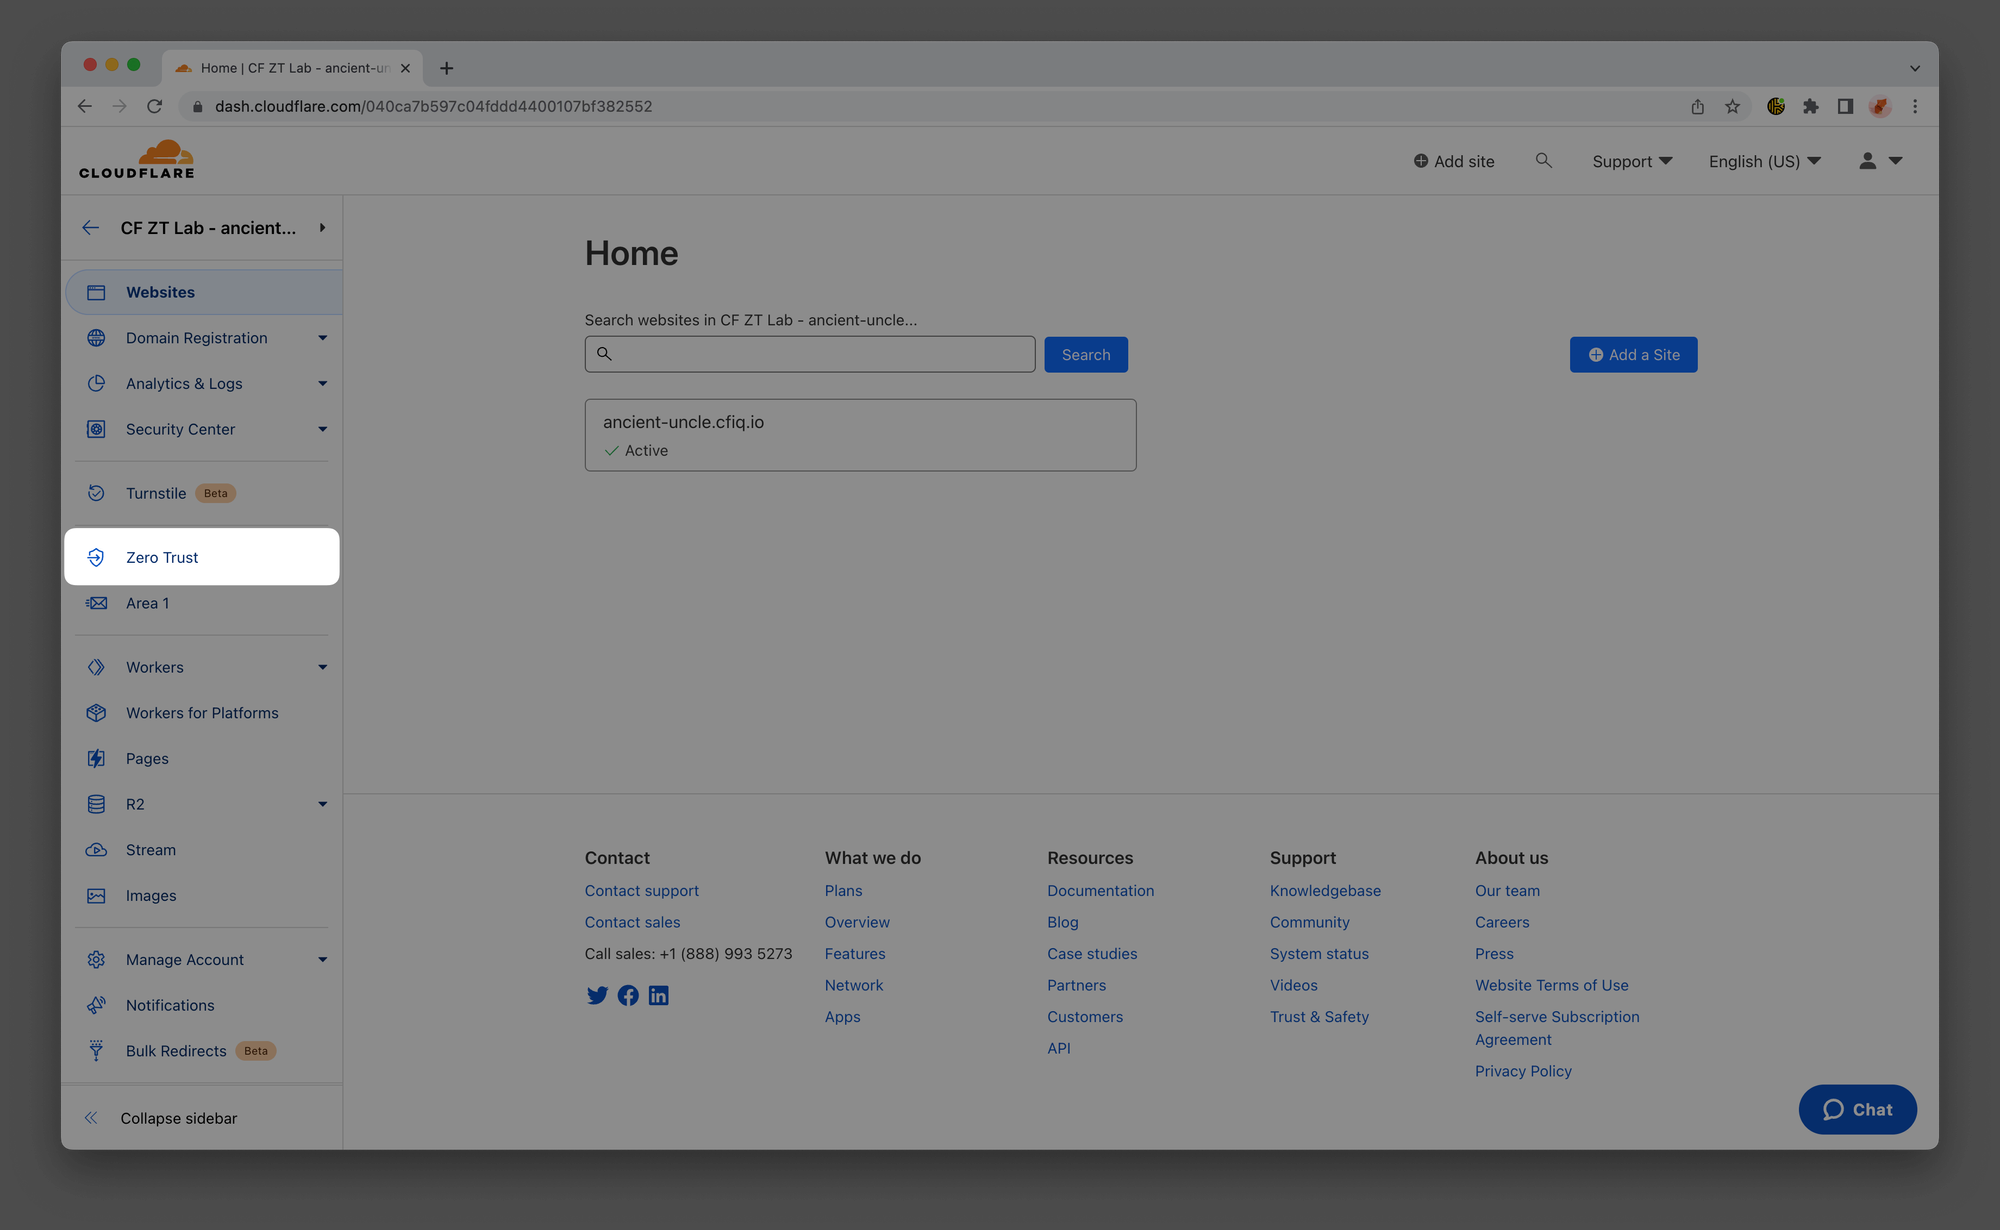
In your Zero Trust dashboard, navigate to Settings ‣ Custom Pages and verify that your Team domain is set to <LAB_SLUG>.cloudflareaccess.com.
Example:
LAB_SLUG: ancient-uncle
Domain: ancient-uncle.cloudflareaccess.com

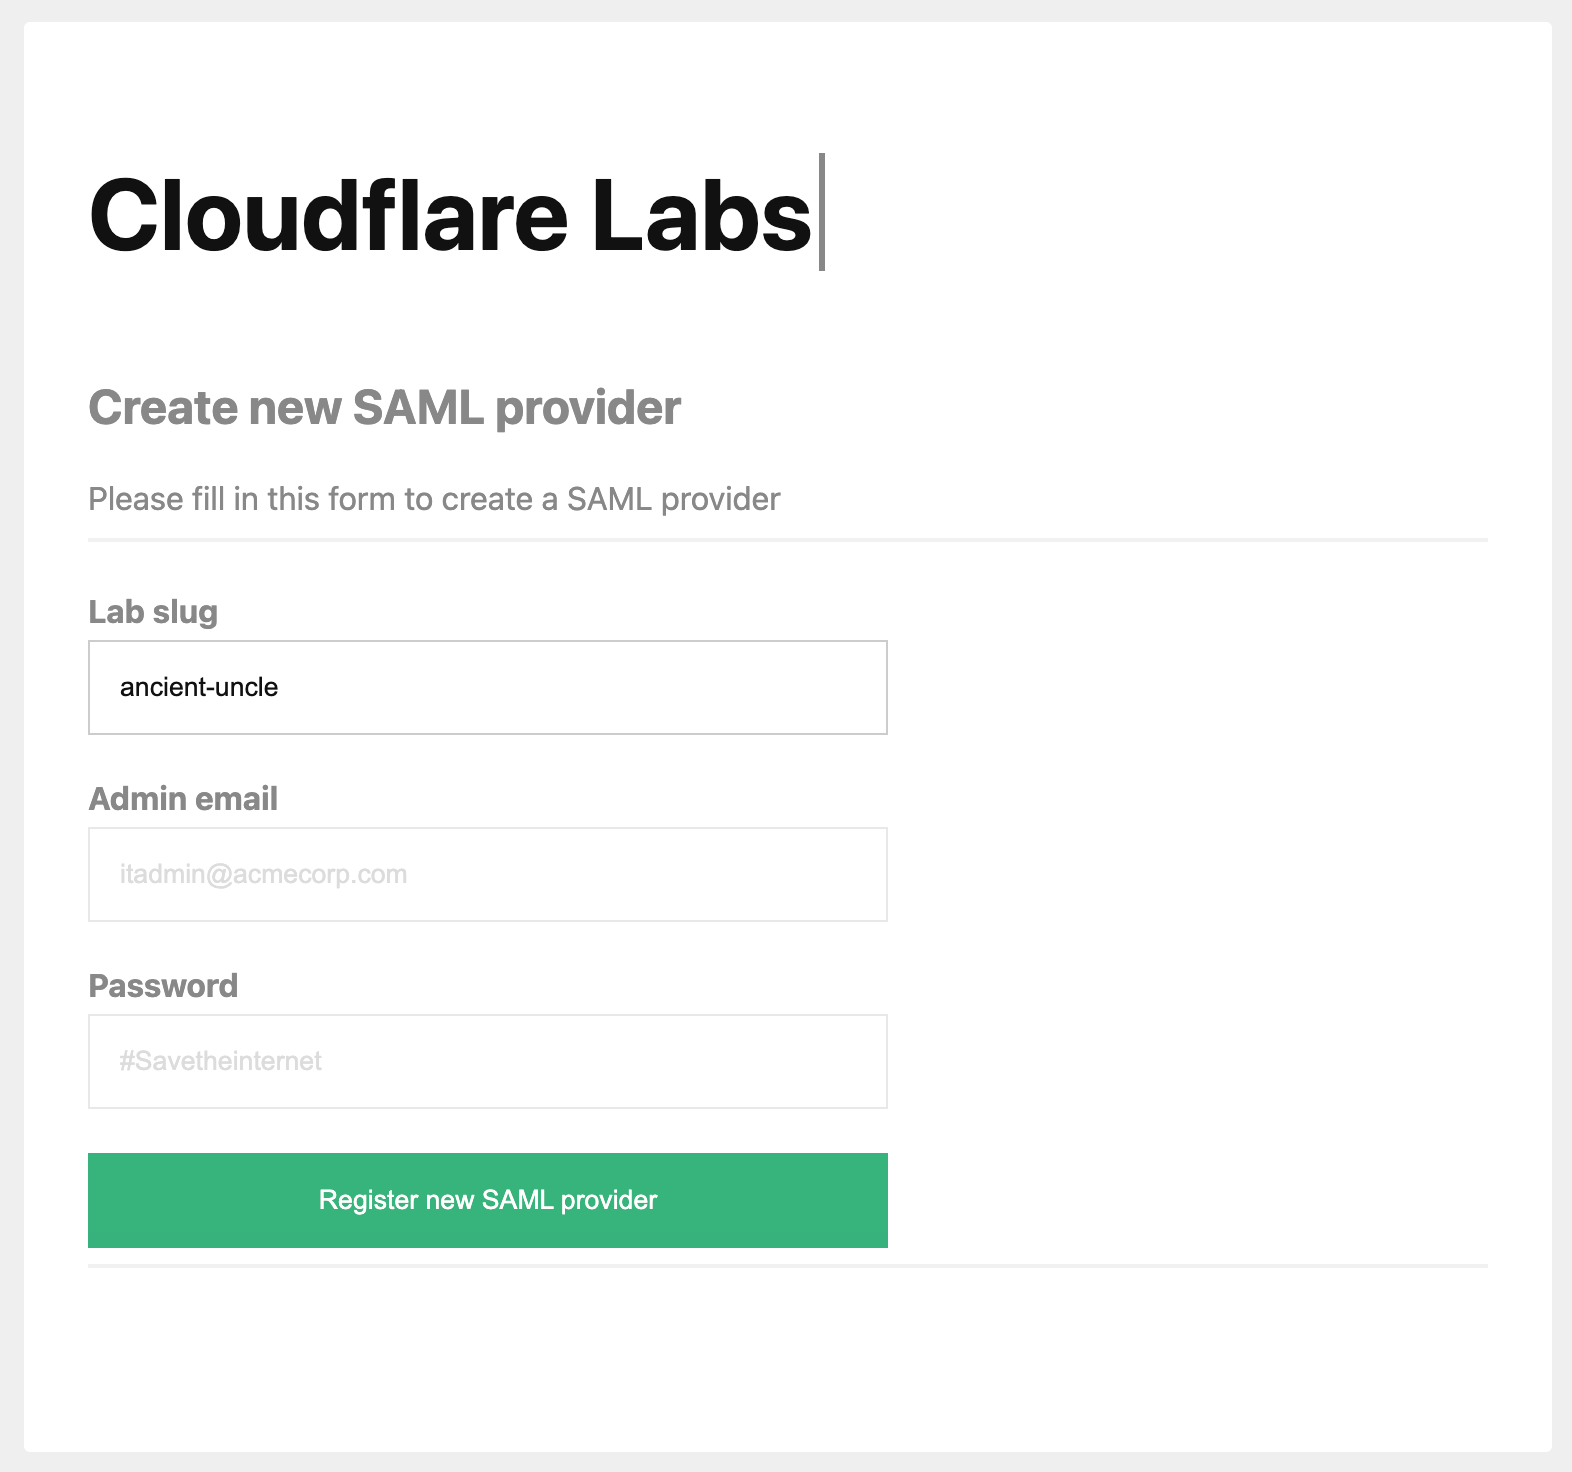
Open this URL: https://lab.cfiq.io/en/registration/d669fe246bad551500469b17ff6a244a8dfae83a/saml
Here, create an identity provider that you will use throughout the rest of this lab by pasting in your LAB_SLUG.
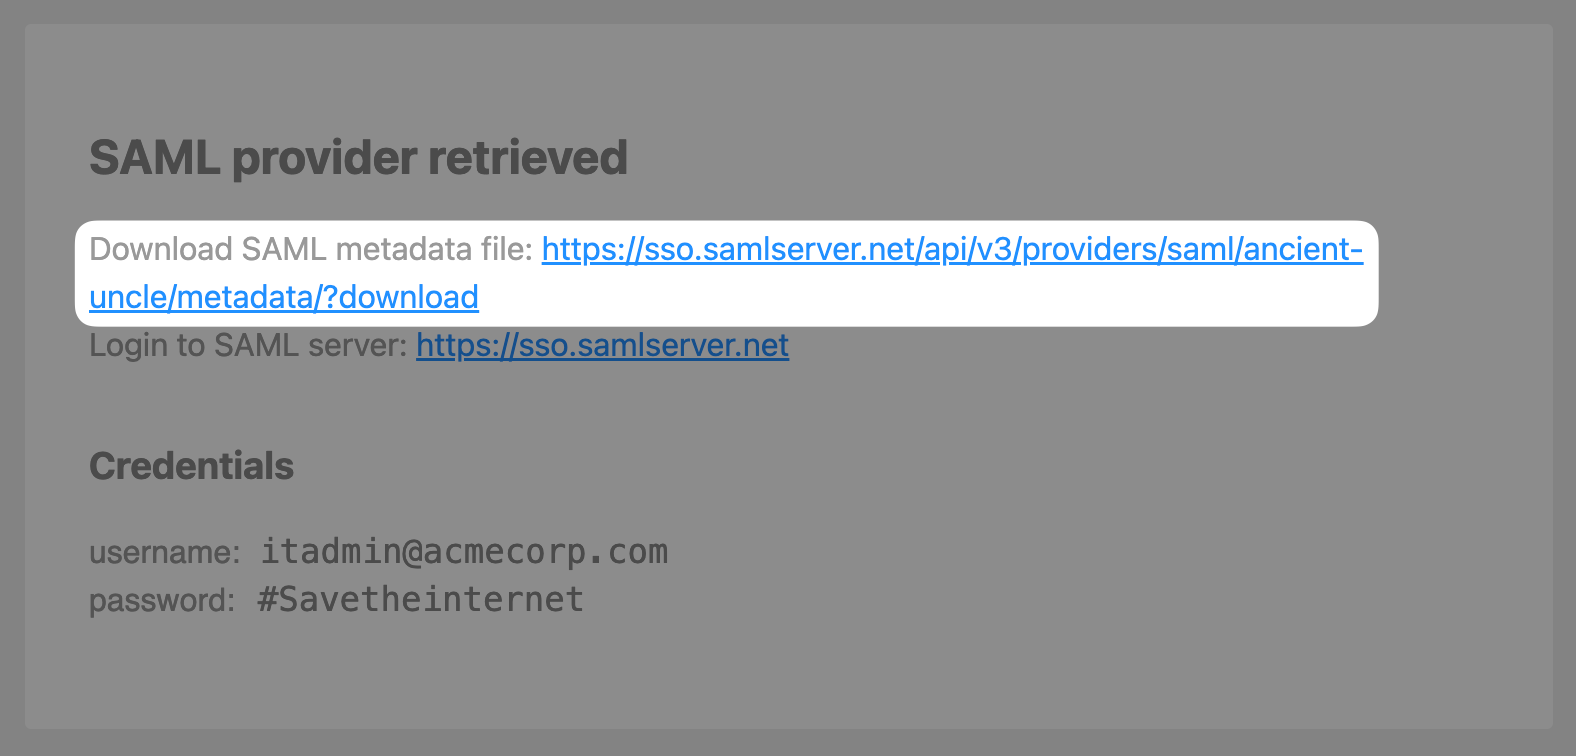
Download the SAML metadata file by clicking on the provided link:
Return to the Zero Trust Dashboard, then open Settings ‣ Authentication. In the Login methods card, click Add new and select SAML.
Drag and drop the metadata file you created in step #3 into the Import box on the callout:

Press Save, then Test.

When prompted to log in, use the following credentials:
Email: [email protected]
Password: #Savetheinternet

Press Continue
You should see your user’s identity successfully retrieved via the SAML callback
