Introduction
The Cloudflare Magic WAN Lab is designed to help learners understand how Magic WAN works by simulating a real world scenario where a user in a branch office wants to access an intranet site in a corporate HQ or datacenter location without having to log into a VPN or other tool. In traditional IT environments, the process to provide this connectivity can become quite complicated. Using Magic WAN, the only thing we will be doing is creating an IPsec tunnel from the router to the Cloudflare network.
Lab Layout

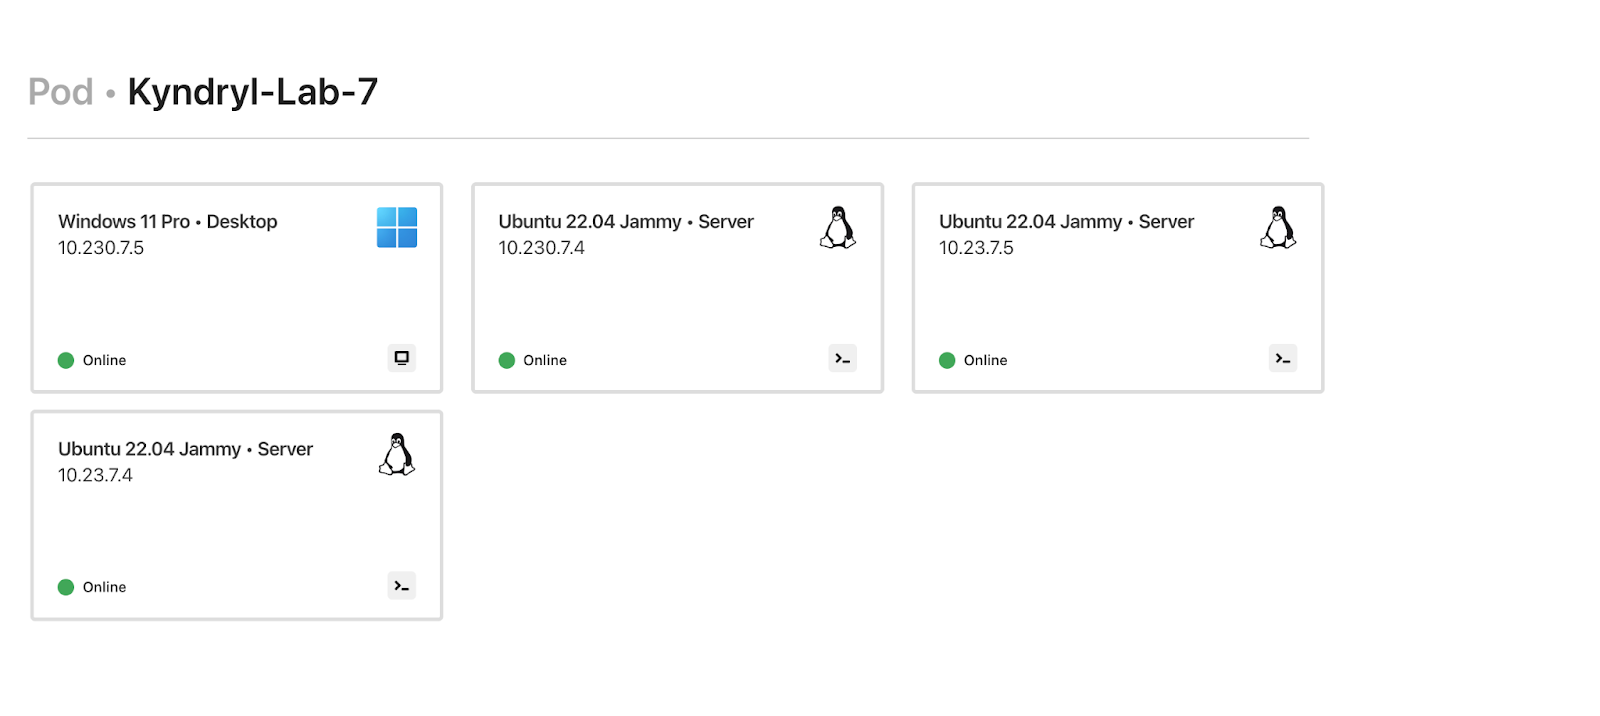
The lab will consist of four virtual machines, The virtual machines will work together to give the student experience with working with the Cloudflare dashboard, and to simulate how two separate networks can connect to each other through Magic WAN. In each network, there will be a Linux-based StrongSwan router. In the “HQ” network, there will be an origin server running a webserver. The “Branch” network will feature a Windows-based client which we will use to connect to the web server via Magic WAN.
The routers in these networks each have 2 virtual NICs. One NIC is the external facing NIC, which will terminate the IPSEC tunnel, and the other is the internal facing or LAN NIC.
For the Router in the HQ:
The external facing NIC has an IP address of 10.20.101.x
The internal facing NIC has an IP address of 10.23.x.4
For the Router in the Branch:
The external facing NIC has an IP address of 10.20.101.x
The internal facing NIC has an IP address of 10.230.x.4
Lab Configuration
Configuration of the lab will be broken into the following parts:
- Cloudflare Dashboard Configuration
- HQ Router Setup
- Branch Router Setup
Cloudflare Dashboard Configuration
Before your arrival, you should have been assigned a Cloudflare account to configure. From the Cloudflare Labs screen, click on “Open CF Dashboard” from the top right. This should take you to the Cloudflare Dashboard and will allow you to select the account that has been assigned to you.
Note: You will have to create a Magic Wan Tunnel for each router
Once in the dashboard, From the left-hand side menu, select Magic WAN and you will be brought to the Magic WAN Configuration page. Select Create to create a new tunnel. From there, select IPsec Tunnel and click Next. You should see a screen that looks like this:
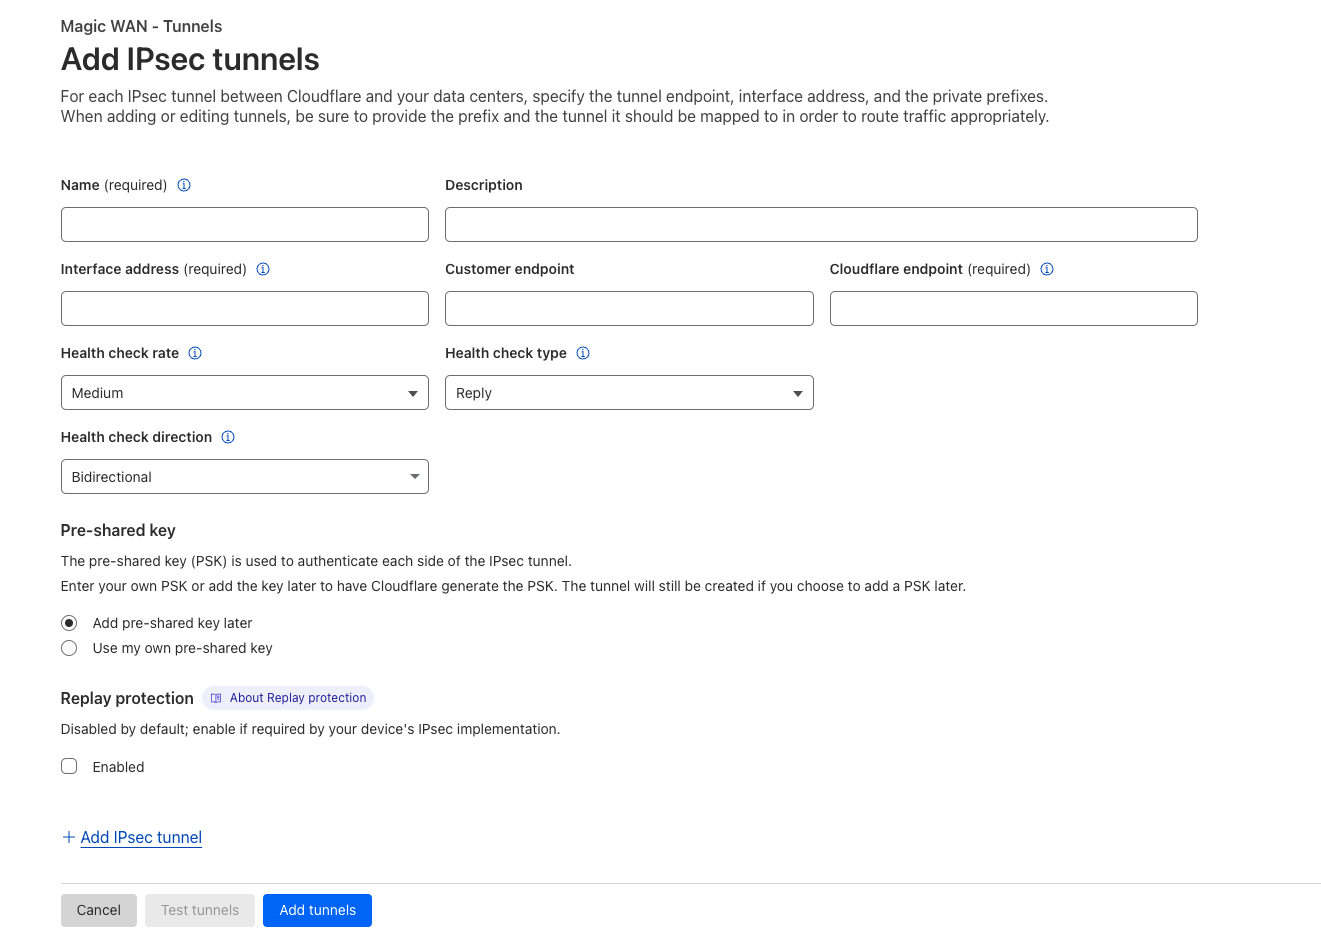
Fill in the following information:
- Tunnel Name - Give the tunnel a name that you can easily identify.
- Description - Additional information about the tunnel (optional).
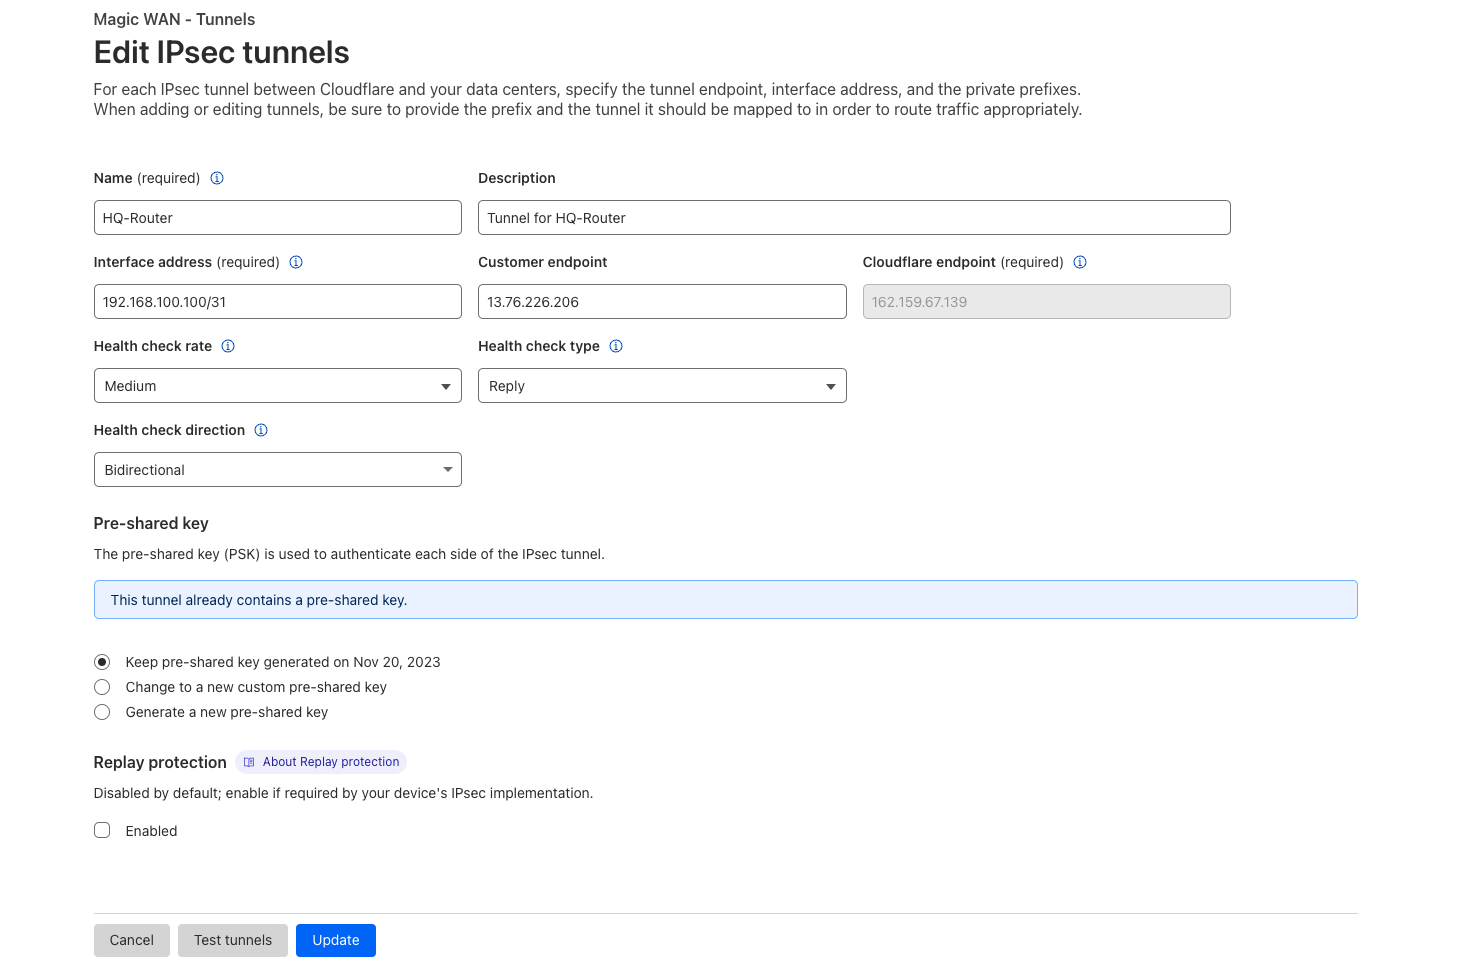
- Interface Address - When creating the Cloudflare IPSec Tunnel in the Dashboard, you will have to create the Cloudflare Interface Address. This address can be any RFC1918 address with 2 hosts. For this lab we will use the following addresses:
- HQ Router:
192.168.100.100/31 - Branch Router:
192.168.100.200/31
- HQ Router:
- The Customer Endpoint is the public IP address of the HQ Router (eg. 13.76.226.206)
- The Cloudflare Endpoint is the Anycast IP address that is assigned to the student account (eg. 162.159.67.158).
Next, move to the Pre-Shared Key section and select Use my own pre-shared key. For the purposes of this lab, we will use #Savetheinternet
When everything is entered, the dashboard should look like this:
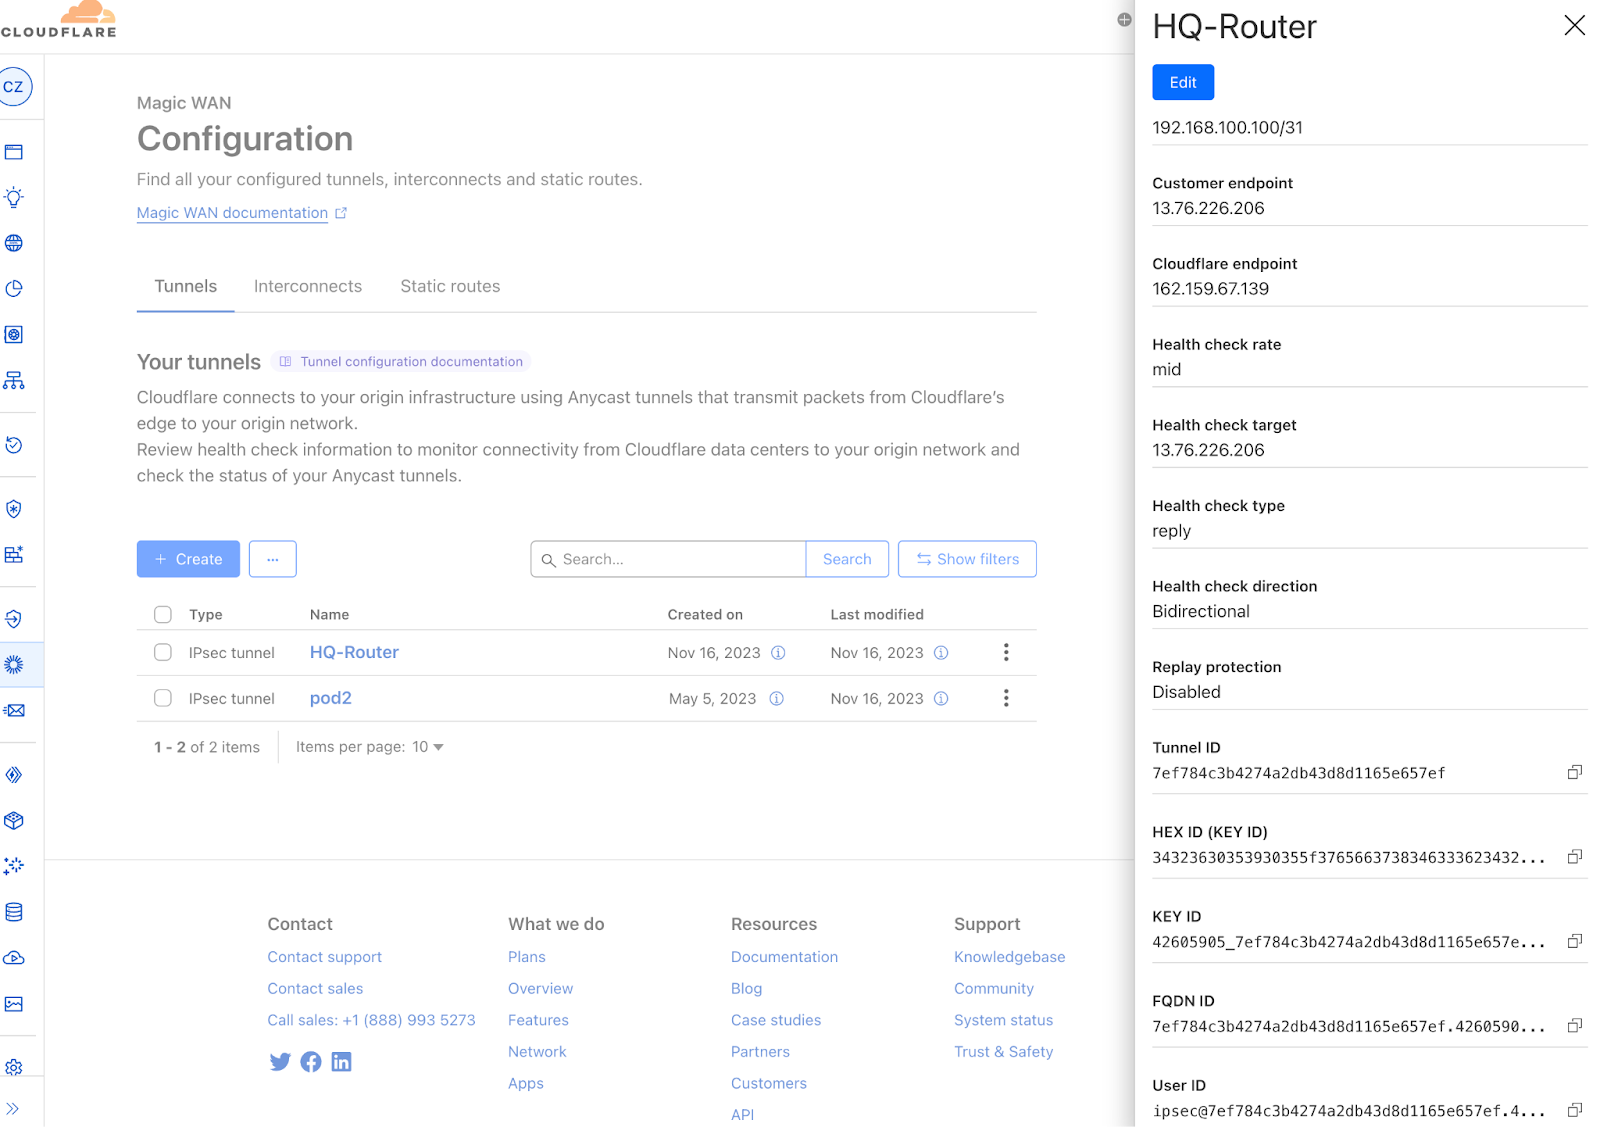
After the tunnel is saved, click on the tunnel and you will see information about the tunnel. We will need to take the following down as we will need it for when we configure the router:
- Cloudflare Endpoint FQDN ID
- Cloudflare Endpoint - This is the Cloudflare Anycast IP Address for the Tunnel
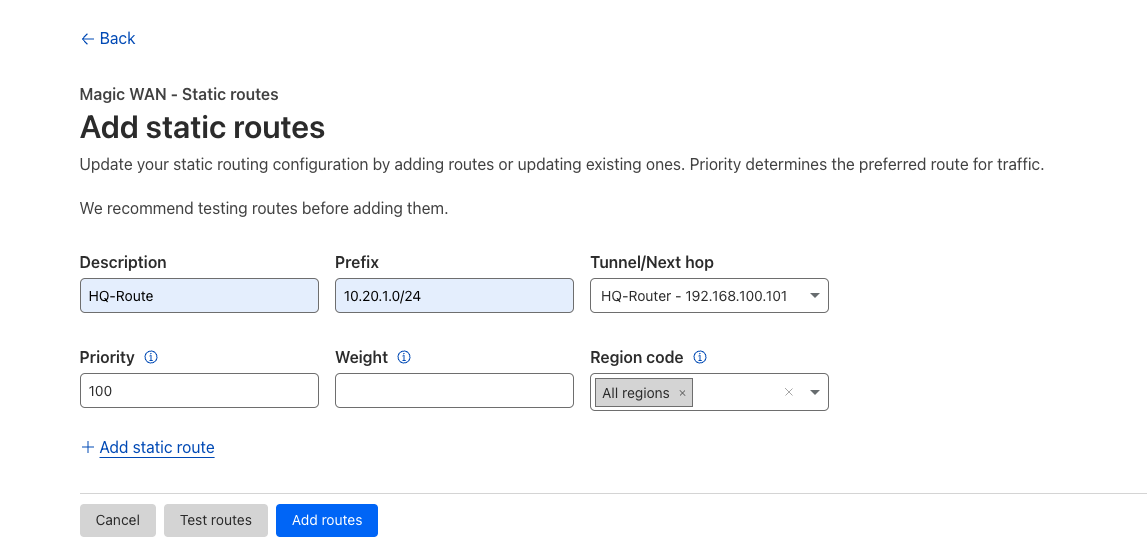
Before we are done with the Cloudflare Dashboard, we need to create a static route that tells Magic WAN to route traffic from the Internal NIC (10.23.x.4). In the dashboard, select Static Routes and then select Create. Enter the following information into the dashboard:Description: Name for the route that can be easily identified
- Prefix: Enter the LAN subnet (10.23.x.0/28)
- Tunnel/Next hop: Click the drop down and you should see the HQ-Router Tunnel that you created in the tunnel configuration.
Leave all the other settings as they are and select Add Routes.
When everything is configured, things should look like this:
Now that the Cloudflare dashboard is configured, we need to move onto the HQ router and configure the tunnels.