Branch router
To properly connect the two sites via Magic WAN, we need to create another IPsec tunnel in the Cloudflare Dashboard. This time it will be for the Branch Router. As before, log into the Cloudflare dashboard and choose the account that you have been assigned. From the left-hand side menu, select Magic WAN and you will be brought to the Magic WAN Configuration page. Select Create to create a new tunnel. From there, select IPsec Tunnel and click Next. You should see a screen that looks like this:
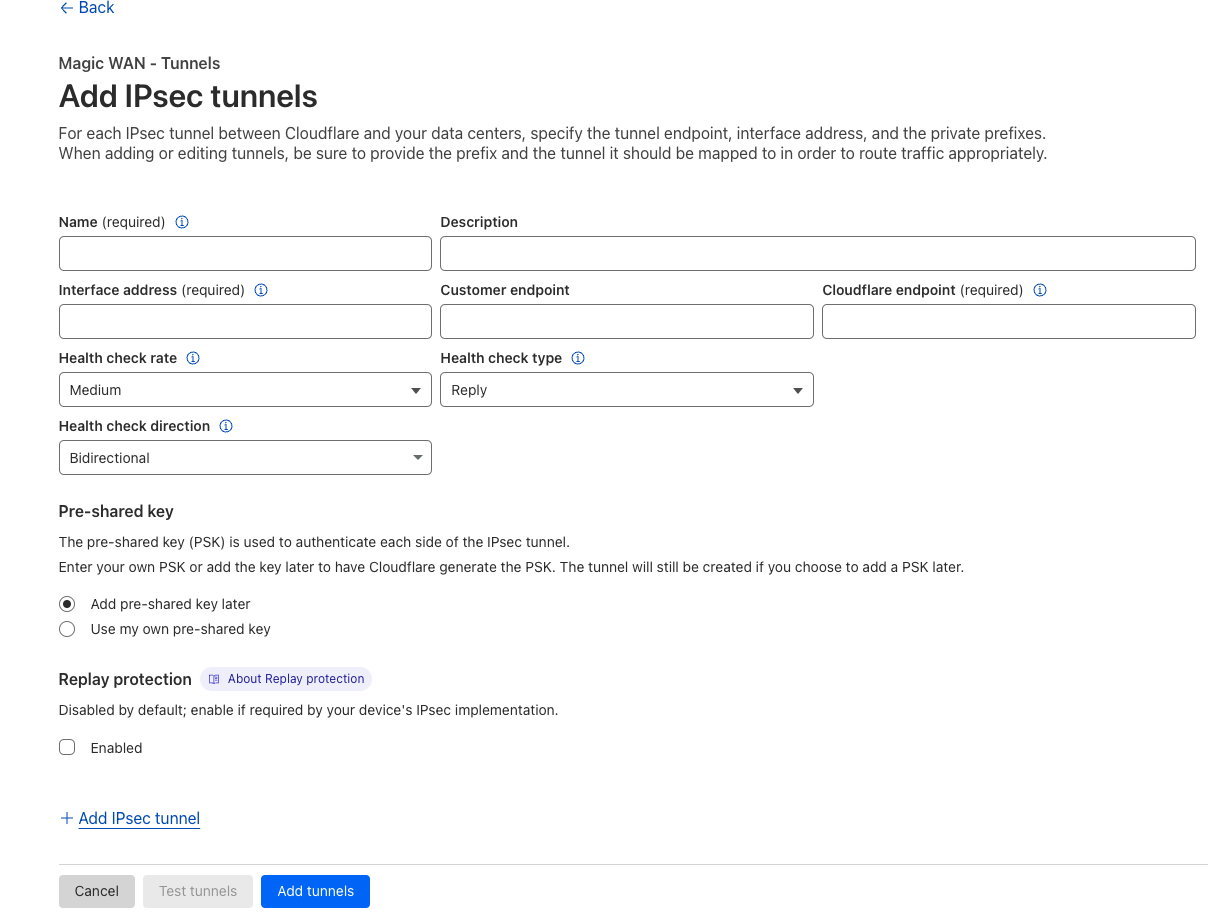
Fill in the following information:
- Tunnel Name - Give the tunnel a name that you can easily identify.
- Description - Additional information about the tunnel (optional).
- Interface Address - When creating the Cloudflare IPSec Tunnel in the Dashboard, you will have to create the Cloudflare Interface Address. This address can be any RFC1918 address with 2 hosts. For this lab we will use the following addresses:
- HQ Router: 192.168.100.100/31
- Branch Router: 192.168.100.200/31
- The Customer Endpoint is the public IP address of the HQ Router (eg. 13.76.226.206)
- The Cloudflare Endpoint is the Anycast IP address that is assigned to the student account (eg. 162.159.67.158).
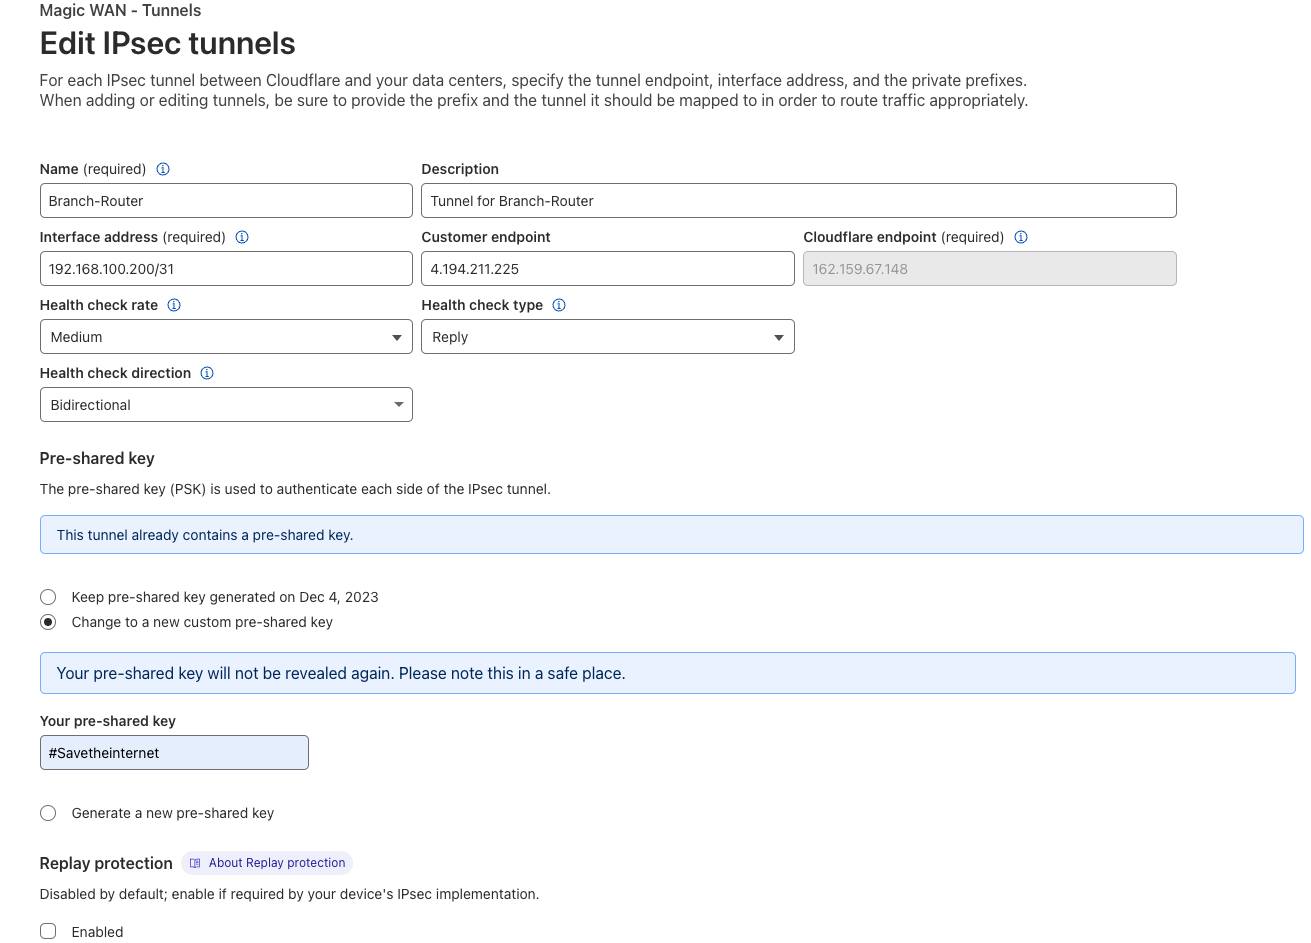
Next move to the Pre-Shared Key section and select Use my own pre-shared key. For the purposes of this lab, we will use #Savetheinternet
When everything is entered, the dashboard should look like this:
After the tunnel is saved, click on the tunnel and you will see information about the tunnel. We
will need to take the following down as we will need it for when we configure the router:
- Cloudflare Endpoint FQDN ID
- Cloudflare Endpoint (This is the CF Anycast IP Address For the Tunnel)
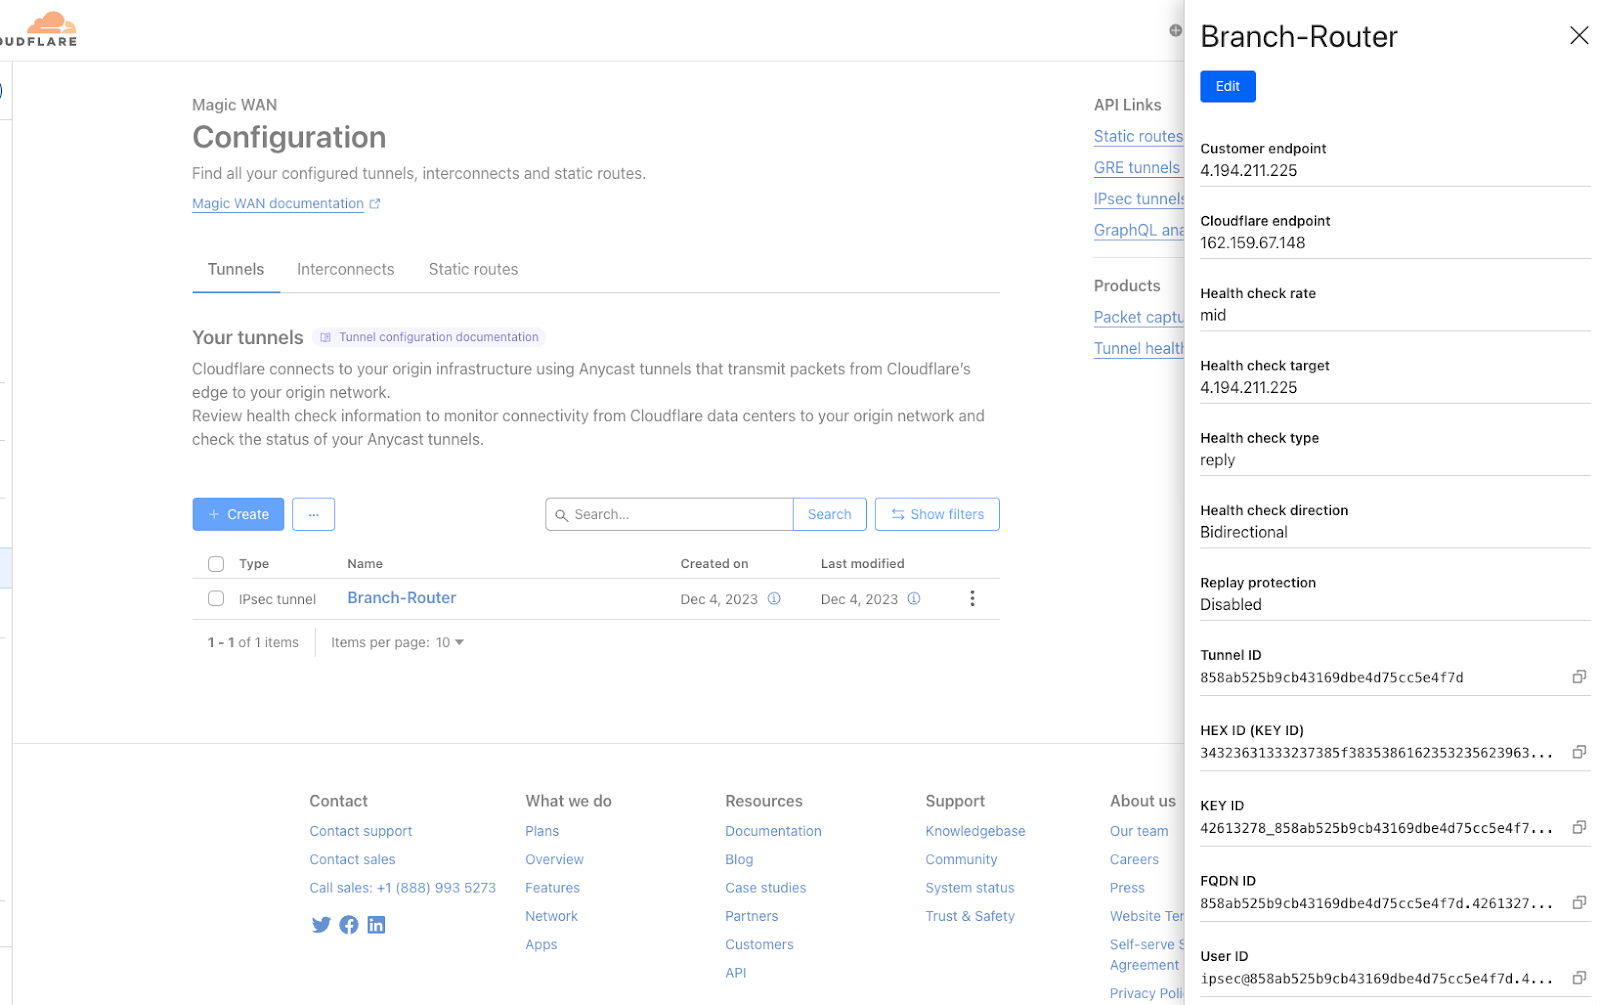
Once we have the information, we need to go to the Branch Router virtual machine and configure it to connect to Magic WAN.
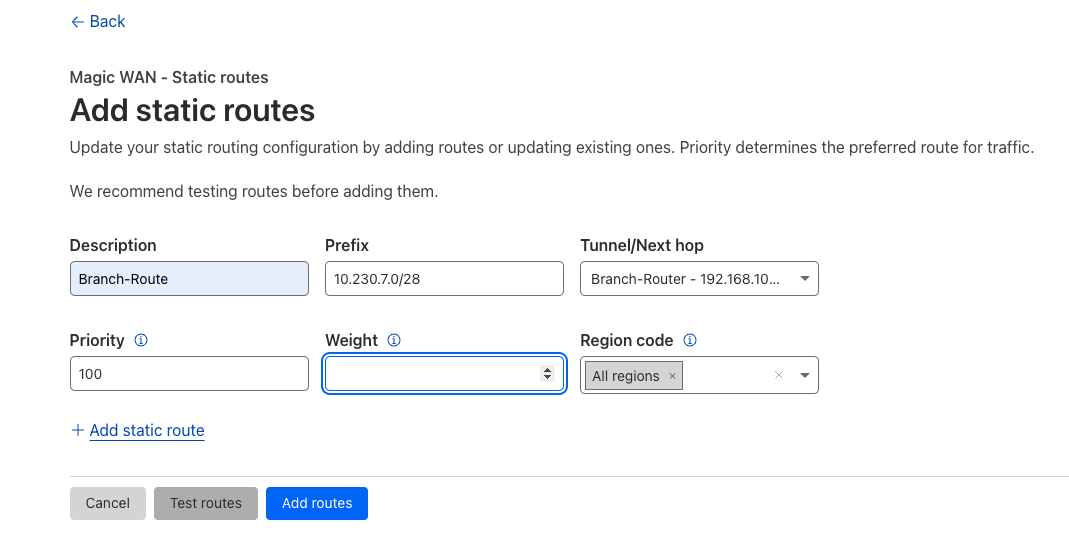
Like we did for the HQ Router, before we are done with the Cloudflare Dashboard, we need to create a static route that tells Magic WAN to route traffic from the Internal NIC (10.230.x.4). In the dashboard, select Static Routes and then select Create. Enter the following information into the dashboard:Description: Name for the route that can be easily identified
- Prefix: Enter the LAN subnet (10.230.x.0/28)
- Tunnel/Next hop: Click the drop down and you should see the HQ-Router Tunnel that you created in the tunnel configuration.
Leave all the other settings as they are and select Add Routes.
When everything is configured, things should look like this:
Now that the Cloudflare dashboard is configured, we need to move onto the routers and configure the tunnels
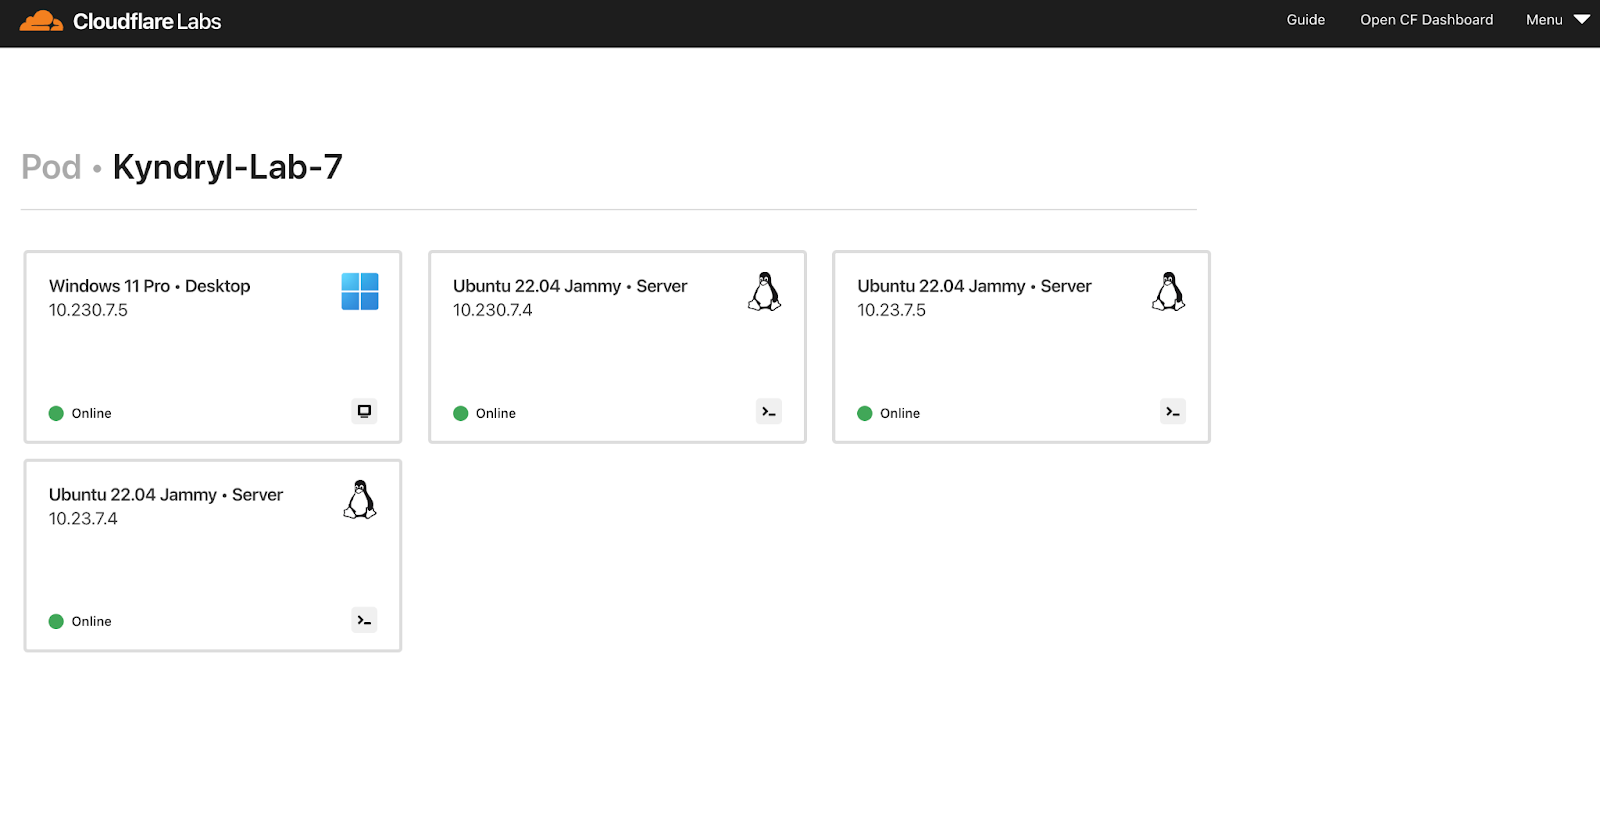
In the Cloudflare Managed Labs (CML) dashboard, select the Branch Router
Perform the following steps to get Strongswan configured with Cloudflare Magic WAN.
To properly configure Strongswan we will need to work on the following files:
/etc/ipsec.conf
IPSec Tunnel Configuration:
At the command line type sudo nano /etc/ipsec.conf
In the configuration file, the only changes you will need to make are to update the following:
Leftid = <FQDN from Tunnel in CF Dashboard>
Right = <CF ANYCAST IP ADDRESS from Dashboard>
Rightid = <CF ANYCAST IP ADDRESS from Dashboard>
Make the changes and save the file.
Note: The file /etc/ipsec.secrets is pre-configured. For this lab, the pre-shared key is #Savetheinternet.
At this point, we should be able to connect the router to Magic WAN via the IPsec tunnel. To confirm this enter the following commands:sudo ipsec reload
sudo ipsec restart
sudo ipsec status
If everything is configured correctly, you should see an output that looks like this:

Now that the tunnels are created, we need to configure the router to send traffic via the tunnel through creating a VT interface. Then we will configure the routing to allow the traffic from the LAN devices to connect to the Internet via the IPsec tunnel interface.
First create the IPSec VTI Tunnel Interface
sudo ip tunnel add vti1 local 10.20.199.15 remote 162.159.67.139 mode vti key 50
IMPORTANT: 10.20.199.15 is an example internal IP address. Use the IP Address Assigned to eth0 ; 162.159.67.139 is an example CF Anycast address. Use the CF Anycast IP address assigned to your account.
sudo ip addr add 192.168.100.201/31 dev vti1
NOTE: This address is the other side of the IPsec Tunnel that we created in the dashboard.
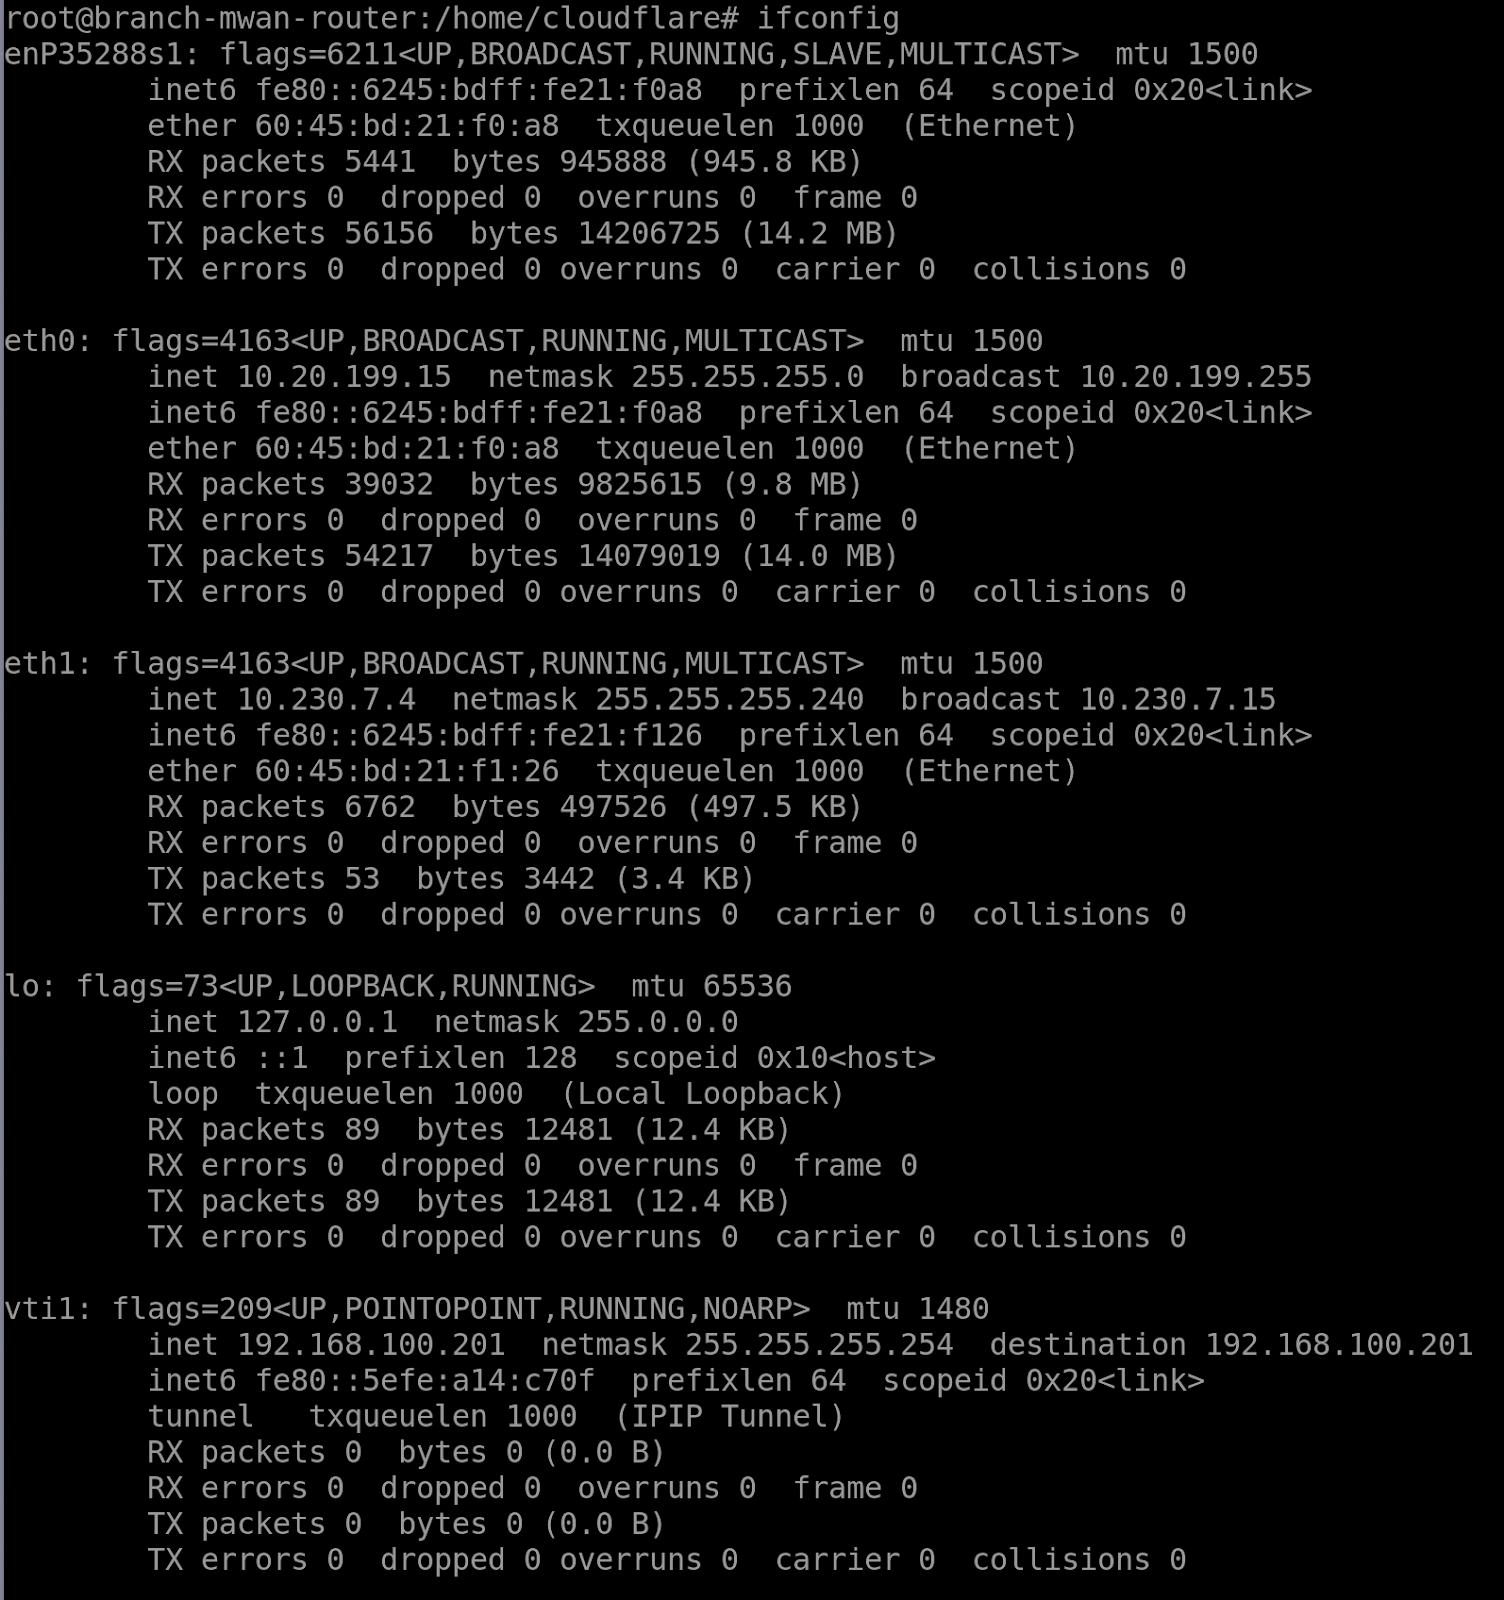
sudo ip link set vti1 up
Verify tunnel creation with ifconfig:
Next we will need to create routing inside the Strongswan Router using Policy Based Routing (PBR) to send traffic in the LAN through the Cloudflare Magic Wan IPsec tunnel.
This requires:
- Creating the corresponding PBR rule(s) to route specific traffic according to route table IPSEC1.
- NOTE: IP rule(s) entered via the CLI at a later order is given a higher priority (i.e. lower preference number) than the rule(s) configured prior, as IP rules are evaluated sequentially from lower preference number to higher preference number. The best way to ensure the proper priority of a given IP rule is to explicitly configure the appropriate priority number when configuring the rule.
- Lastly, configure a default route in table IPSEC1 that routes all traffic that is being performed route lookup in table IPSEC1 to be sent over the IPsec tunnel to Cloudflare Magic WAN.
- Validate the effect of the configuration with “cat /etc/iproute2/rt_tables”, “ip rule” and “ip route list table IPSEC1” or “ip route list table 201” or “ip route list table all”
Use the Following Commands to create the routes and rules to allow for proper routing capabilities:
ip rule add from 10.230.x.0/28 table IPSEC1
ip rule add from 10.230.x.2 to 10.230.x.0/28 lookup main
ip rule add to 10.90.0.6/32 lookup main - This is a critical step, do not skip
ip route add default via 192.168.100.200 dev vti1 table IPSEC1
Next, check to make sure net.ipv4.ip_forward is set to 1 (i.e enabled), since this VM is used as a router. (cat /etc/sysctl.conf |grep ip_forward).
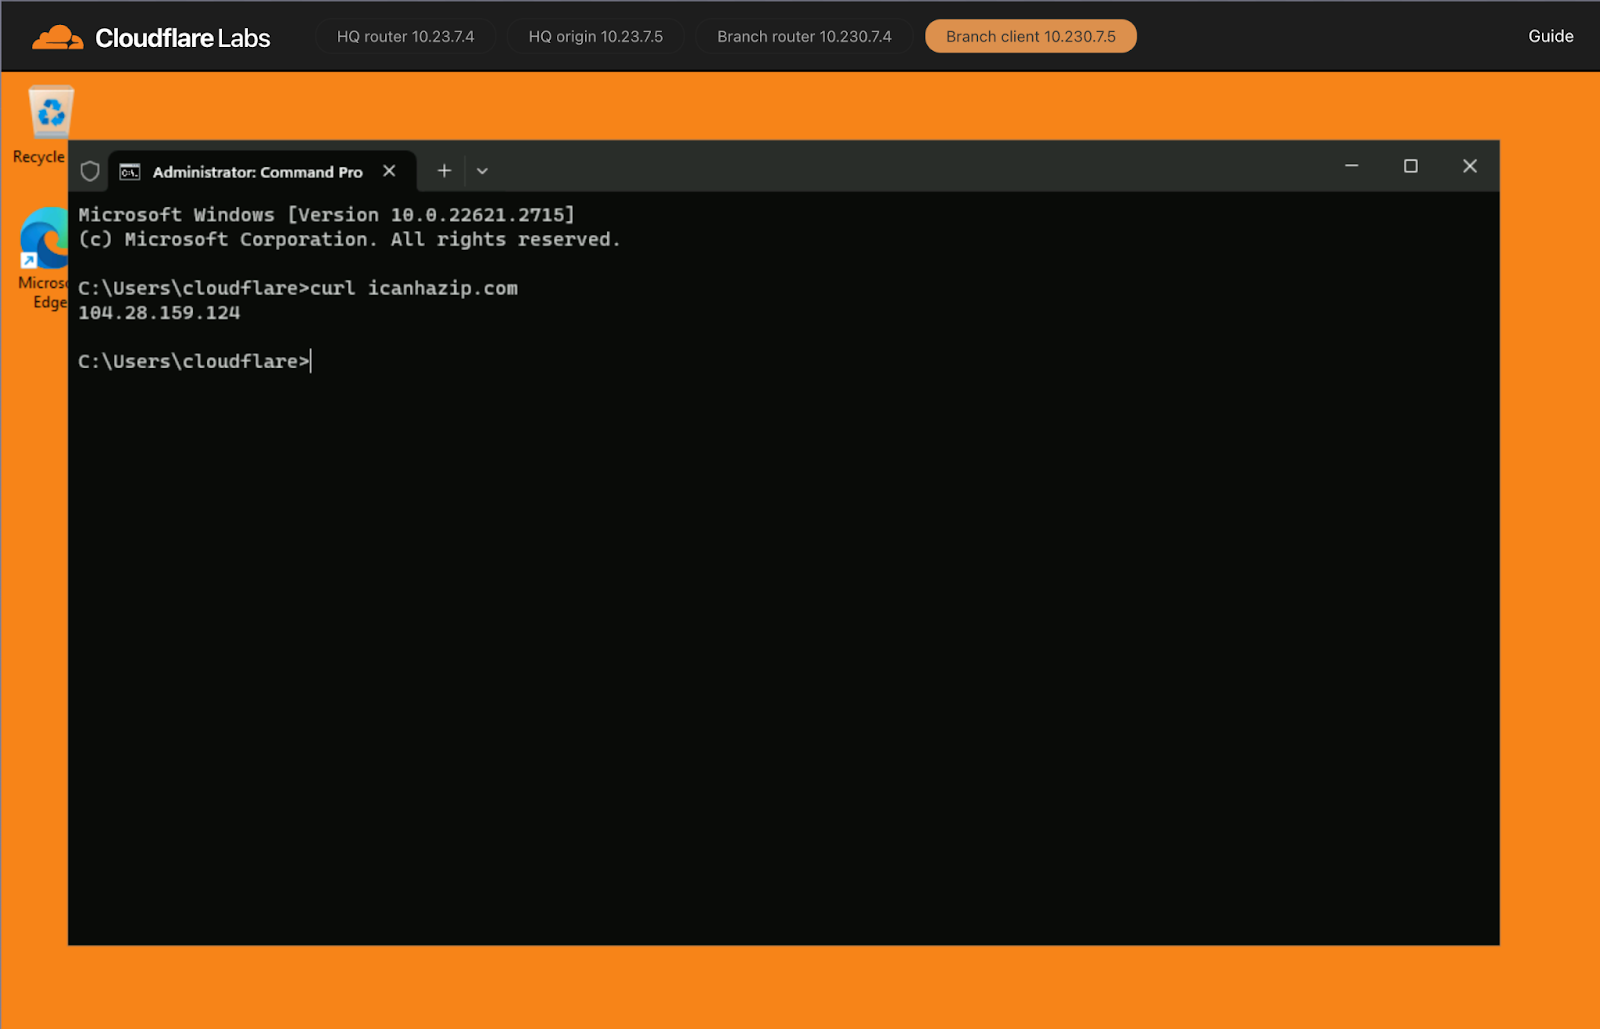
At this point, the router configuration should be completed. Log into the Branch Client machine to confirm connectivity. Open the Windows Command Line application.
At the command line, enter curl icanhazip.com and you should get a Cloudflare IP address returned to you: 104.28.159.124
We have now successfully configured two Magic WAN tunnels and have connected both the HQ and the Branch office to the Cloudflare network. Since we have the default route going through Magic WAN and the VTI interface in the routers, we have been able to prove connectivity to the Internet from a client device via Magic WAN.