WAF
Task
In this section we will deploy key components of Cloudflare Application Security, including:
- WAF Rulesets
- Custom Rules
- Rate Limiting
Why
The Cloudflare Managed Ruleset is a comprehensive set of security rules created and maintained by the Cloudflare security team. It is designed to provide fast and effective protection for all types of applications, and it is frequently updated to cover new vulnerabilities and reduce false positives.
By following these exercises, you will learn how to deploy these features to protect your web applications.
Steps
1. What can we see before deploying the WAF?
The Cloudflare WAF provides comprehensive protection right out of the box. A common problem with web applications is accidental exposure of sensitive files and folders.
To test this, attempt to navigate to .git/secrets.txt on your Cloudflare zone (e.g. https://cfdemolab-zone-xxx.cfdemolab.xyz/.git/secrets.txt)
This simulates the scenario of an exposed git version control repository. Oh no, the credentials are exposed! We will revisit this later.

2. Deploy the Cloudflare Managed Ruleset
In the Cloudflare Dashboard go to Security ‣ WAF ‣ Managed Rules
Find the “Cloudflare Managed Ruleset” from the list of available rulesets and click on it (don’t click Deploy just yet).

On this screen, you can configure the scope (hostnames) to which the ruleset will apply, along with changing other settings, including:
- Set the action to perform (Managed Challenge, Block, JS Challenge, Log, Interactive Challenge, or Default).
- Override the action performed by individual rules or rules with specific tags.
- Disable specific rules or rules with specific tags.
- Customize the filter expression to apply the ruleset only to a subset of incoming requests.
Feel free to browse settings and the rules to see the different types of vulnerabilities mitigated out of the box.
For now we will leave everything as default so when you are ready, click Deploy.

You will now see that the ruleset is enabled.
Repeat this action to also deploy the Cloudflare OWASP Core Ruleset with default settings. As before, feel free to explore the rules and settings.
If you’d like to understand more about the rulesets and their various settings, please see Cloudflare WAF Developers Docs.
3. Test the Cloudflare Managed Ruleset
At the start of the exercise, you were able to browse the .git folder on your Cloudflare zone which revealed a secrets file (e.g. https://cfdemolab-zone-xxx.cfdemolab.xyz/.git/secrets.txt).
Try this test again - you will see that simply deploying the ruleset with default settings has now prevented this attack.

4. Analyse the Block
Navigate to Security > Events
You will see some recent blocks, caused by the steps in the previous exercise

Spend some time looking at the various options you have here. Note how you can see the Service associated with a block.
Scroll down to see more details on the events, note you can see what triggered the rule, the source IP, and so on.
Finally, expand one of the lines in the Activity Log - This provides even more detail. Note how you can see the Ruleset, and the Specific Rule ID, along with more detailed information on the request. This is very useful for analysing WAF triggers.

Try adding a filter matching just this rule so you can see all events associated with this example rule.
5. Create a custom rule
Before proceeding with this section, we recommend taking a quick look at Cloudflare Rule Operators Docs if you are not yet familiar.
Custom rules allow you to control incoming traffic by filtering requests to a zone. You can perform actions like Block or Managed Challenge on incoming requests according to rules you define.
In this task, we will create a simple custom rule to present a Managed Challenge to users attempting to reach the AcmeCorp Contact Page.
In the Cloudflare Dashboard go to Security ‣ WAF ‣ Custom Rules
ℹ️
If you see ‘Firewall Rules’ on the Dashboard, please ignore this and use Custom Rules only

- Enter a descriptive name for the rule, such as “Challenge Contact Requests”
- Set the Field to URI Path
- Set the Operator to equals
- Set the Value to /contact/
- In the Choose action dropdown, select Managed Challenge
You configuration should look something like this:

- Deploy the rule
Your rule is now active, and any requests to your sites contact page will trigger a Managed Challenge.
Navigate to your Contact page - you should see you are presented with the Managed Challenge.
ℹ️
If you don’t see the Managed Challenge, try a Private/Incognito tab, or a different browser.

Typically, a modern browser and a real user will be redirected to the requested page. If for any reason you are prompted to verify you are human, please tick the box.
You’ll now see the AcmeCorp Contact page

Try the same request with curl. What do you see? Why?
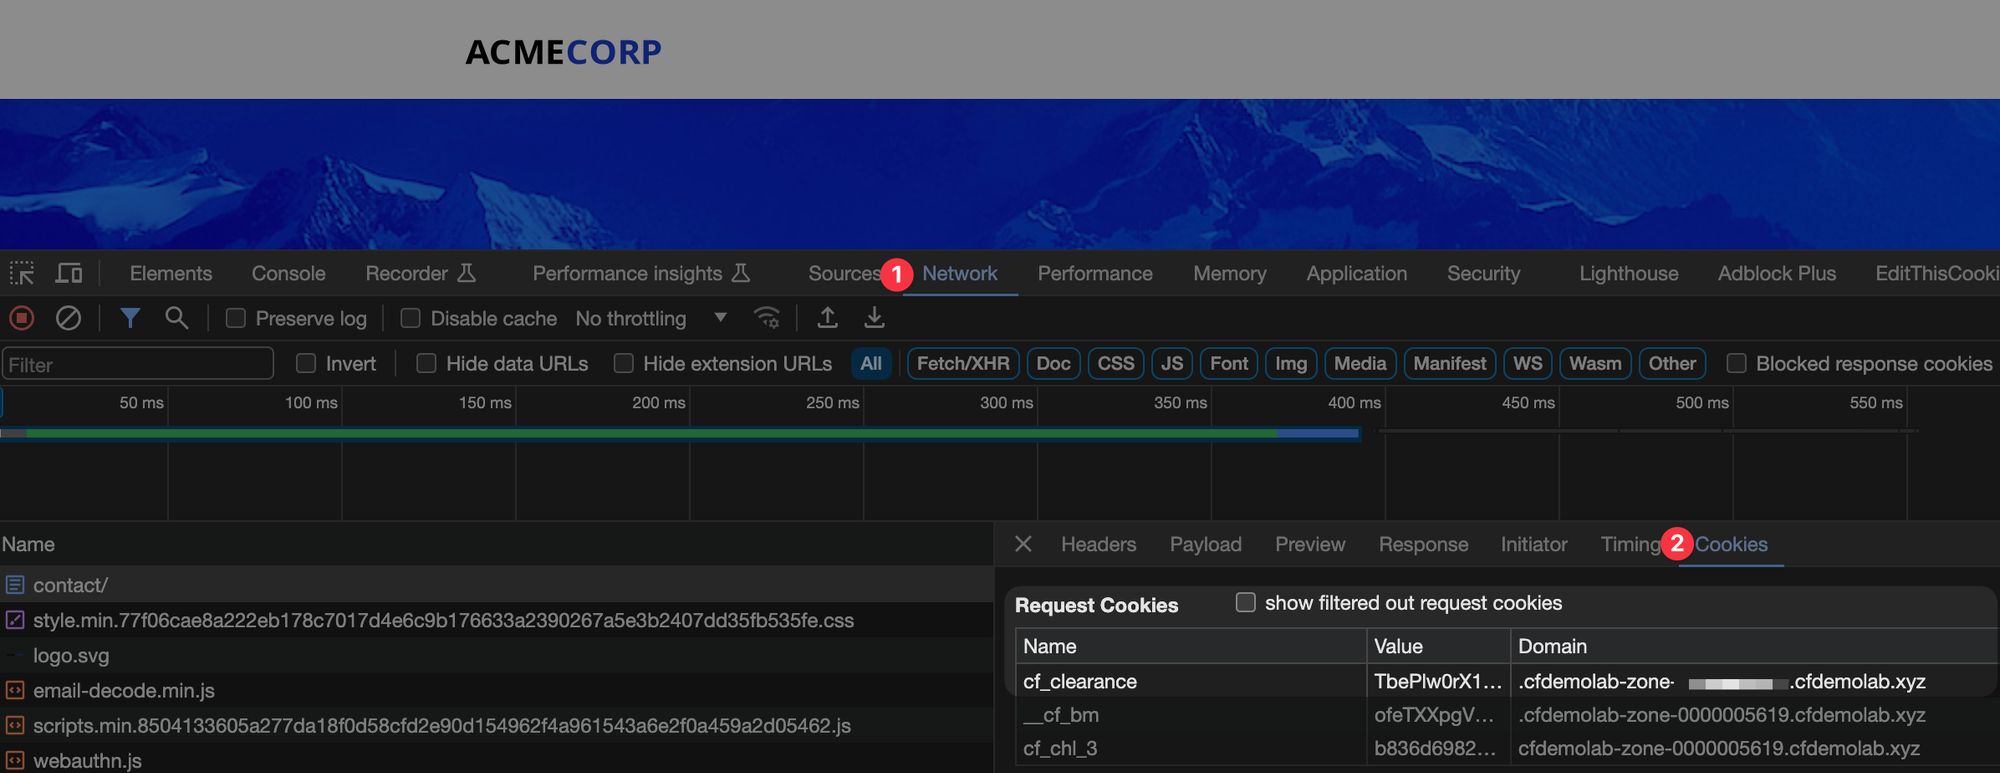
Before we wrap up this section, press F12 in your browser to bring up the developers console. We're going to take a look at what happens in the browser when you pass a challenge.
In the Developers Console go to the Network tab and then select Cookies
When a challenge is solved, the cf_clearance cookie is issued to the browser in the response. This prevents repeated challenges, but may also mean you don't see the challenge when you expect to! See the previous tip on using an Incognito browsing session or a different browser to trigger the Managed Challenge, as you will not yet have the cookie in that session.
If you wish to read more about the different use cases for custom rules, please see Common use cases for custom rules.
6. Create a rate limiting rule
Now that we’ve deployed the Managed Ruleset & Custom Rules, let’s further harden access to the AcmeCorp application with Advanced Rate Limiting.
In the Cloudflare Dashboard go to Security ‣ WAF ‣ Rate limiting rules and select Create Rule.

Goal: Limit request attempts to 5 per minute to prevent brute force attacks
Use the following criteria:
- Set the Field to URI Path
- Set the Operator to Contains
- Set the Value to /services/safes/
- Set Characteristics to IP
- When Rate exceeds… 5 requests in a 1 minute period
- Set the Action to Block with Response Type as Default
- Select Block for the selected duration as the behaviour and set 1 minute as the value
You completed rule should look like this

Deploy your rule.
You may be wondering why we used contains as the operator in this example, and equals in the previous example. This is to highlight the different operators, but also contains can be more flexible for scenarios such as similarly named directories or pages, or in cases (such as with the AcmeCorp website) where trialing slashes get added via a redirect. The equals operator is explict, so if you were to set a policy for /contact but the application links to /contact/, the rule would not trigger if browsing to /contact/, but if the policy was using contains, then it would.
Now let’s test the rule you just created.
Open your terminal and run a loop using curl or powershell (replace cfdemolab-zone-xxx with your own zone):
curl
$ for i in {1..10}; do curl -svo /dev/null "https://cfdemolab-zone-xxx.cfdemolab.xyz/services/safes/" 2>&1 | grep "< HTTP.* "; done⚙️ nocopy ⚙️
< HTTP/2 200
< HTTP/2 200
< HTTP/2 200
< HTTP/2 200
< HTTP/2 200
< HTTP/2 429
< HTTP/2 429
< HTTP/2 429
< HTTP/2 429
< HTTP/2 429Powershell
for (($i = 0); $i -lt 10; $i++) { try { $Response = Invoke-WebRequest -Uri "https://cfdemolab-zone-xxx.cfdemolab.xyz/services/safes/"; $StatusCode = $Response.StatusCode } catch { $StatusCode = $_.Exception.Response.StatusCode.value__ }; "#$i - $(Get-Date -Format "yyyy-MM-dd HH:mm:ss") - $StatusCode" }⚙️ nocopy ⚙️
#0 - 2023-10-30 08:50:25 - 200
#1 - 2023-10-30 08:50:25 - 200
#2 - 2023-10-30 08:50:25 - 200
#3 - 2023-10-30 08:50:25 - 200
#4 - 2023-10-30 08:50:26 - 200
#5 - 2023-10-30 08:50:26 - 429
#6 - 2023-10-30 08:50:26 - 429
#7 - 2023-10-30 08:50:26 - 429
#8 - 2023-10-30 08:50:26 - 429
#9 - 2023-10-30 08:50:26 - 429Note how we see a few 200 responses, followed by the HTTP 429 as your requests get rate limited.
You will noticed that you do not get an HTTP 429 on other pages.
ℹ️
If you have an issue using curl, you can simply use a browser and refresh the page quickly as the threshold is quite low.

Wait 1 minute, then try again - you will now be able to access the page again

This example is reasonably simple, however you can read more about the configuration options in the Advanced rate limiting documentation.
What other rules can you create? Feel free to experiment.
Summary
In this section we’ve configured WAF, along with Custom Rules & Advanced Rate Limiting.
Next, we will configure Bot Management.