Virtual networks
In this section, we'll tackle a common advanced use case of private networks. We'll configure two virtual networks with overlapping subnets.
Our Origin A will assume the role of our production system and Origin B of our staging. Note that both are in the same IP subnet.

Task
Configure two virtual networks with overlapping private IP address space allowing both to be accessed using WARP Client.
Why
- Cloudflare Tunnel enables creation of virtual networks to access private resources
- Virtual networks allow routing to duplicate private addresses in different environments (e.g., staging vs production)
- Users can select which network to connect to via their WARP Client settings

Steps
1. Cleanup
Let's remove tunnel configuration from the previous lab.
Delete the route (on either origin):
cloudflared tunnel route ip delete 10.0.0.0/24Either origin
Delete the tunnel (on either origin):
cloudflared tunnel delete test-tunnelEither origin
Delete the configuration on both origins:
rm -f ~/.cloudflared/*.{json,yaml}Origin A & B
2. Create virtual networks
First, let's create a the tunnel and vnet on Origin A.
Create a production tunnel:
cloudflared tunnel create production-tunnelOrigin A
Create a production network:
cloudflared tunnel vnet add production-vnetOrigin A
Next, switch to console of Origin B and create a staging tunnel:
cloudflared tunnel create staging-tunnelOrigin B
And a staging network:
cloudflared tunnel vnet add staging-vnetOrigin B
List the virtual networks on either origin to confirm they have been created correctly. The network configuration is stored on Cloudflare's Edge, so both servers should see both networks.
cloudflared tunnel listID NAME IS DEFAULT
aaaaaaaa-aaaa-aaaa-aaaa-aaaaaaaaaaaa production-vnet false
bbbbbbbb-bbbb-bbbb-bbbb-bbbbbbbbbbbb staging-vnet falseEither origin
Configure your tunnels with the IP/CIDR range of your private networks
Set identical IP range for both of your virtual networks and tunnels:
cloudflared tunnel route ip add --vnet production-vnet 10.0.0.0/24 production-tunnelThen staging:
cloudflared tunnel route ip add --vnet staging-vnet 10.0.0.0/24 staging-tunnelFinally, confirm the configuration:
cloudflared tunnel route ip listID NETWORK ...
cccccccc-cccc-cccc-cccc-cccccccccccc 10.0.0.0/24 ...
yyyyyyyy-yyyy-yyyy-yyyy-yyyyyyyyyyyy 10.0.0.0/24 ...We now have two overlapping subnets routed to production-vnet and staging-vnet.
Enable WARP on the origins
On Origin A, get your tunnel UUID. This can be done with cloudflared tunnel info production-tunnel but we prepared a one-liner that saves that UUID to a variable to the TUNNELID variable we can use in the next step:
TUNNELID=$(cloudflared tunnel info --output json production-tunnel | jq -r .id)Let's now use that tunnel UUID to prepare a config file:
cat << EOF > ~/.cloudflared/config.yaml
tunnel: $TUNNELID
credentials-file: /home/cloudflare/.cloudflared/$TUNNELID.json
warp-routing:
  enabled: true
EOF
Lastly, run your production-tunnel:
cloudflared tunnel run production-tunnelRepeat the above steps on Origin B with staging-tunnel - get its tunnel UUID, create the configuration file to enable WARP routing and start the tunnel.
When done, you should see both tunnels started in the dashboard:

Test access to virtual networks from WARP
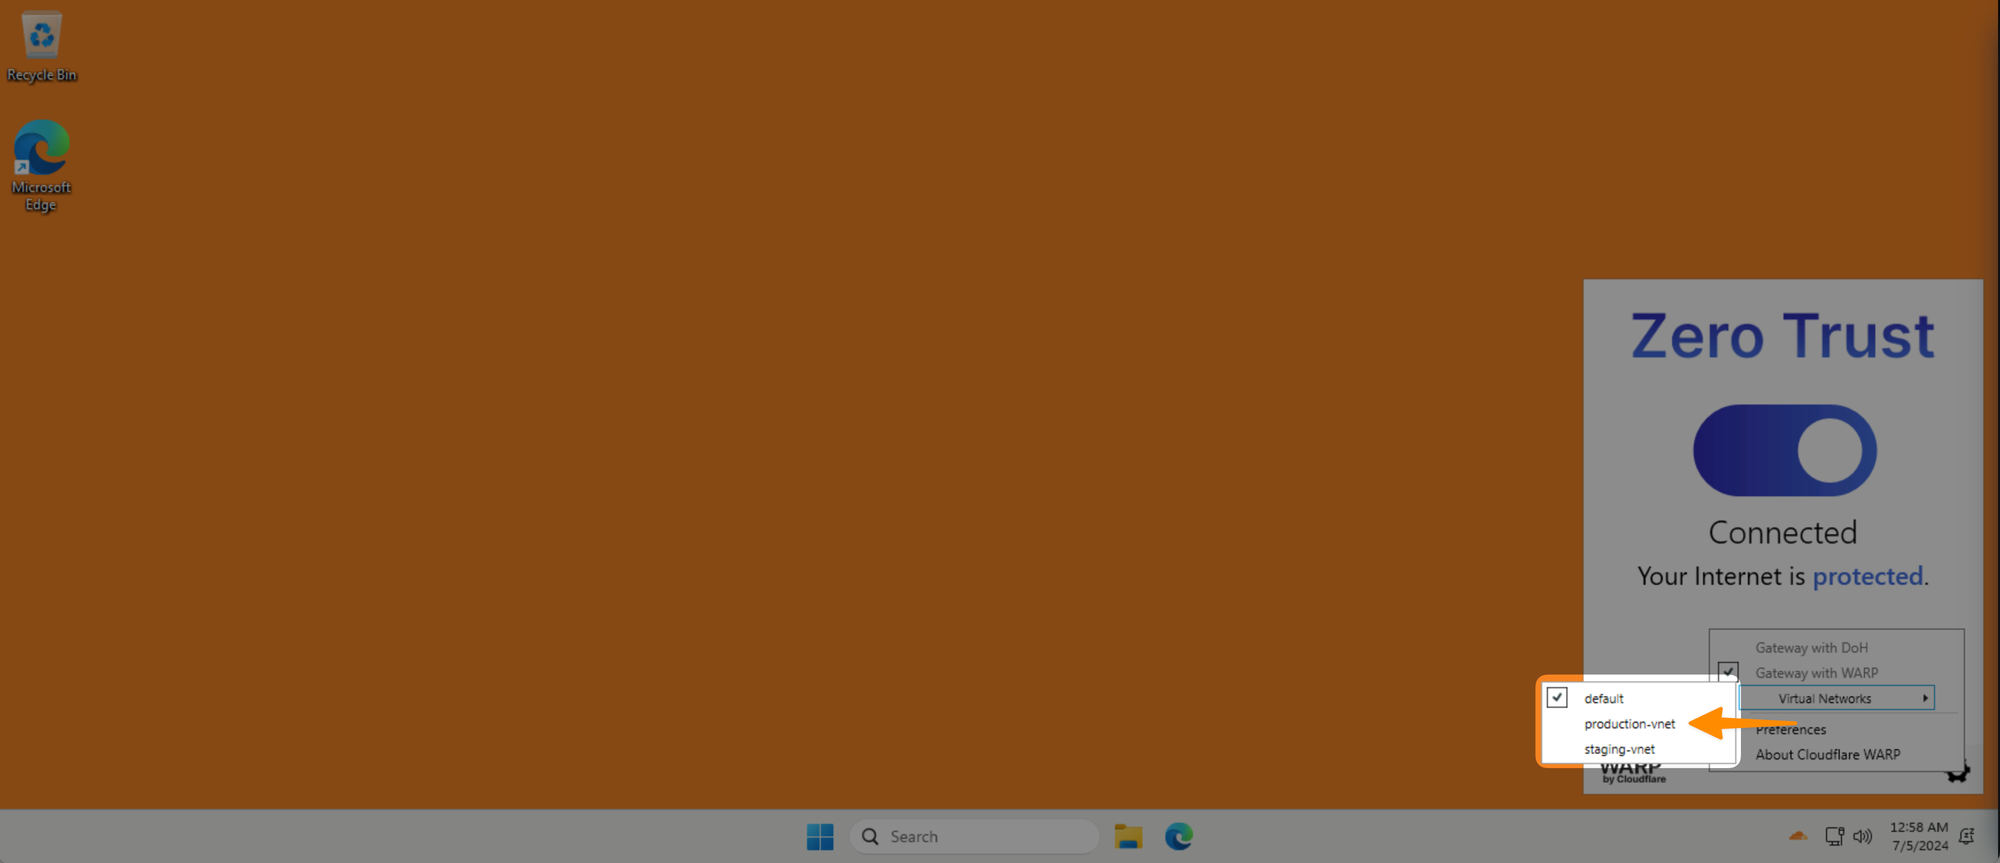
In your WARP client, click on the Gear icon, and you should now see a Virtual Networks selector there. Click on it and switch to production-vnet.
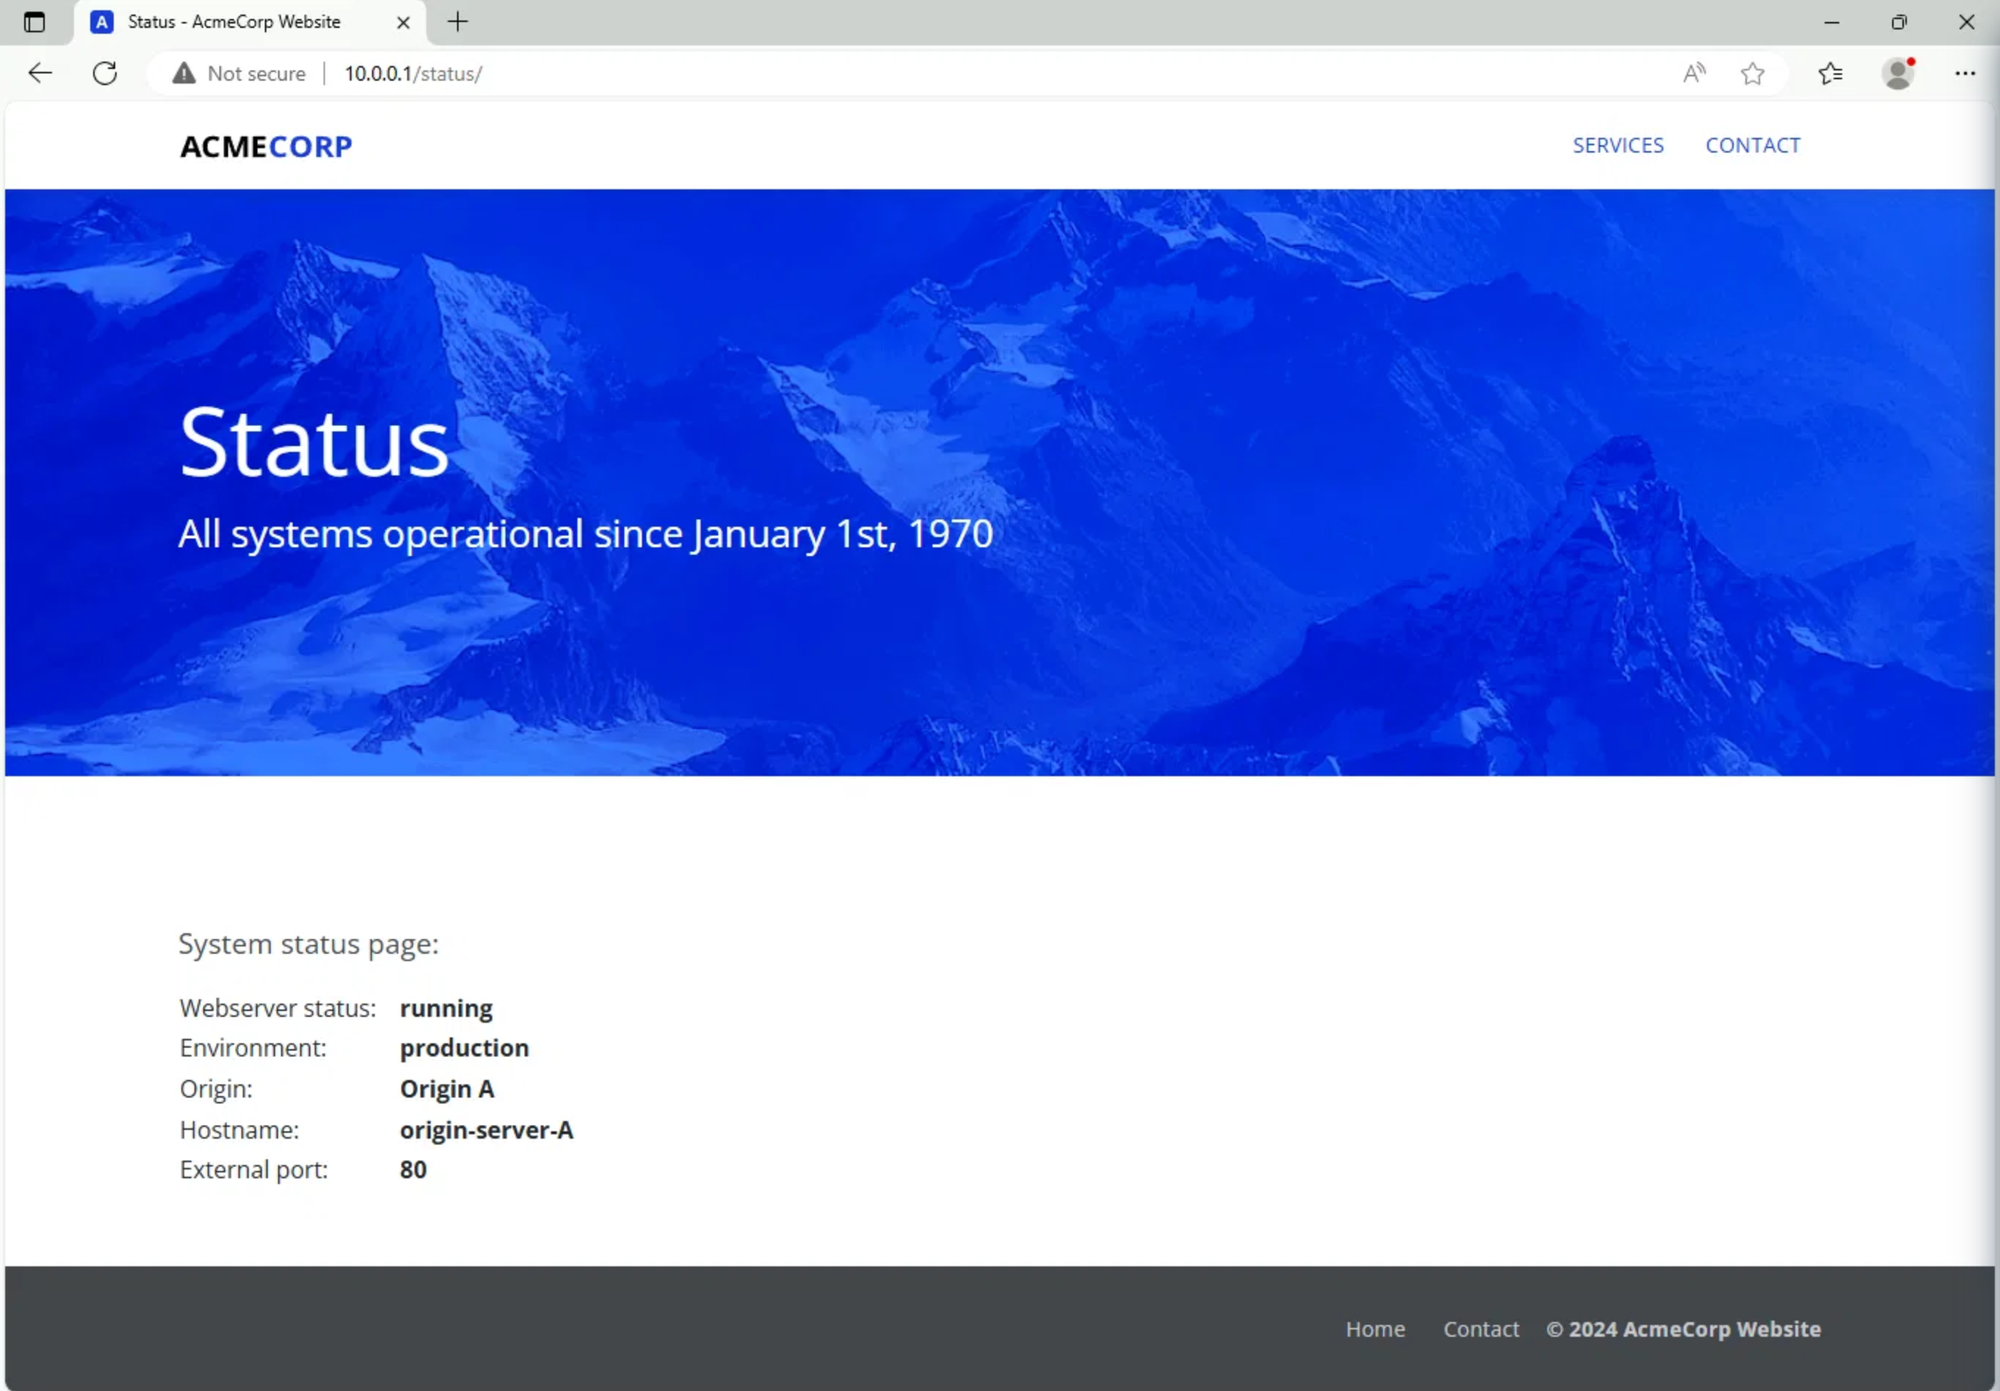
Now open a browser inside the Win11 client and navigate to http://10.0.0.1/status
You should see that the website is served by your Origin A representing the production environment:
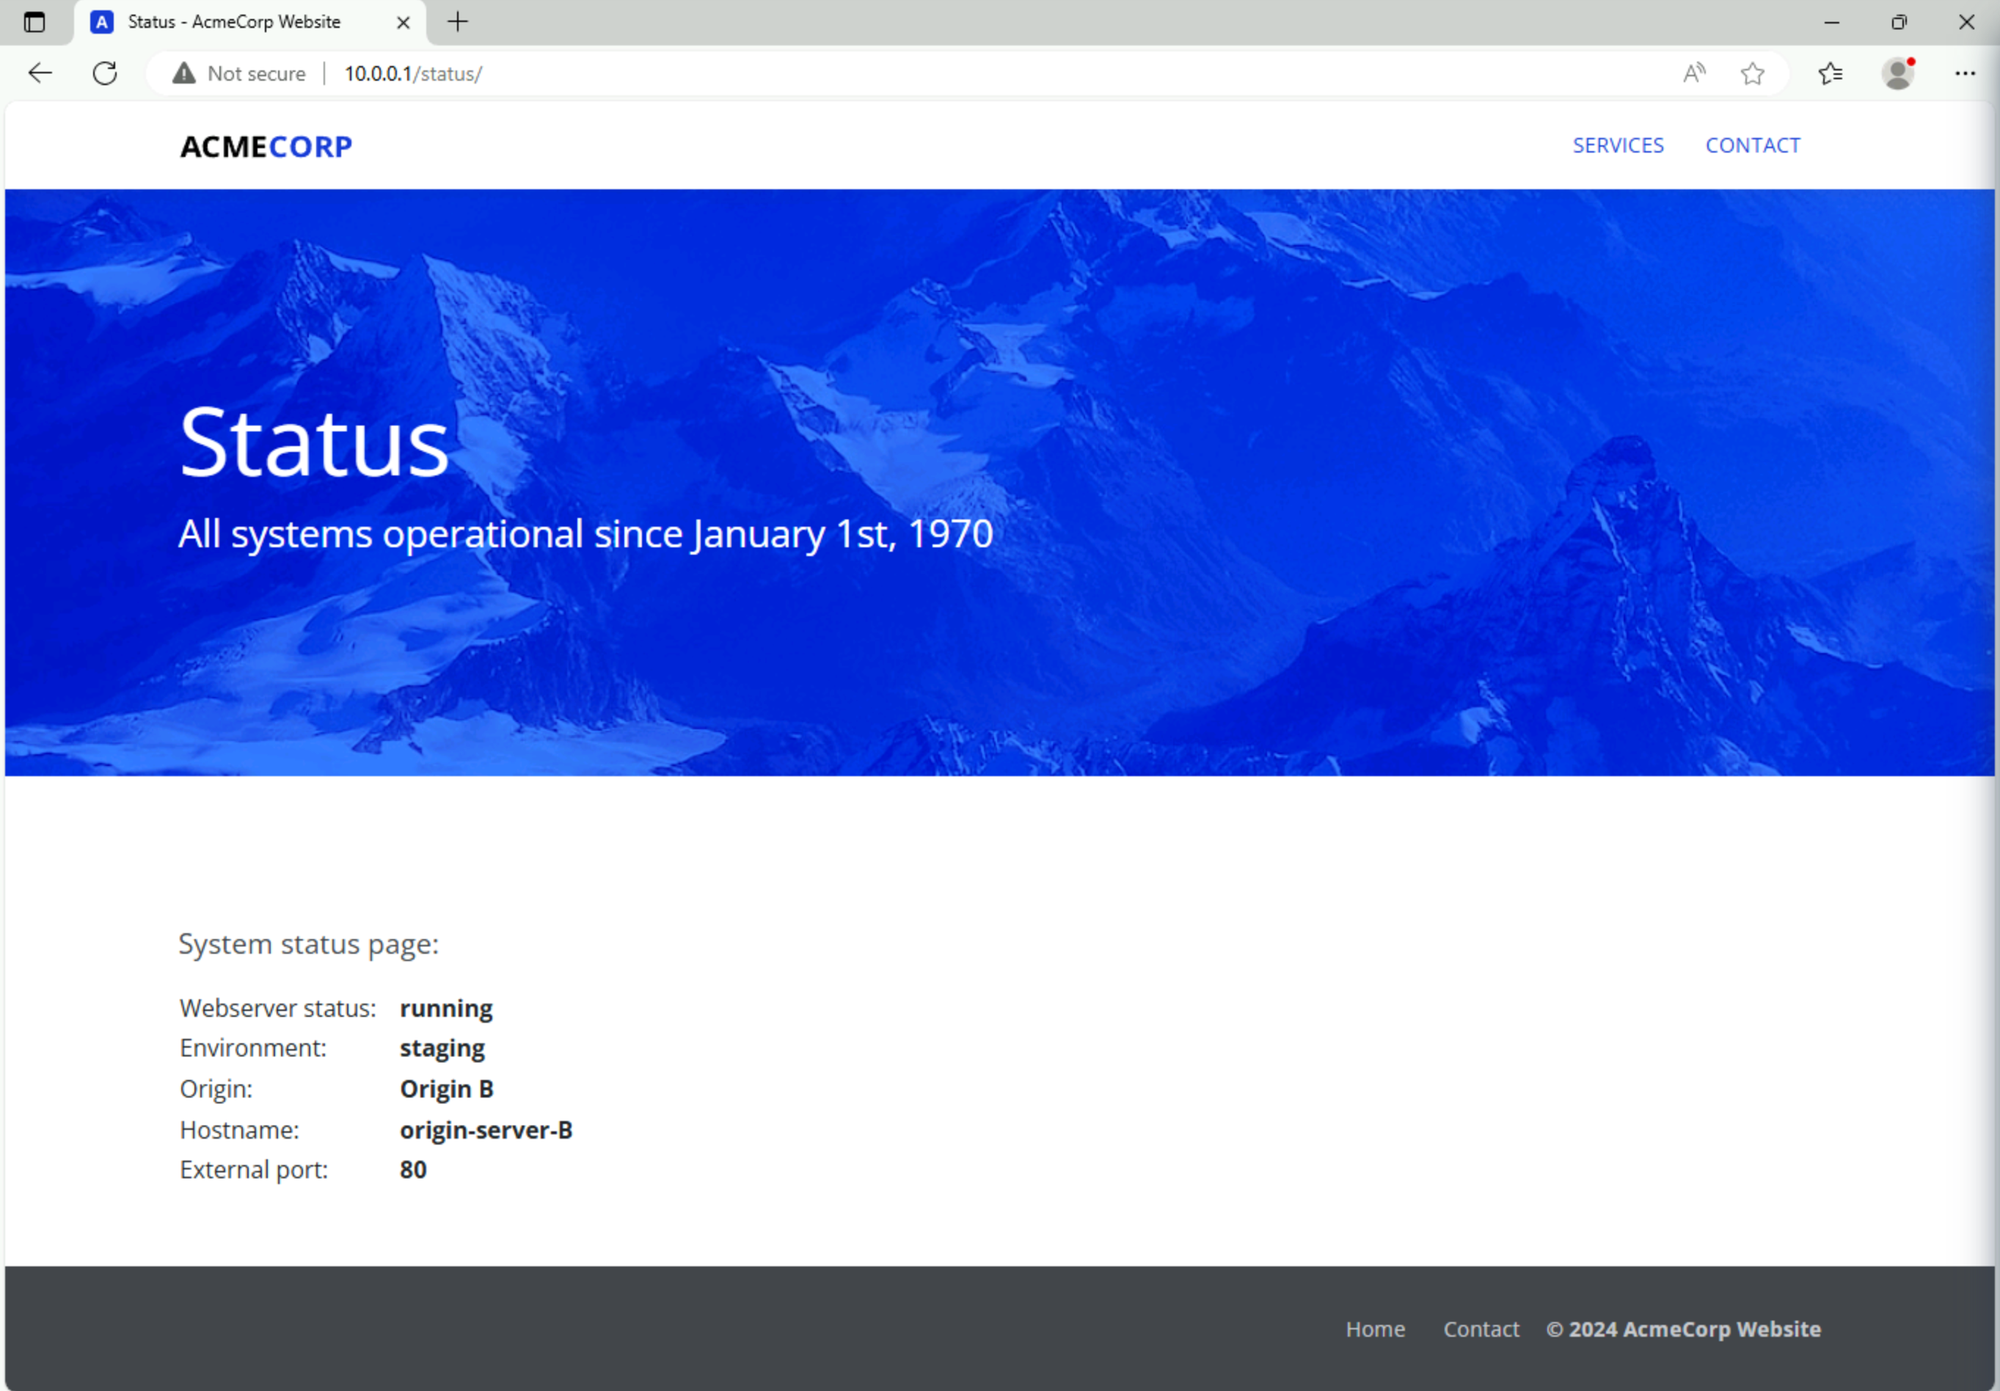
Now switch the virtual network in your WARP client to staging-vnet and reload the page.
You should now see the page served by your Origin B in the staging environment:
If that all works, you are now done with this lab!
If you’re completing this lab virtually, run the following command to get the completion token:
curl "https://lab.cfiq.io/zt/v1/seed" -H "X-Get-Token: y0GYQjLgw7czU3Nqams0"If successful, the output should look like this:
curl "https://lab.cfiq.io/zt/v1/seed" -H "X-Get-Token: y0GYQjLgw7czU3Nqams0"⚙️ nocopy ⚙️
Enter this token in the 401 Zero Trust e-learning course:
🟨completion-token-will-be-hereLab section complete. Return back to the Zero Trust 401 e-learning course and continue there.