TLS (SSL)
Task
Inspect the default universal SSL certificate Cloudflare created for your domain, create a subdomain that isn't covered by it and request an advanced certificate for it.
You can find more about Cloudflare DNS in our SSL Developers Docs.
Why
- Cloudflare automatically issues a universal certificate for all domains added to Cloudflare
- This certificate covers the apex domain itself and one level of subdomains via a wildcard
- What if you need a deeper domain structure? In such cases, you can order an Advanced Certificate
- Advanced Certificates allow allow for additional configuration to be customised, such as the cipher suites.
Steps
Before proceeding with this lab, make sure you disable any services running on your machine that might intercept HTTPS traffic (VPNs, Cloudflare WARP, etc.).
1a. Always use HTTPS
Before we start looking at TLS certificates, let's enforce HTTPS on our zone. This will help prevent accidental requests via HTTP that wouldn't use TLS.
Open your zone in the Cloudflare Dashboard and select SSL/TLS ‣ Edge Certificates. Here, turn on Always Use HTTPS.

1b. Change Minimum TLS Version
TLS 1.0 is the default zone setting. This is maintained for compatibility purposes, but is advisable to change in most cases. Scroll down a little further from the previous setting and set Minimum TLS Version to TLS 1.2

2. Add a subdomain
Next, head to DNS ‣ Records and create a level 1 subdomain, in this example we'll call it sub1.
For the purposes of this exercise, it doesn't really matter where that subdomain points to. For the sake of simplicity, let's use the same origin server the apex domain points to: 20.88.188.200.
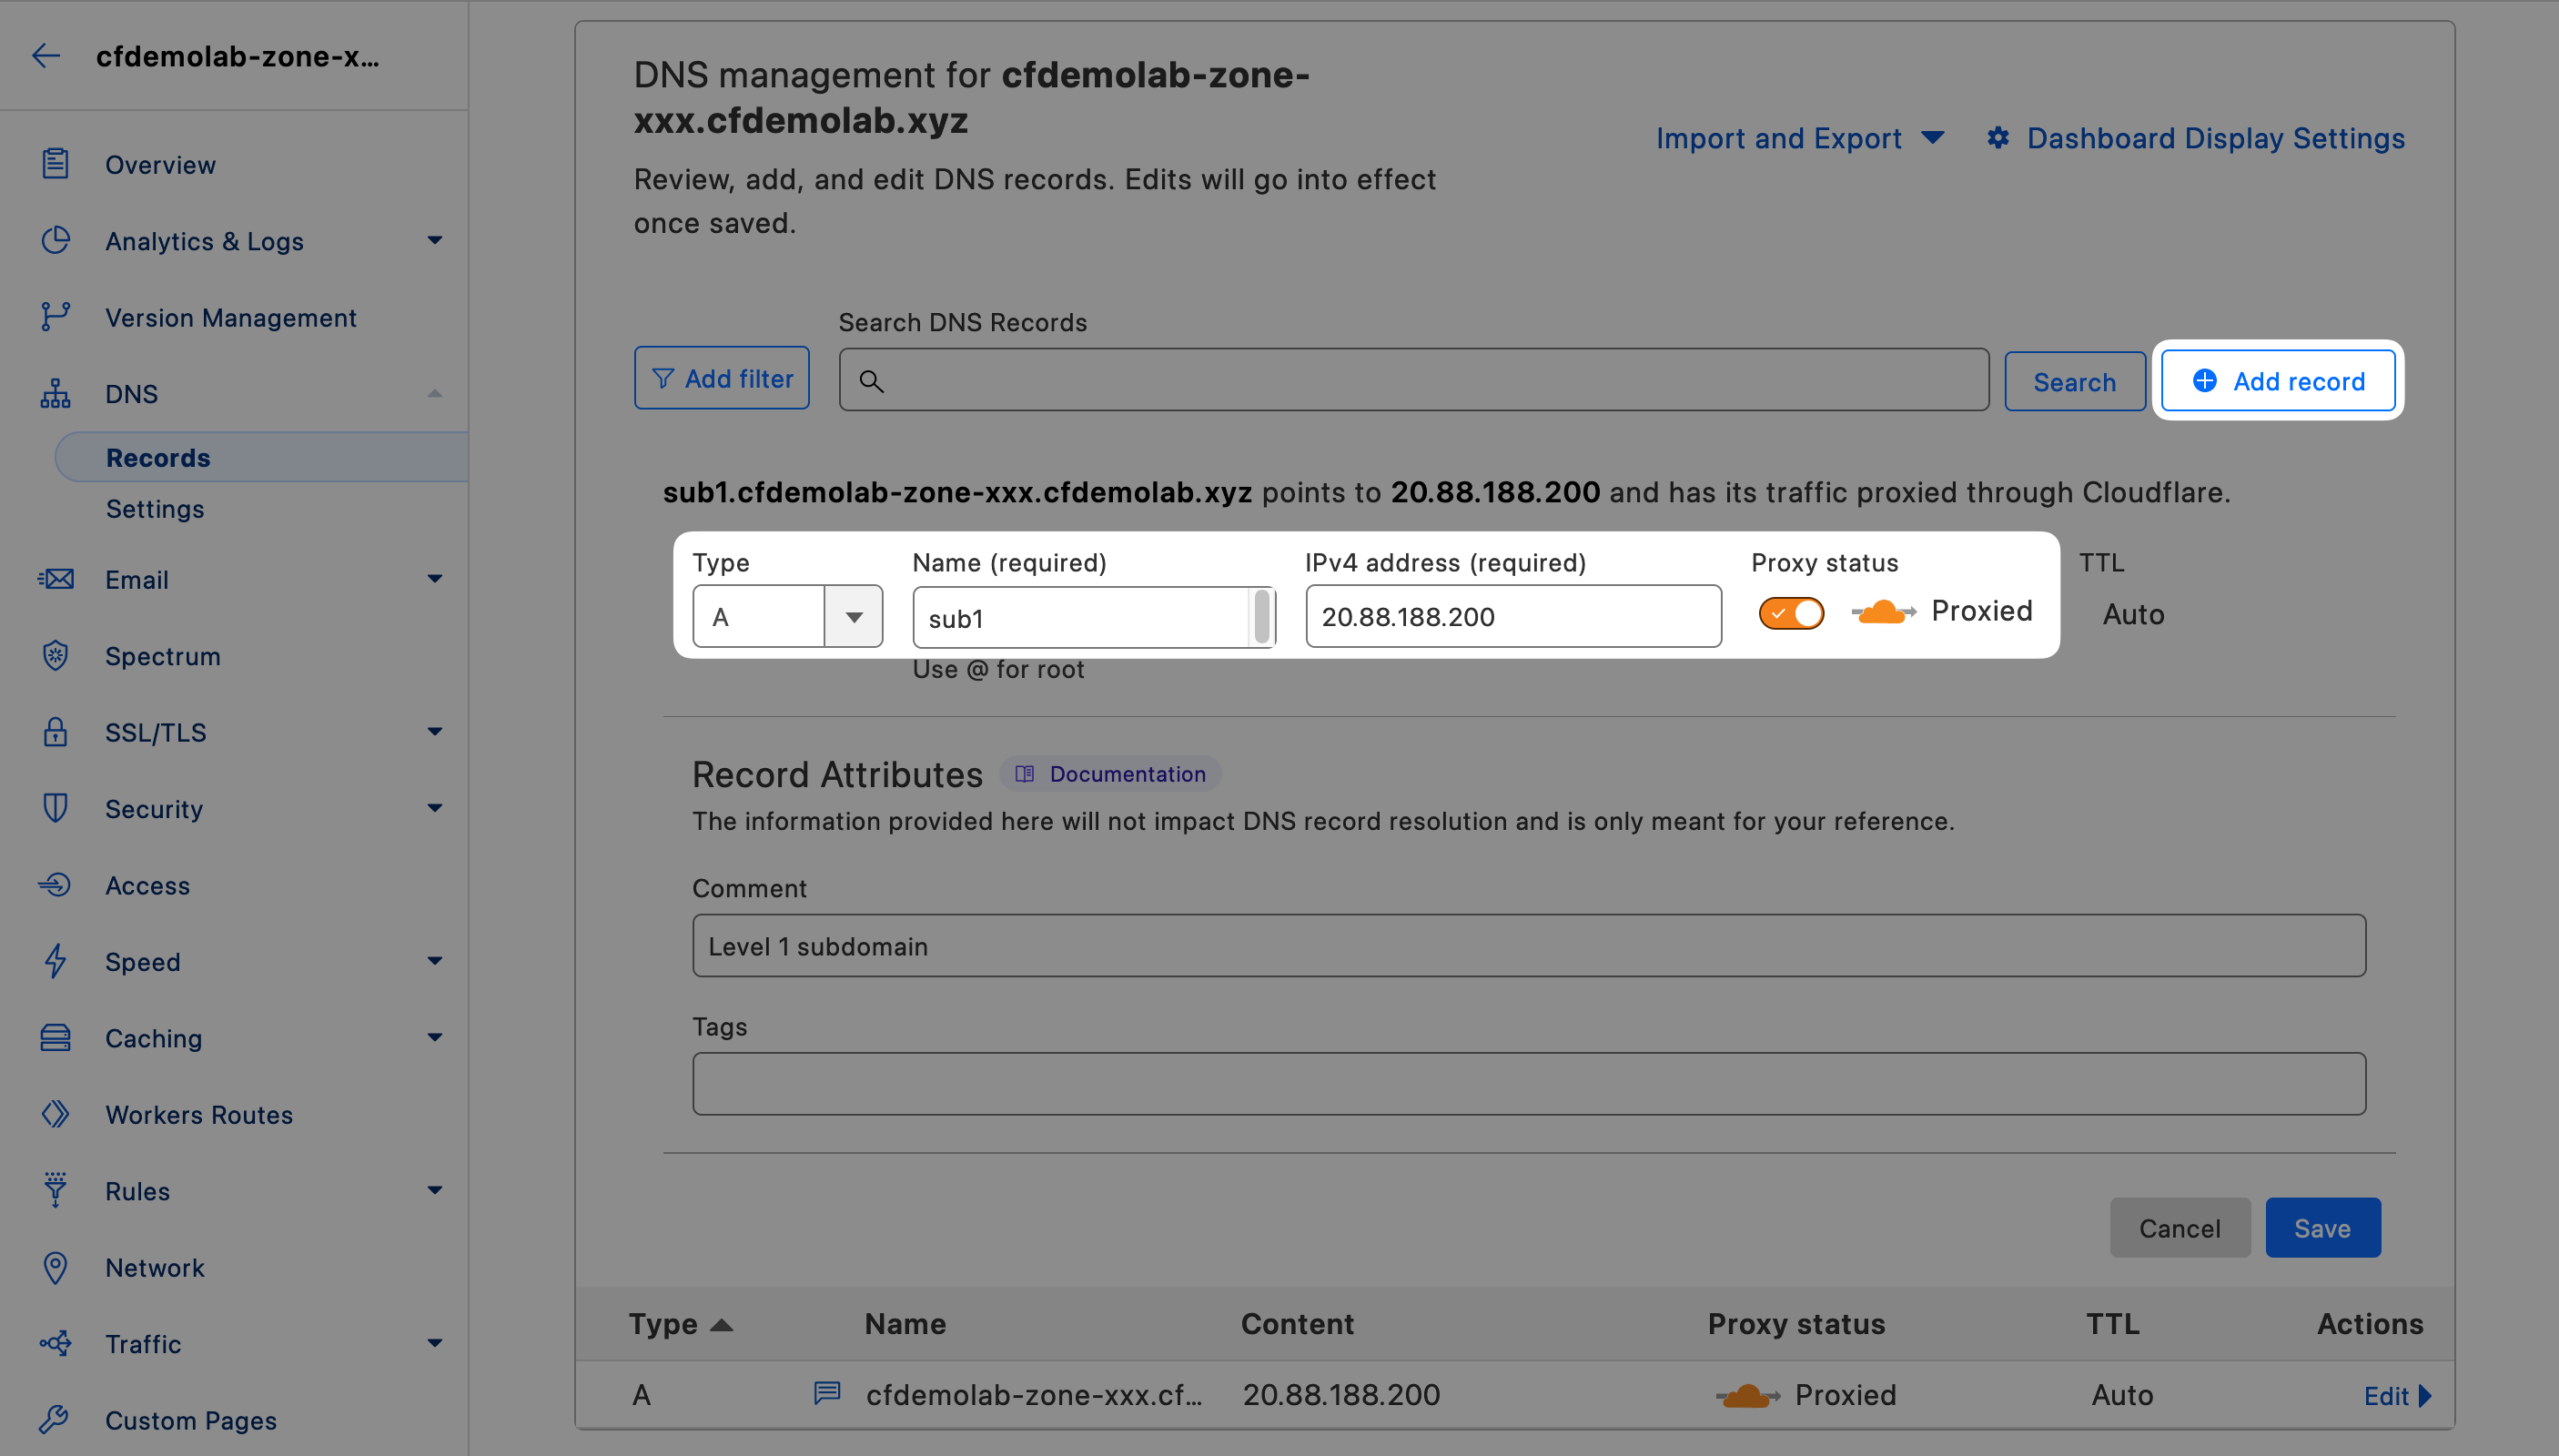
Navigate to this new subdomain (e.g. https://sub1.cfdemolab-zone-xxx.cfdemolab.xyz) in your browser and it should open your web application as expected, becuase it is covered by the universal certificate.
3. Add a subdomain to that subdomain
Next, add a subdomain to the subdomain you just created, in this example we'll call it sub2, so the name will be sub2.sub1.
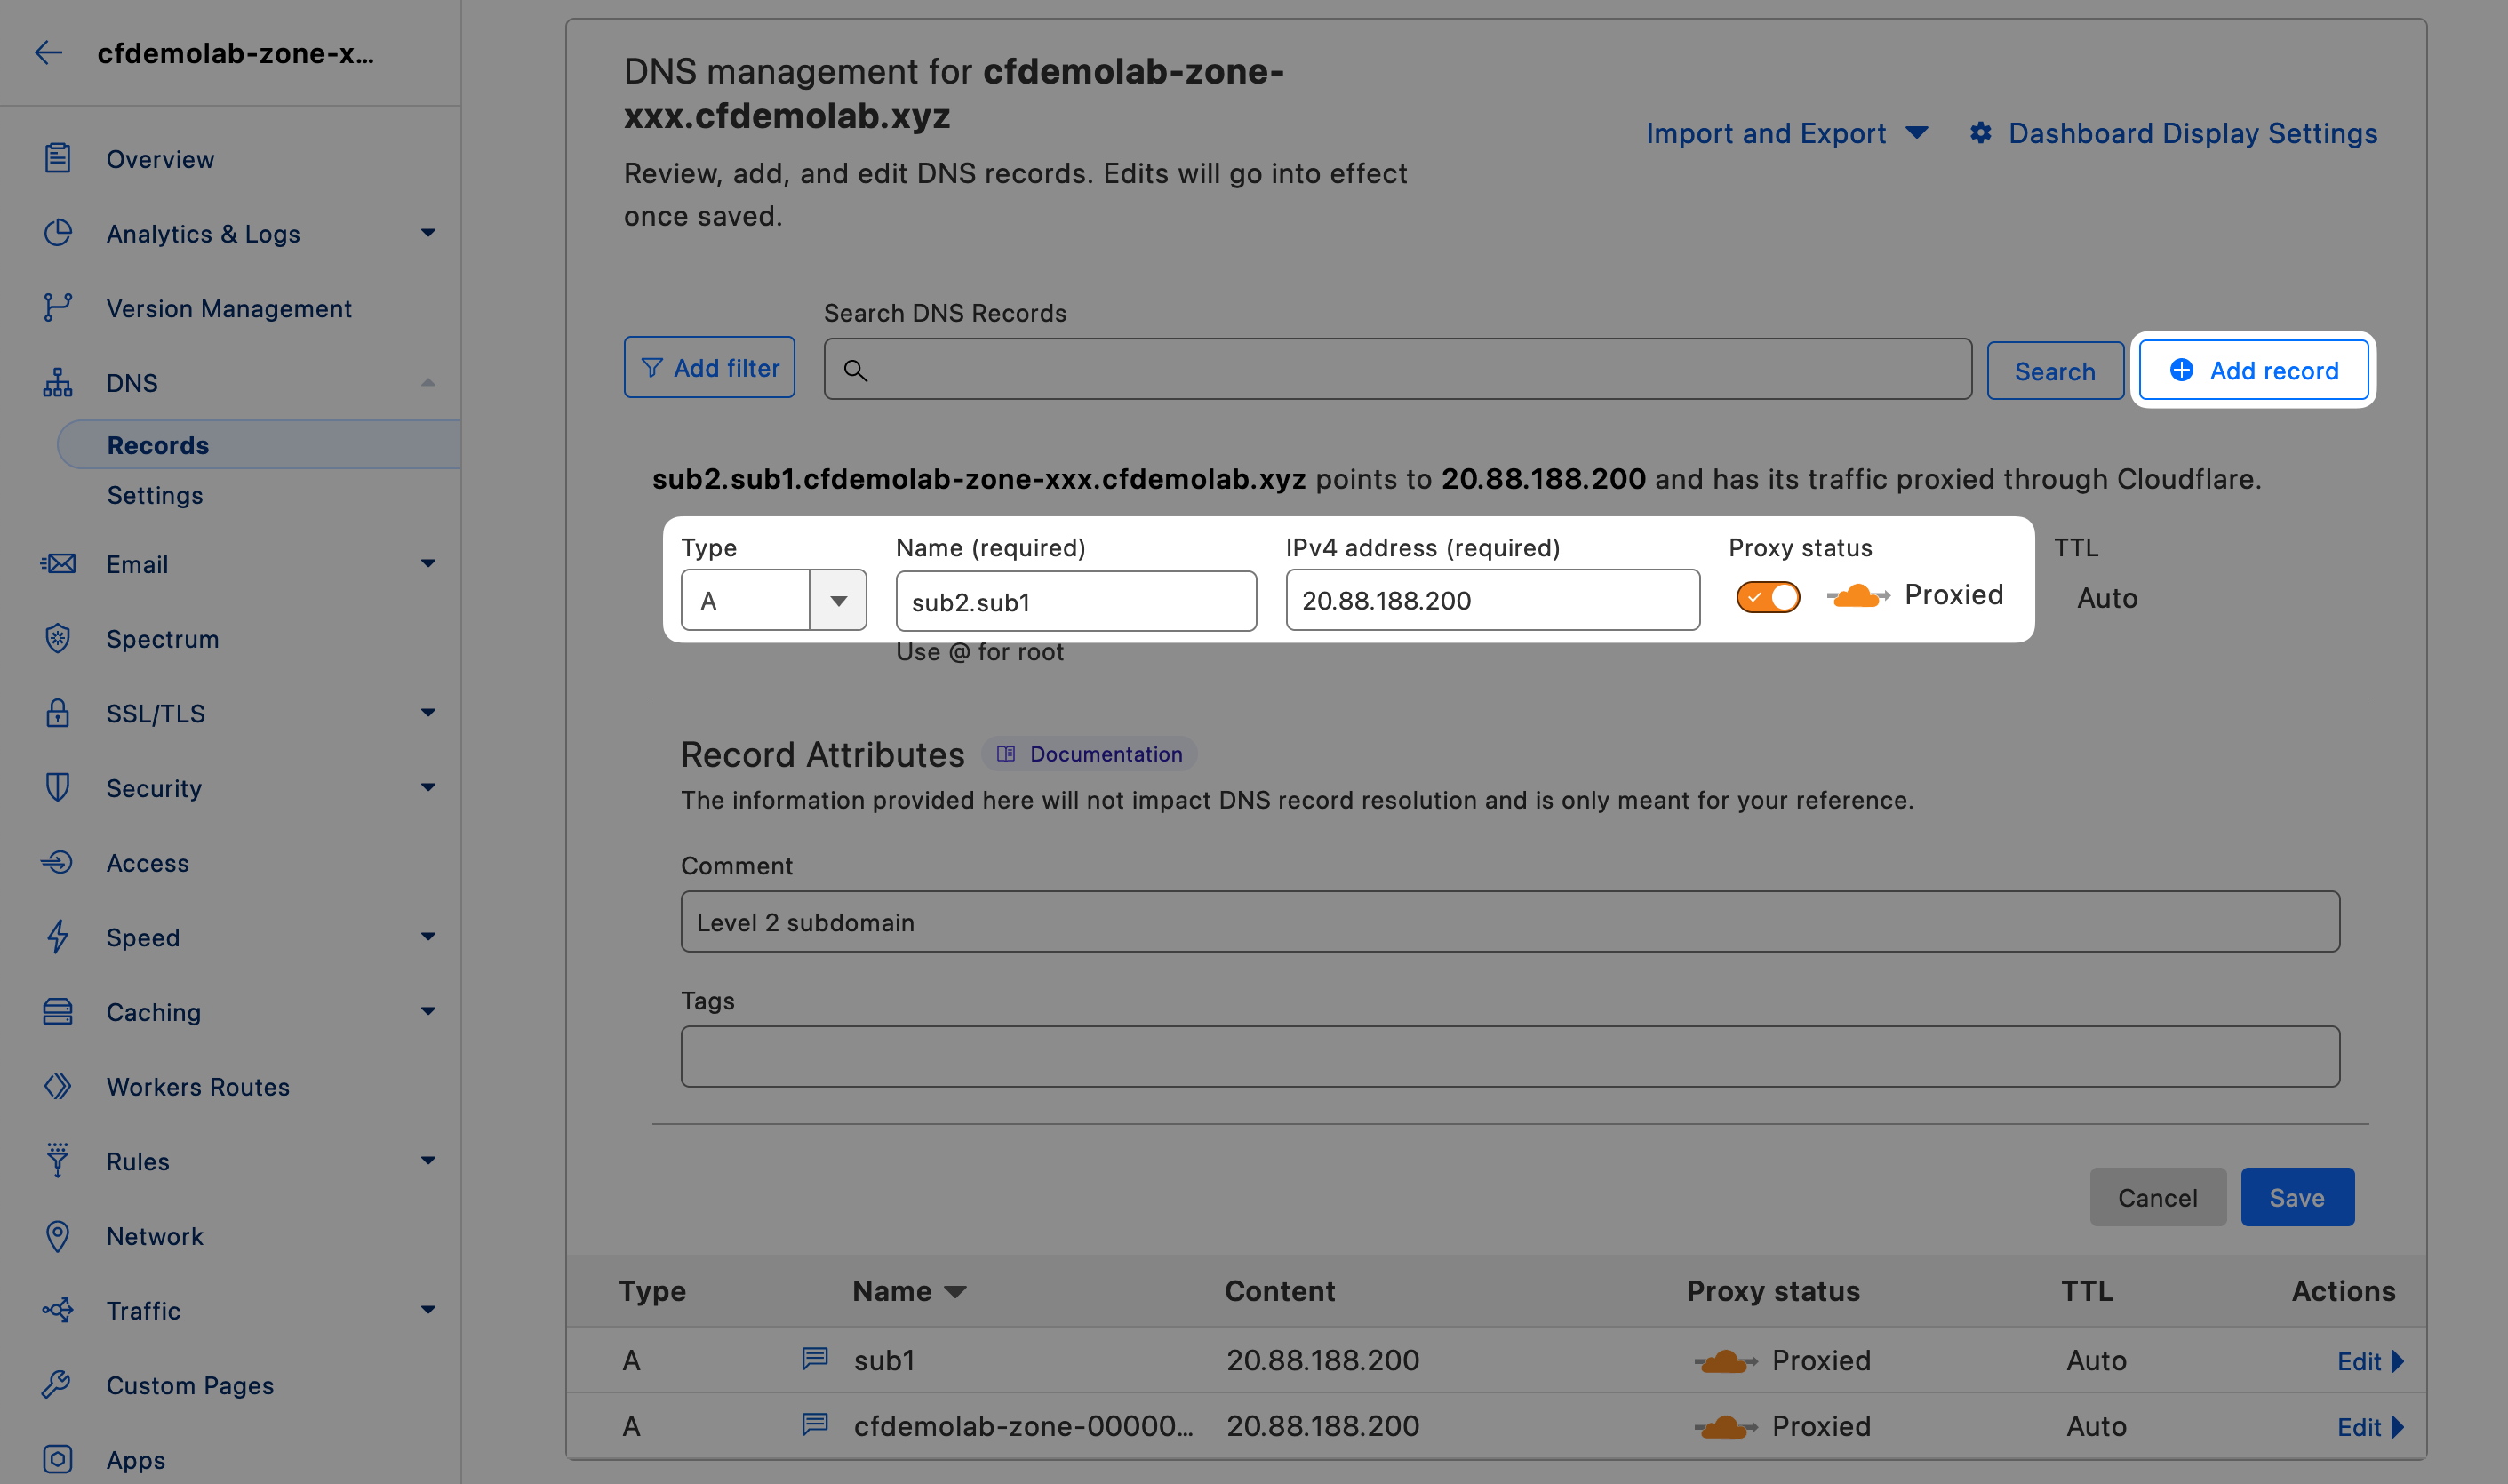
Note the warning that is displayed next to this level 2 subdomain. That is because that subdomain is no longer covered by the universal certificate.

If you try opening this new subdomain in a web browser, you will receive an error that your browser cannot establish a secure connection.
4. Order Advanced Certificate
Head to SSL/TLS ‣ Edge Certificates and select Order Advanced Certificate.
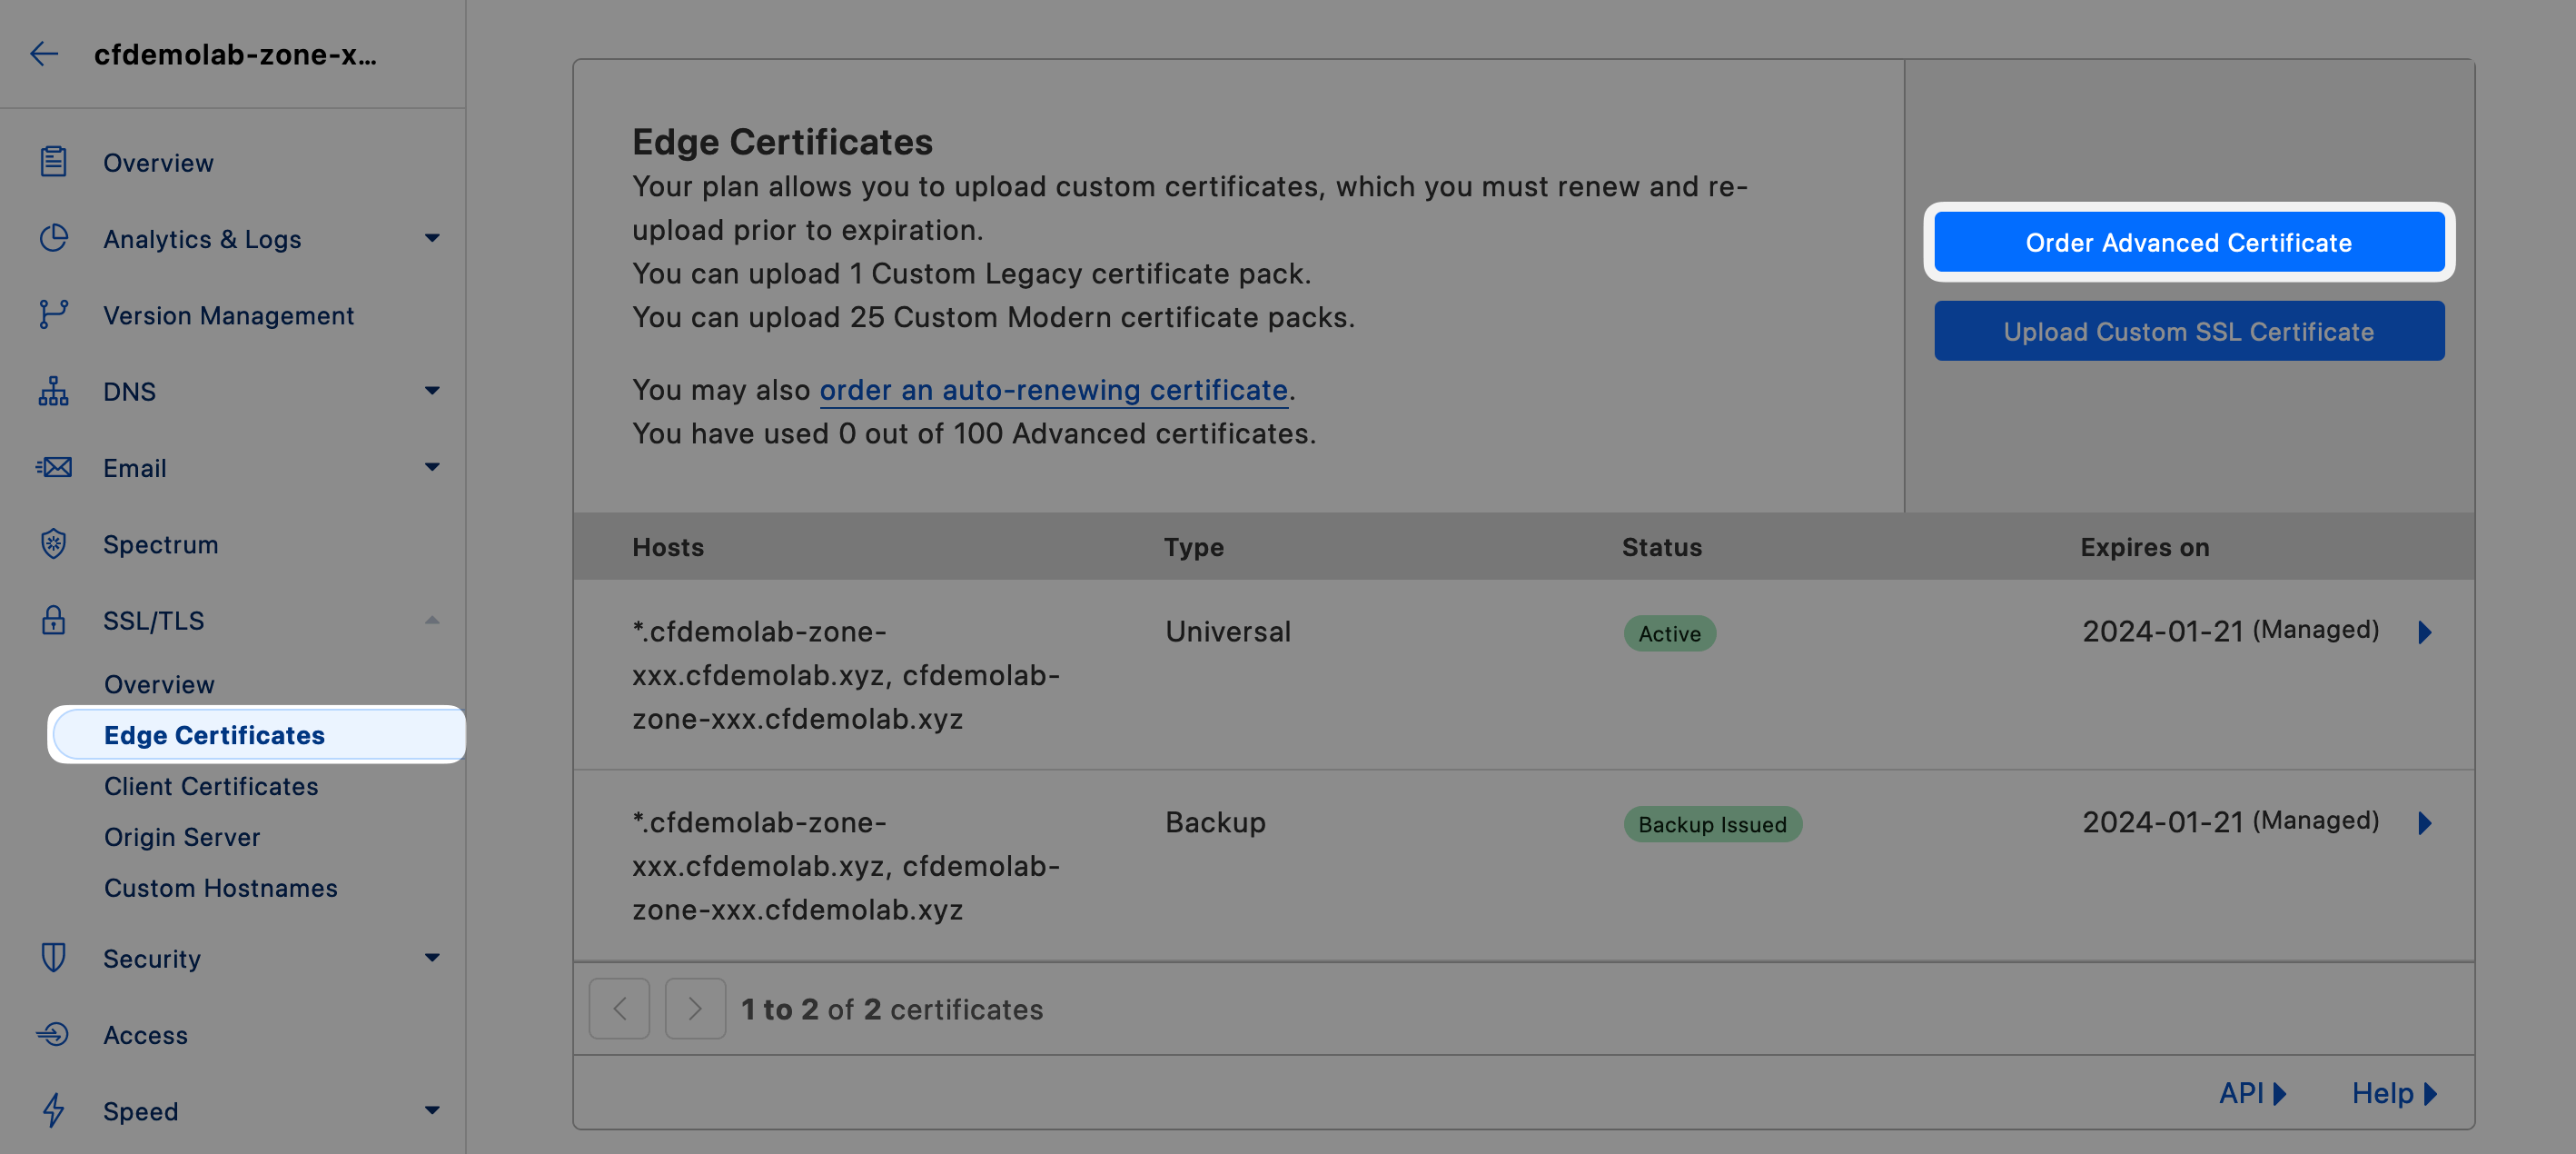
You can use any Certificate Authority, in this example we'll keep the default: Let's Encrypt.
Type your subdomain (e.g. sub2.sub1) into the Certificate Hostnames field and select the autocompleted option with the full domain name once it pops up.
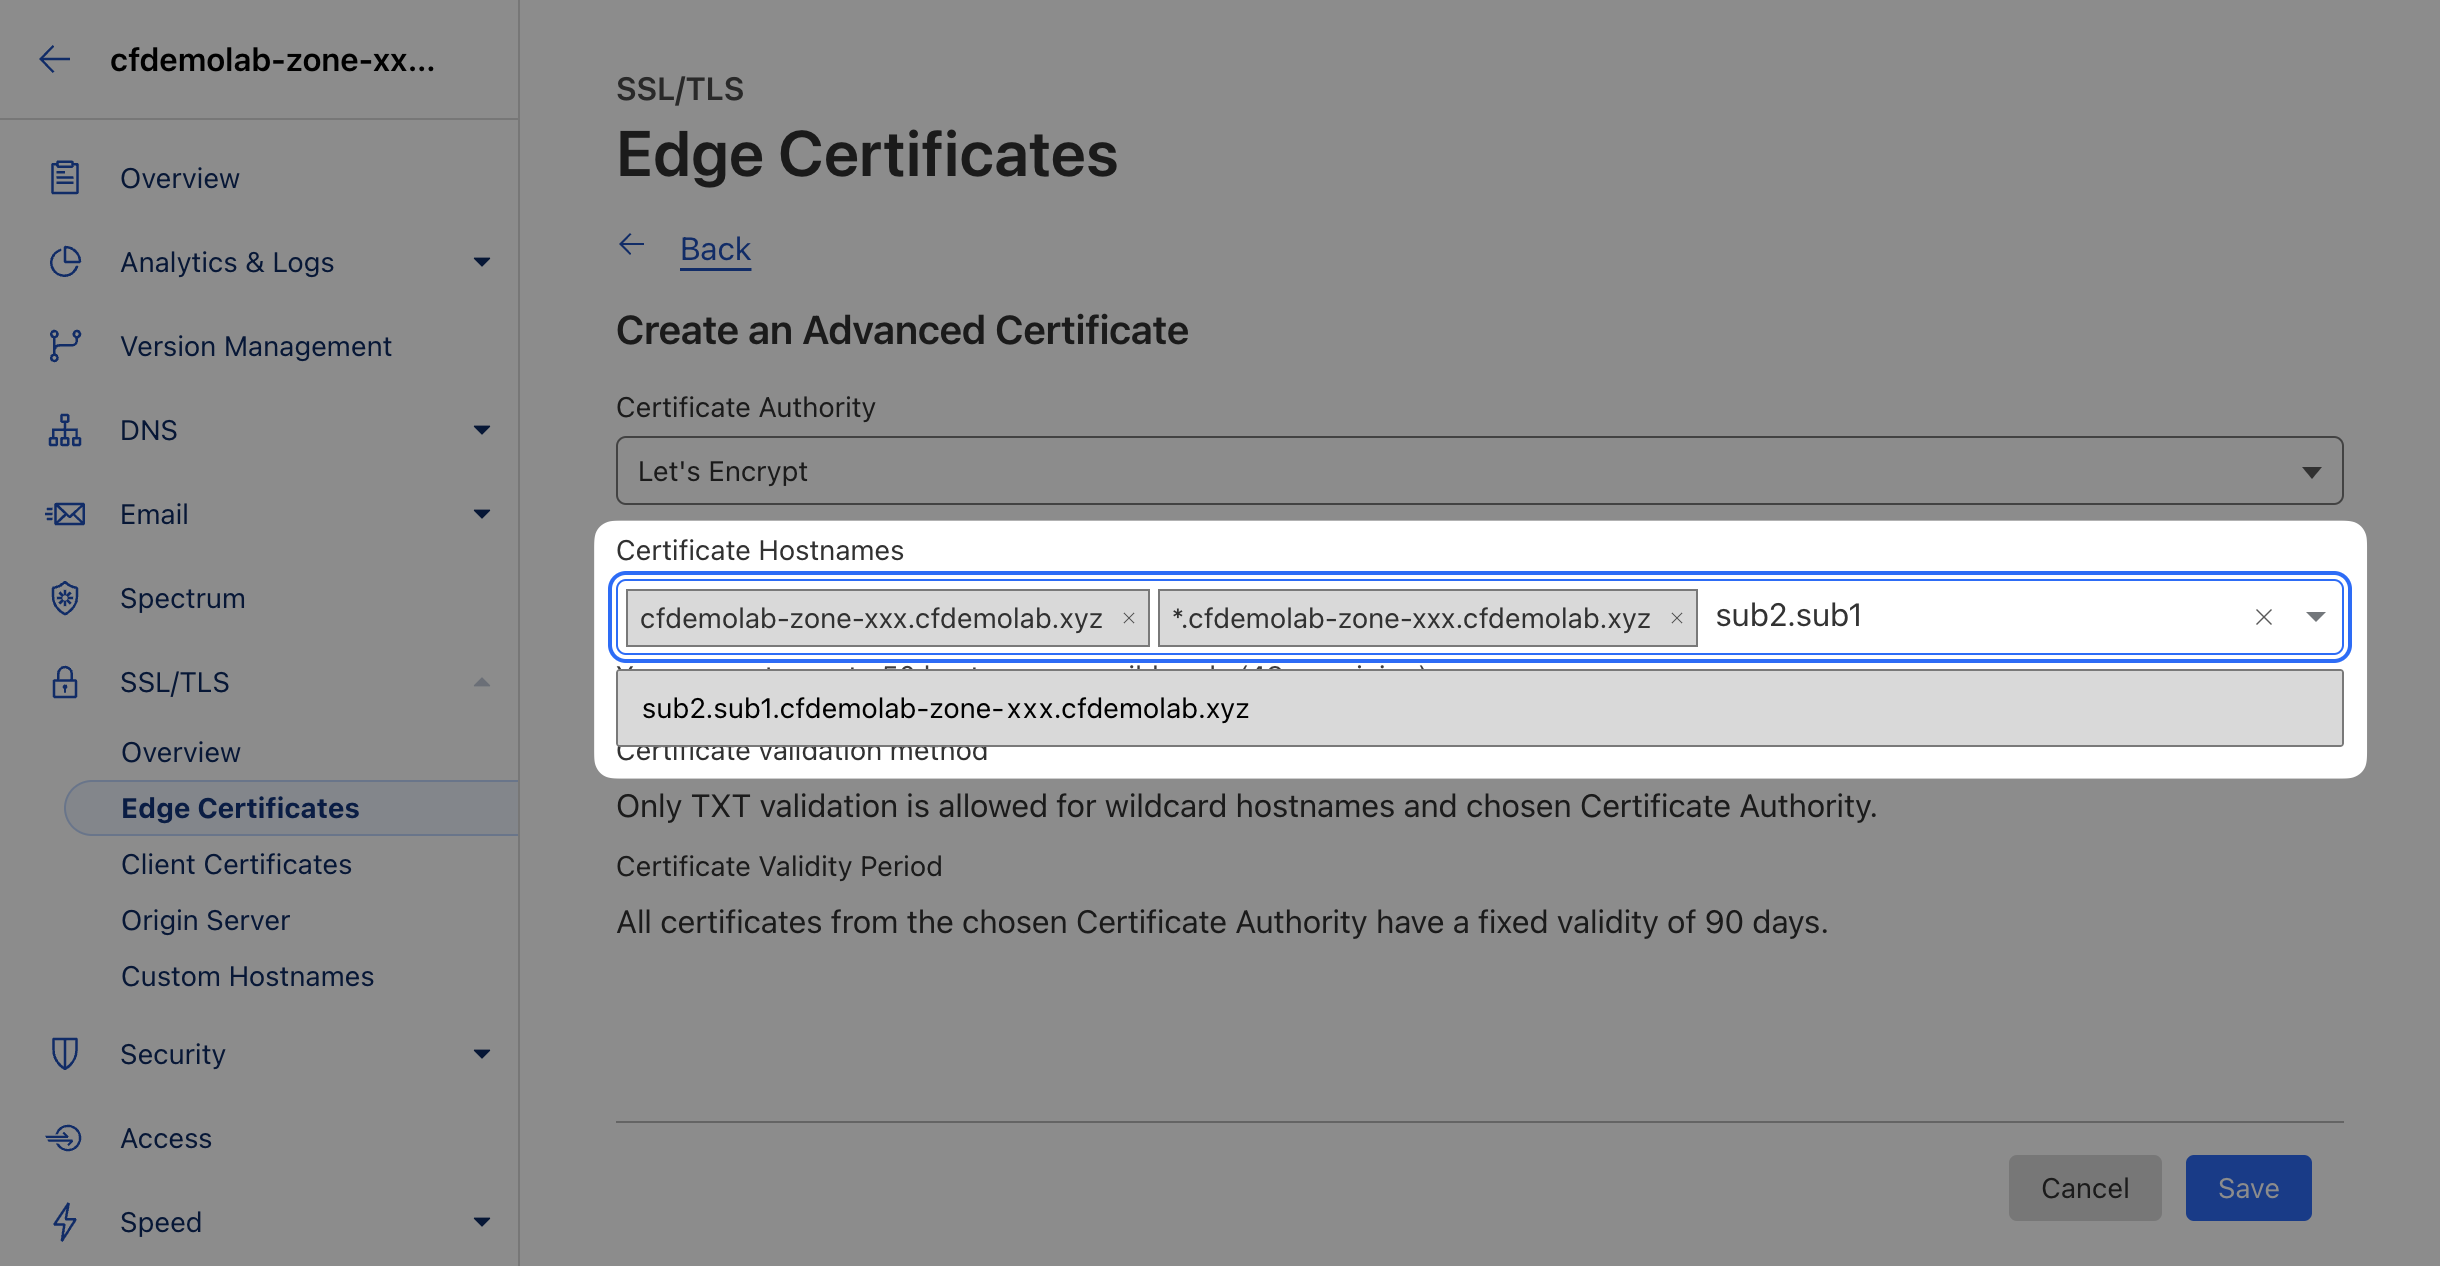
As long as your domain is on full setup, Cloudflare will handle Domain Control Validation automatically on your behalf when using a TXT Validation.
You should now see a new certificate in a Pending Validation state.
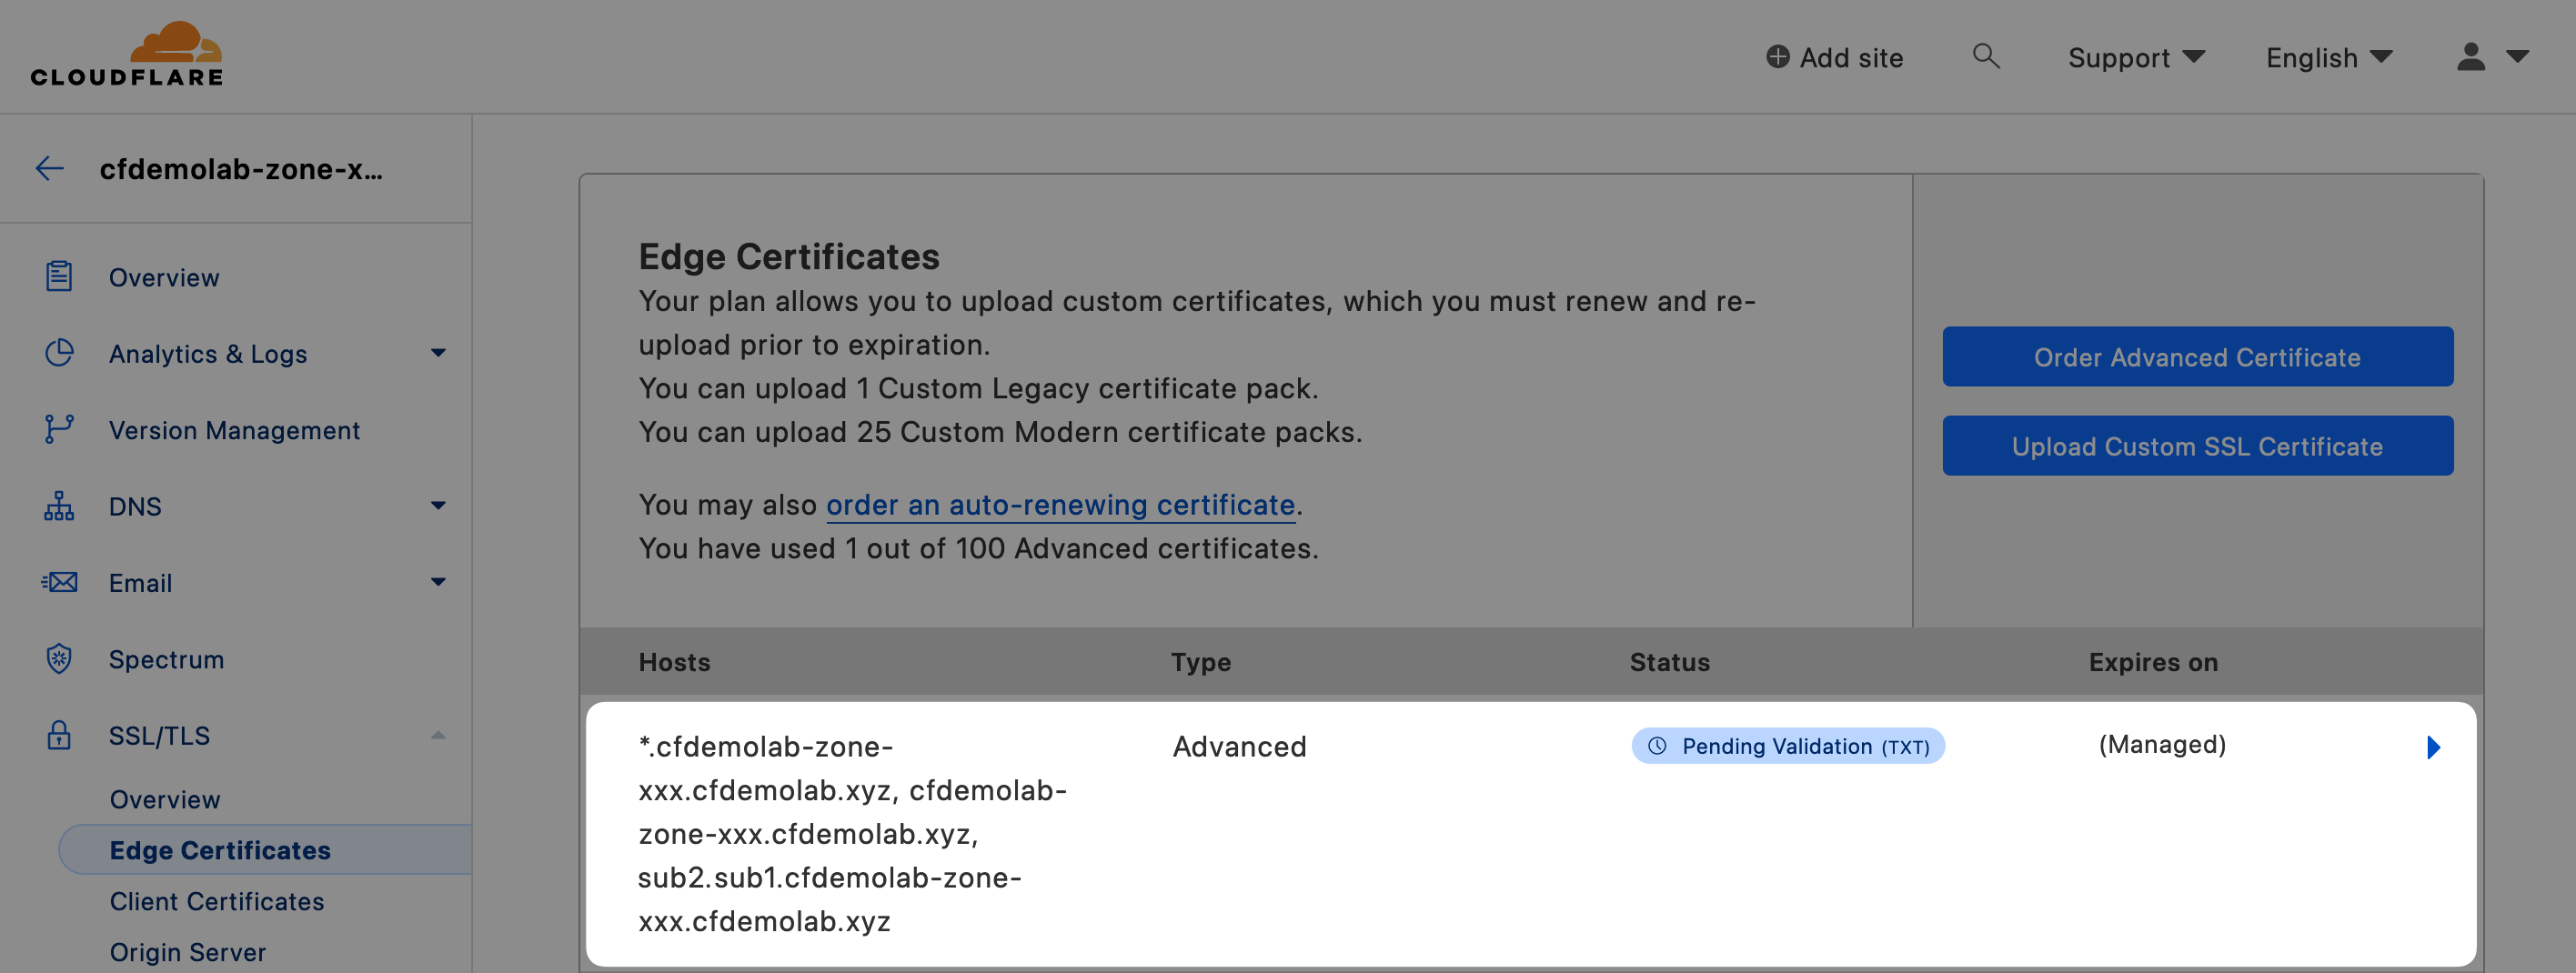
Once the validation process is completed, navigate to the new subdomain with your browser again and you should now see it load securely.
Summary
In this section we've understood & configured TLS (SSL) Certificates
Next, we will take a look at the Cache Tuning.