Short-lived SSH certs
In this last lab, we are going address the challenge of managing SSH access in large organizations. We will deploy short-lived certificates, one of the first and most popular services offered by Cloudflare’s Zero Trust platform.
In this setup, a user attempting to access a specific resource via SSH is first redirected to an Access URL. After they successfully authenticate through Access, Cloudflare issues (and distributes to the client via cloudflared) an SSH certificate with a very short validity that is used to establish this one session.
Task
Configure access to Origin A using short-lived SSH certificates.
Why
The use of short-lived certificates:
- Eliminates need for users to generate and manage long-lived SSH keys, simplifying access management
- Improves security by replacing static public keys with ephemeral certificates tied to authenticated user sessions
- Centralizes SSH access control through Cloudflare Access, enhancing visibility and reducing administrative overhead
Steps
Create Access application
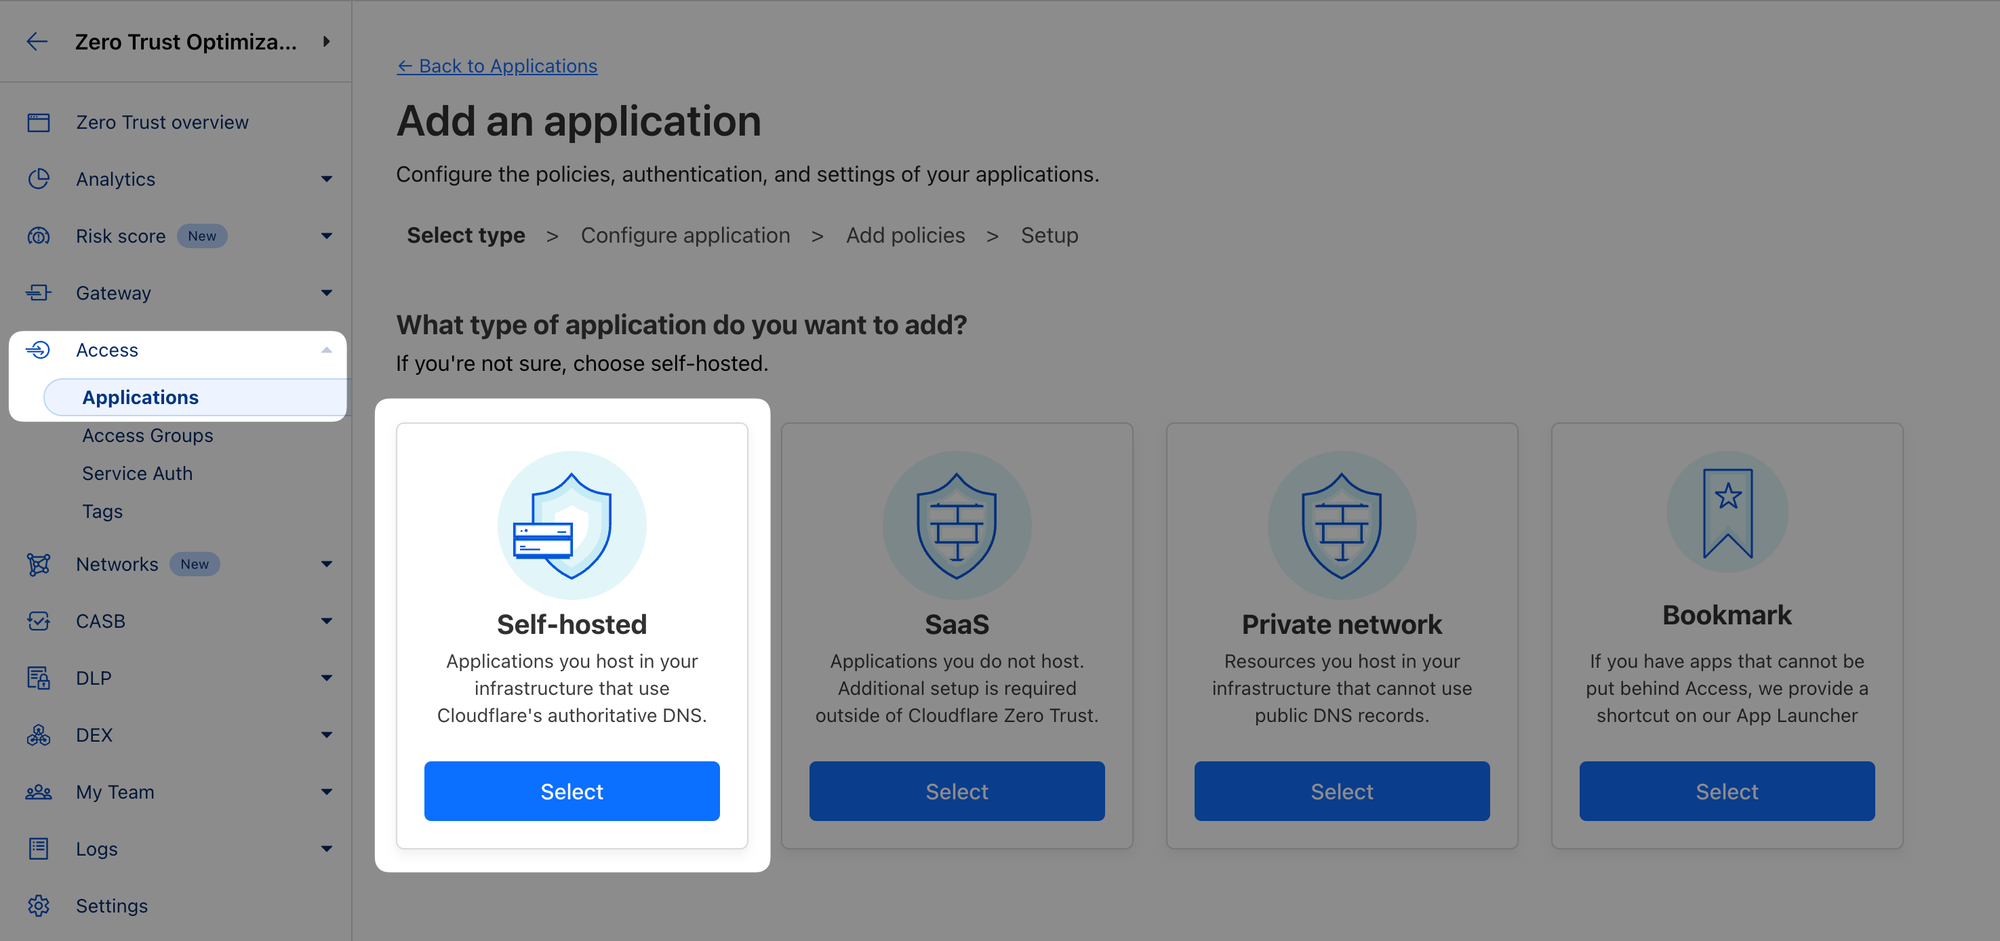
- In the Zero Trust dashboard, navigate to Access ‣ Applications
- Click Add an application and select Self-hosted
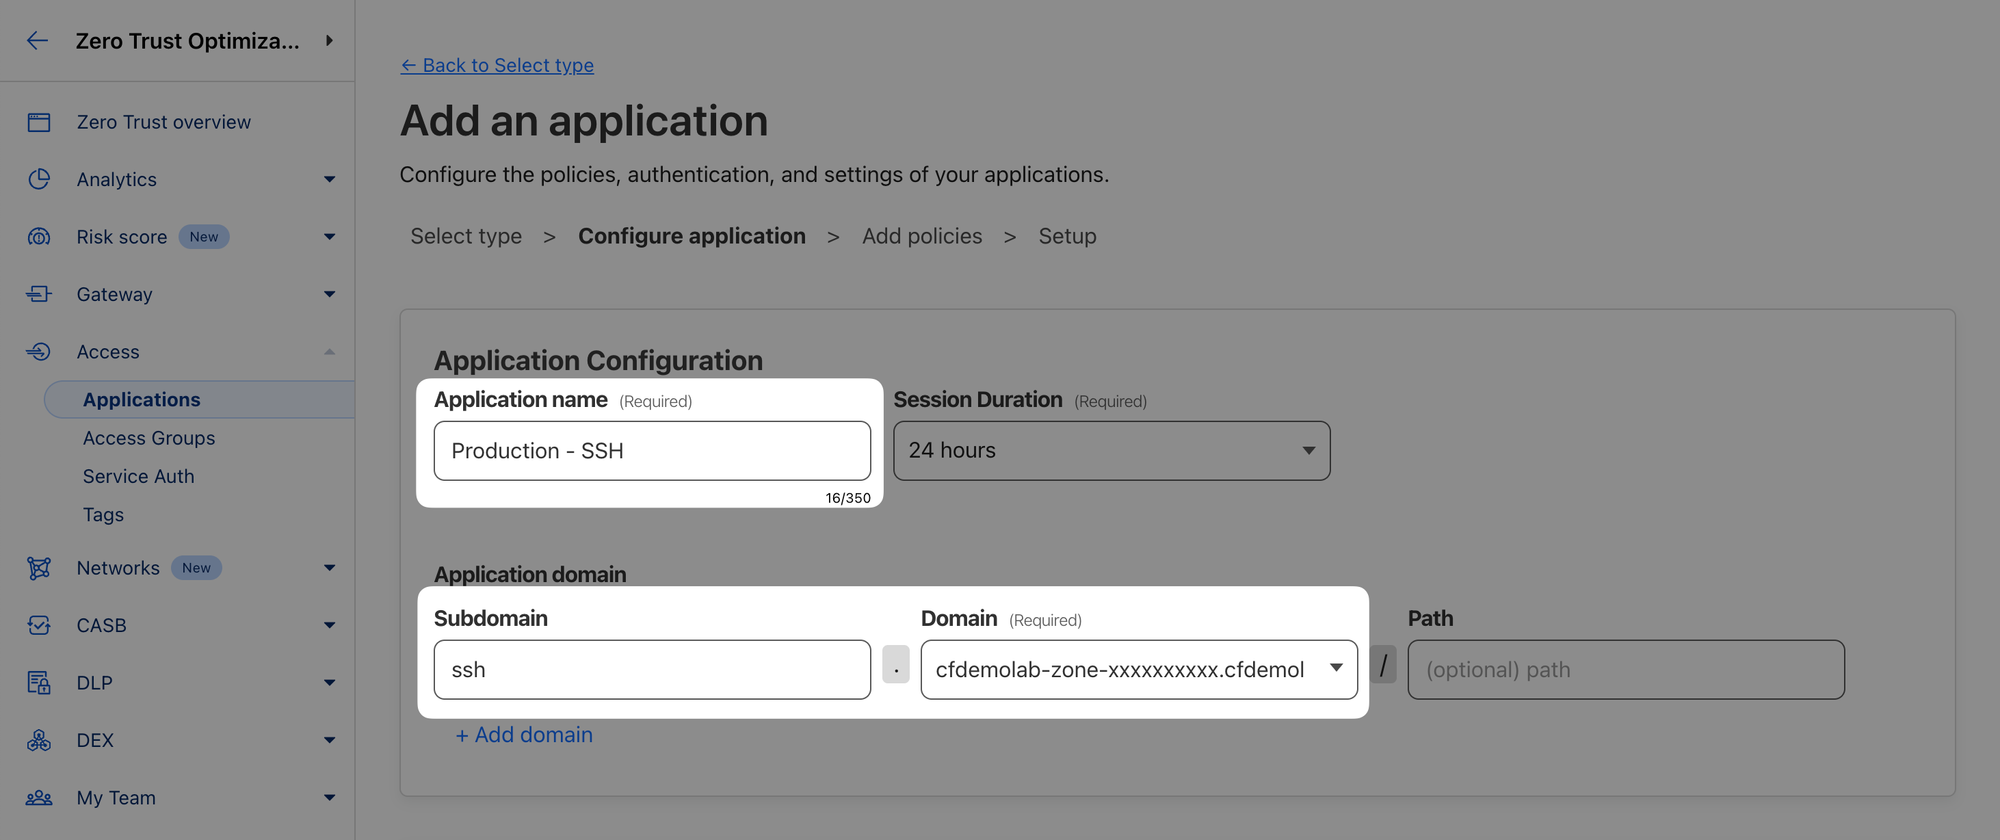
Application
- Name the application, for example “Production - SSH”
- Select a domain from the drop-down menu under Application Domain and set the subdomain to
ssh
- Scroll down to the Identity Providers section and make sure your SAML IdP is among the accepted providers
- Click Next
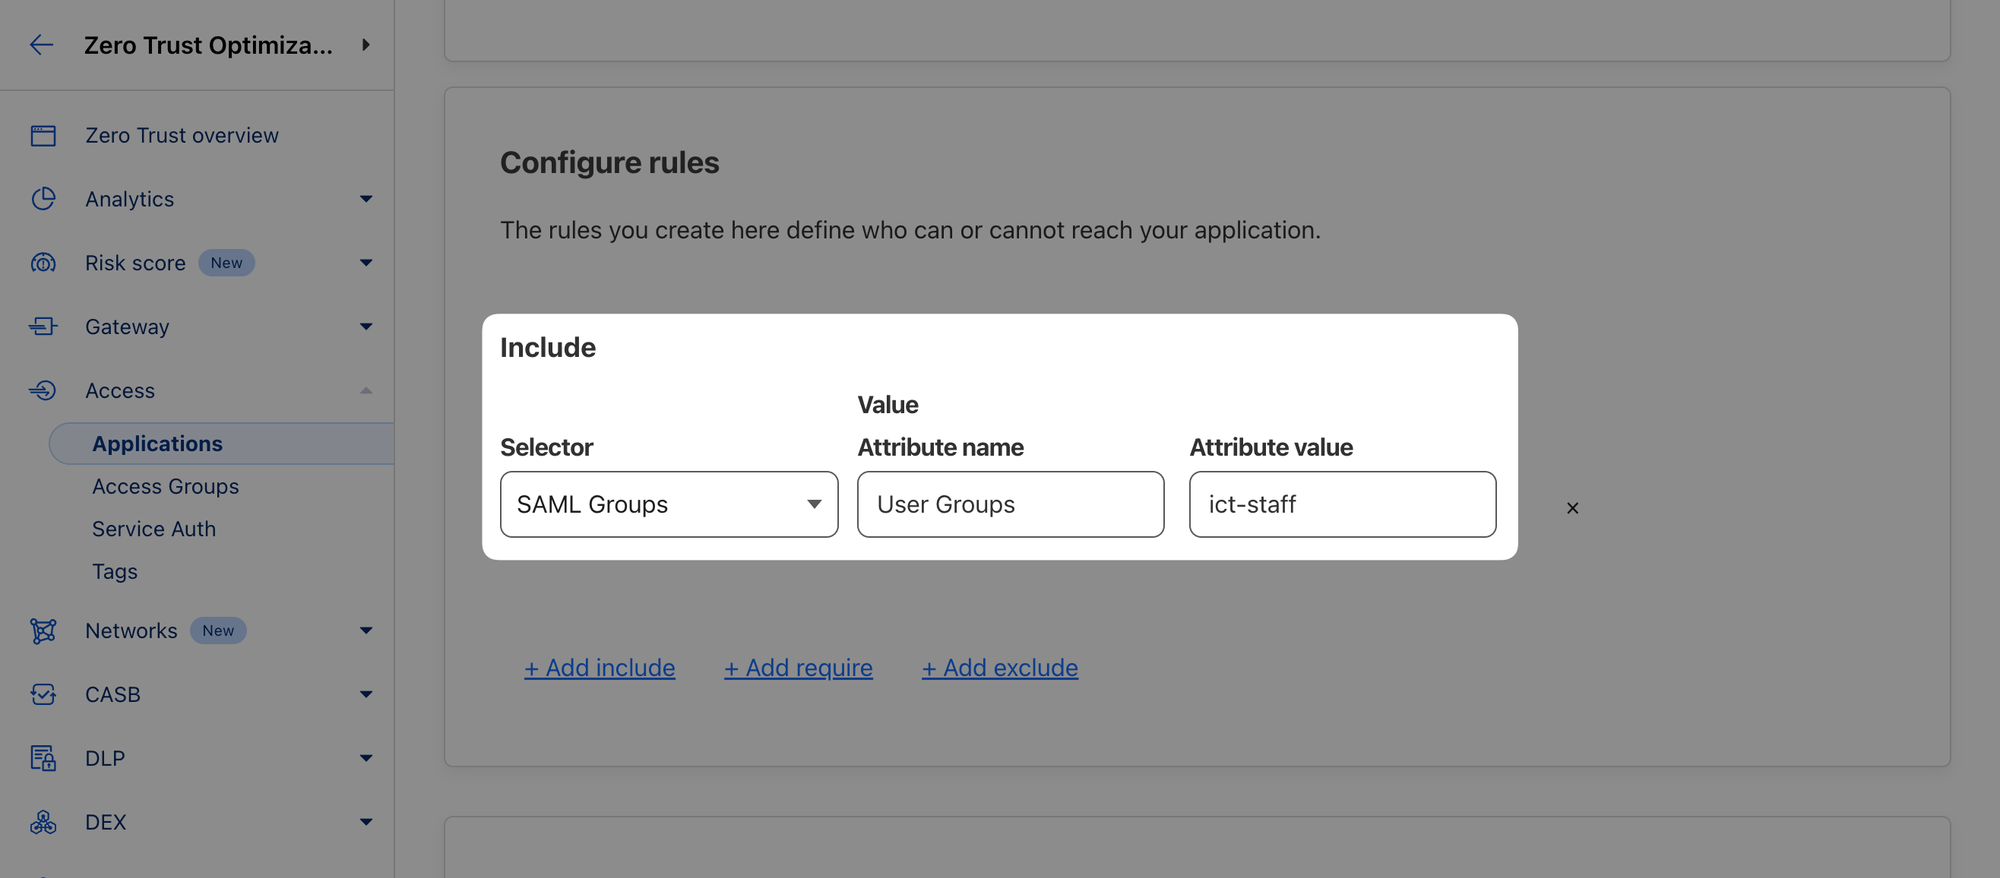
Policy
- On the next page, name the policy, for example “Allow IT personnel”
- Choose the SAML Groups selector and set the attribute to a group you’re affiliated with in the SAML IdP, for example "User Groups" with value "ict-staff"
- Click Next
Setup
- In the Additional Settings section, select Browser Rendering ‣ SSH from the drop-down menu to enable Cloudflare to render terminal connections in the browser
- Click Add application
Set up certificates
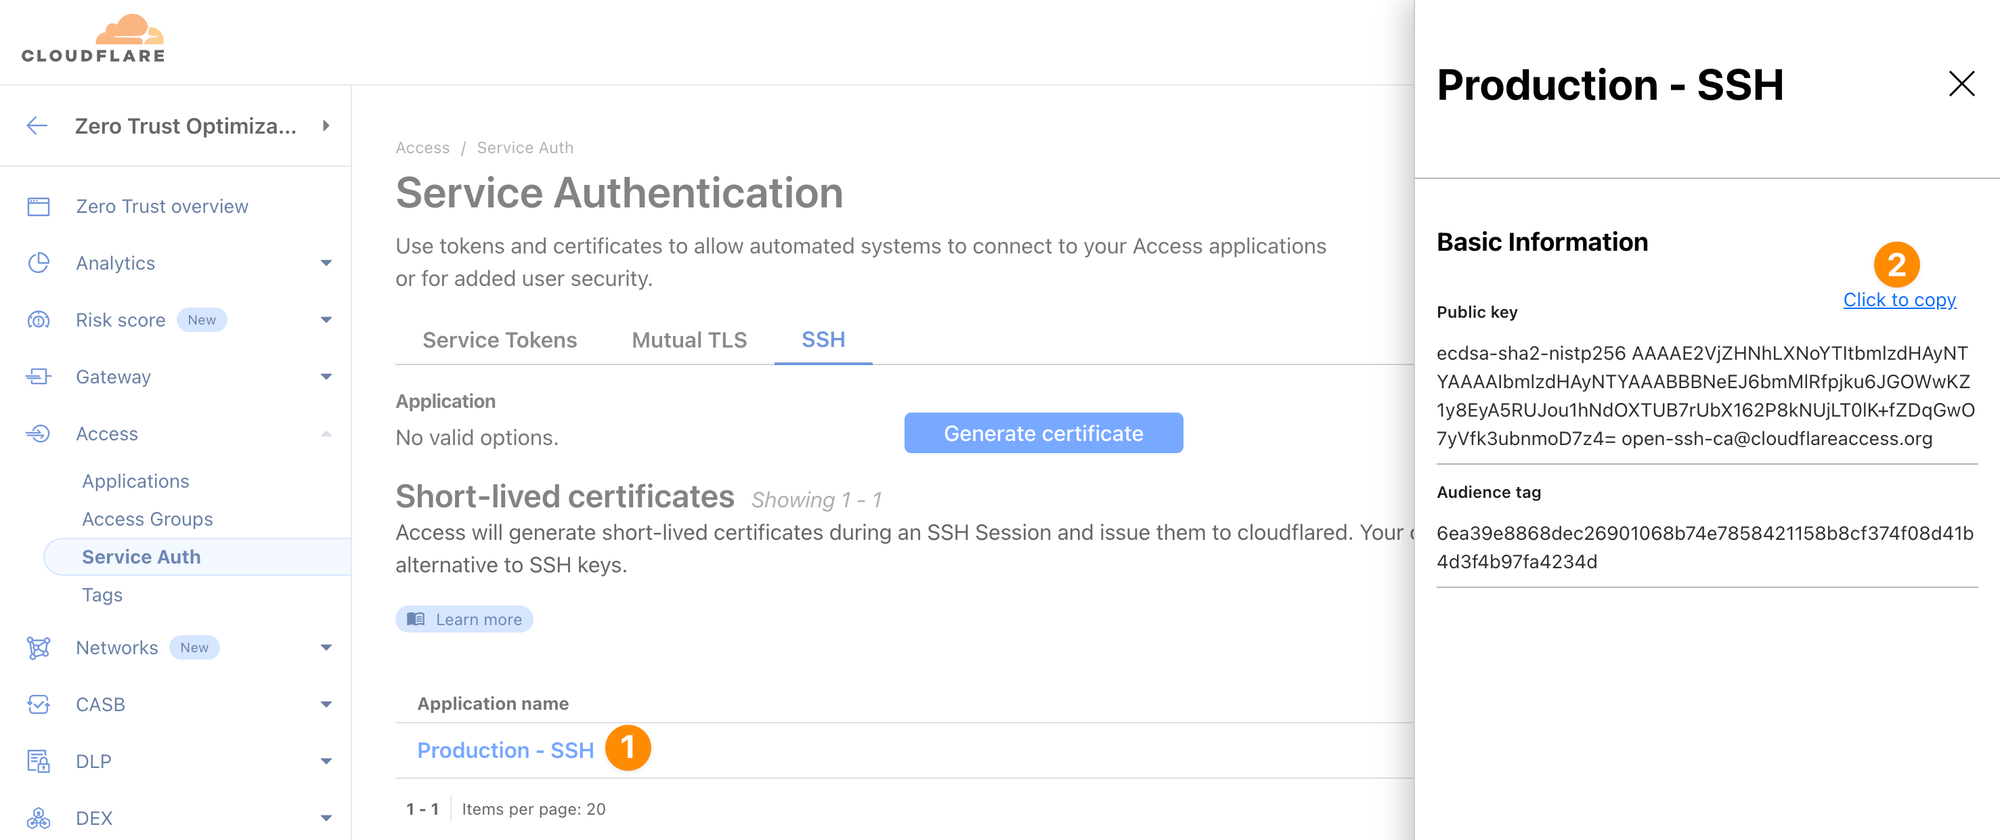
- Next, navigate to Access ‣ Service Auth ‣ SSH
- Choose the application representing the resource you secured in the previous step and click “Generate certificate”
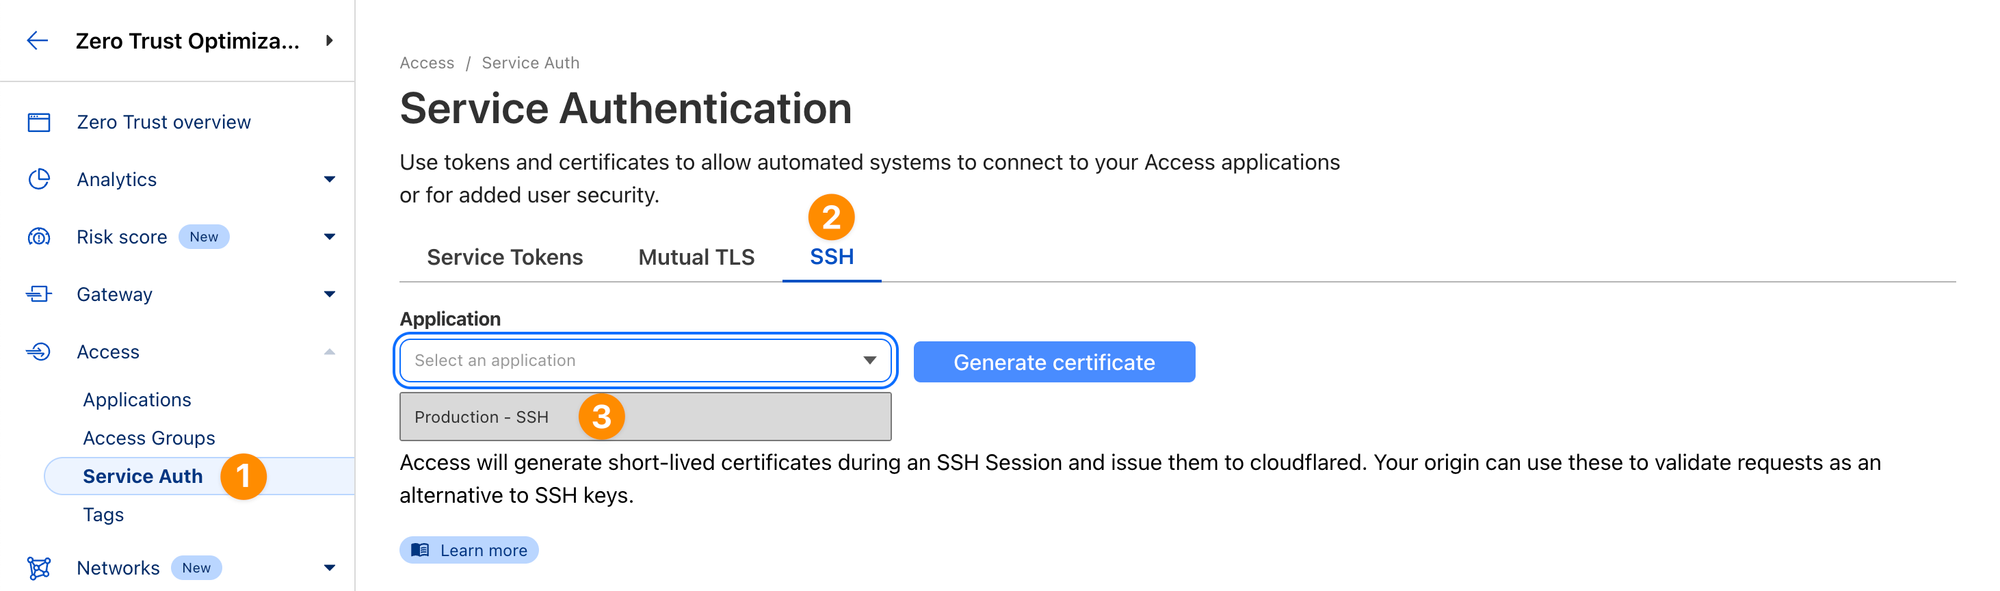
- Click on the application that was generated and copy the public key to your clipboard
Save the public key
On Origin A, first save the public key to a variable:
Ctrl+C to stop your tunnel if it is still running.PUBLICKEY="<your_public_key_copied_in_previous_step>"Origin A
Then save it to /etc/ssh/ca.pub:
echo ${PUBLICKEY} | sudo tee /etc/ssh/ca.pub- Print the contents to confirm your key was saved properly:
cat /etc/ssh/ca.pubecdsa-sha2-nistp256 AA... [email protected]Create hostname
On your Origin A, set DNSZONE variable to your zone (you got this in an earlier lab in your dashboard):
DNSZONE=<your_lab_zone>.cfdemolab.xyzOrigin A
And create a hostname record for ssh:
cloudflared tunnel route dns production-tunnel "ssh.$DNSZONE"INF Added CNAME ssh.cfdemolab-zone-xxxxxxxxxx.cfdemolab.xyz which will route to this tunnel tunnelID=xxxxxxx-xxxx-xxxx-xxxx-xxxxxxxxxxxxOrigin A
ssh subdomain from one of the previous labs still exists.Delete it in your Cloudflare dashboard under Websites ‣ <your zone> ‣ DNS, then find record for
ssh and select Edit ‣ Delete.Then repeat the
cloudflared command above.Next, set the TUNELID variable:
TUNNELID=$(cloudflared tunnel info production-tunnel | grep -oP '(?<=Your tunnel )[a-f0-9-]+' | awk '{print $1}')Origin A
Finally replace your tunnel config file (we're assuming your production tunnel from the previous lab still exists):
cat << EOF > ~/.cloudflared/config.yaml
tunnel: $TUNNELID
credentials-file: /home/cloudflare/.cloudflared/$TUNNELID.json

ingress:
  - hostname: ssh.$DNSZONE
    service: ssh://localhost:22
  - service: http_status:404
EOF
Origin A
We're done with the Cloudflare side, next let's set up SSH.
Update sshd service config
Still on Origin A edit the SSH service config file:
sudo vim /etc/ssh/sshd_configOrigin A
Here we will need to update 2 things:
- enable the public key we’ve just added
- map your SAML user to the linux user
To enable the public key created in the previous step, navigate to a row containing PubkeyAuthentication. It will likely be commented out:
# PubkeyAuthentication yesOrigin A: /etc/ssh/sshd_config
Uncomment it by removing the # symbol and make sure the value is yes.
Then add the following line to point to the certificate file we created earlier:
TrustedUserCAKeys /etc/ssh/ca.pubOrigin A: /etc/ssh/sshd_config
Next, by default, Cloudflare Access uses user’s email address prefix as the unix username. So if your SAML email is [email protected], by default Access will use the short-lived certificate to log in as linux user itadmin. But the linux user on the Origin A we’re using is cloudflare.
To map itadmin to our cloudflare user, add the following section:
Match user cloudflare
  AuthorizedPrincipalsCommand /bin/echo 'itadmin'
  AuthorizedPrincipalsCommandUser nobody
Match all
Origin A: /etc/ssh/sshd_config
Save your changes and restart sshd:
sudo systemctl restart sshOrigin A
And double-check your changes didn't cause any errors and the ssh service is in an active (running) state:
sudo systemctl status ssh● ssh.service - OpenBSD Secure Shell server
Loaded: loaded
Active: active (running); 3s agoOrigin A
Update ssh client config
Previously, this lab has only shown how to interact with cloudflared server-side. But cloudflared can also run in client mode, we already used that mode in one of the earlier labs when we copied files between origins via scp. Let's now dig a bit deeper.
(optional) You can use your local machine as the client that will be connecting to the server. If you want to do that, you'll need to install the cloudflared command line tool on your local machine:
- Windows (64-bit)
- Windows (32-bit)
- macOS (alternatively
brew install cloudflared) - Other platforms
In this guide however we'll demonstrate the steps on Origin B which will act as the SSH client.
Switch to Origin B and add set your DNSZONE variable again:
DNSZONE=<your_lab_zone>.cfdemolab.xyzOrigin B
Then run the following config to generate the necessary configuration entry for your SSH config file:
cloudflared access ssh-config --hostname ssh.$DNSZONE --short-lived-cert
Add to your /home/cloudflare/.ssh/config:
Match host ssh.cfdemolab-zone-xxxxxxxxxx.cfdemolab.xyz exec "/usr/bin/cloudflared access ssh-gen --hostname %h"
  ProxyCommand /usr/bin/cloudflared access ssh --hostname %h
  IdentityFile ~/.cloudflared/%h-cf_key
  CertificateFile ~/.cloudflared/%h-cf_key-cert.pub
Copy the output in your console (not the one above, that's just an example) and add it to your ~/.ssh/config file.
Alternatively, you can run the following command:
cat << EOF >> ~/.ssh/config
Match host ssh.$DNSZONE exec "/usr/bin/cloudflared access ssh-gen --hostname %h"
  ProxyCommand /usr/bin/cloudflared access ssh --hostname %h
  IdentityFile ~/.cloudflared/%h-cf_key
  CertificateFile ~/.cloudflared/%h-cf_key-cert.pub
EOF
Test the connection
Start your cloudflared tunnel on Origin A:
cloudflared tunnel run production-tunnelOrigin A
And then, use ssh to connect it from Origin B (or your local machine if that's what you set up as the client):
ssh.<your_lab_zone>.cfdemolab.xyzPlease open the following URL and log in with your Cloudflare account:
🟨https://ssh.cfdemolab-zone-xxxxxxxxxx.cfdemolab.xyz/cdn-cgi/access/cli?...
Leave cloudflared running to download the token automatically.Origin B
Copy the URL and open it in a browser. Log in via SAML when prompted, eventually you should receive the following prompt:
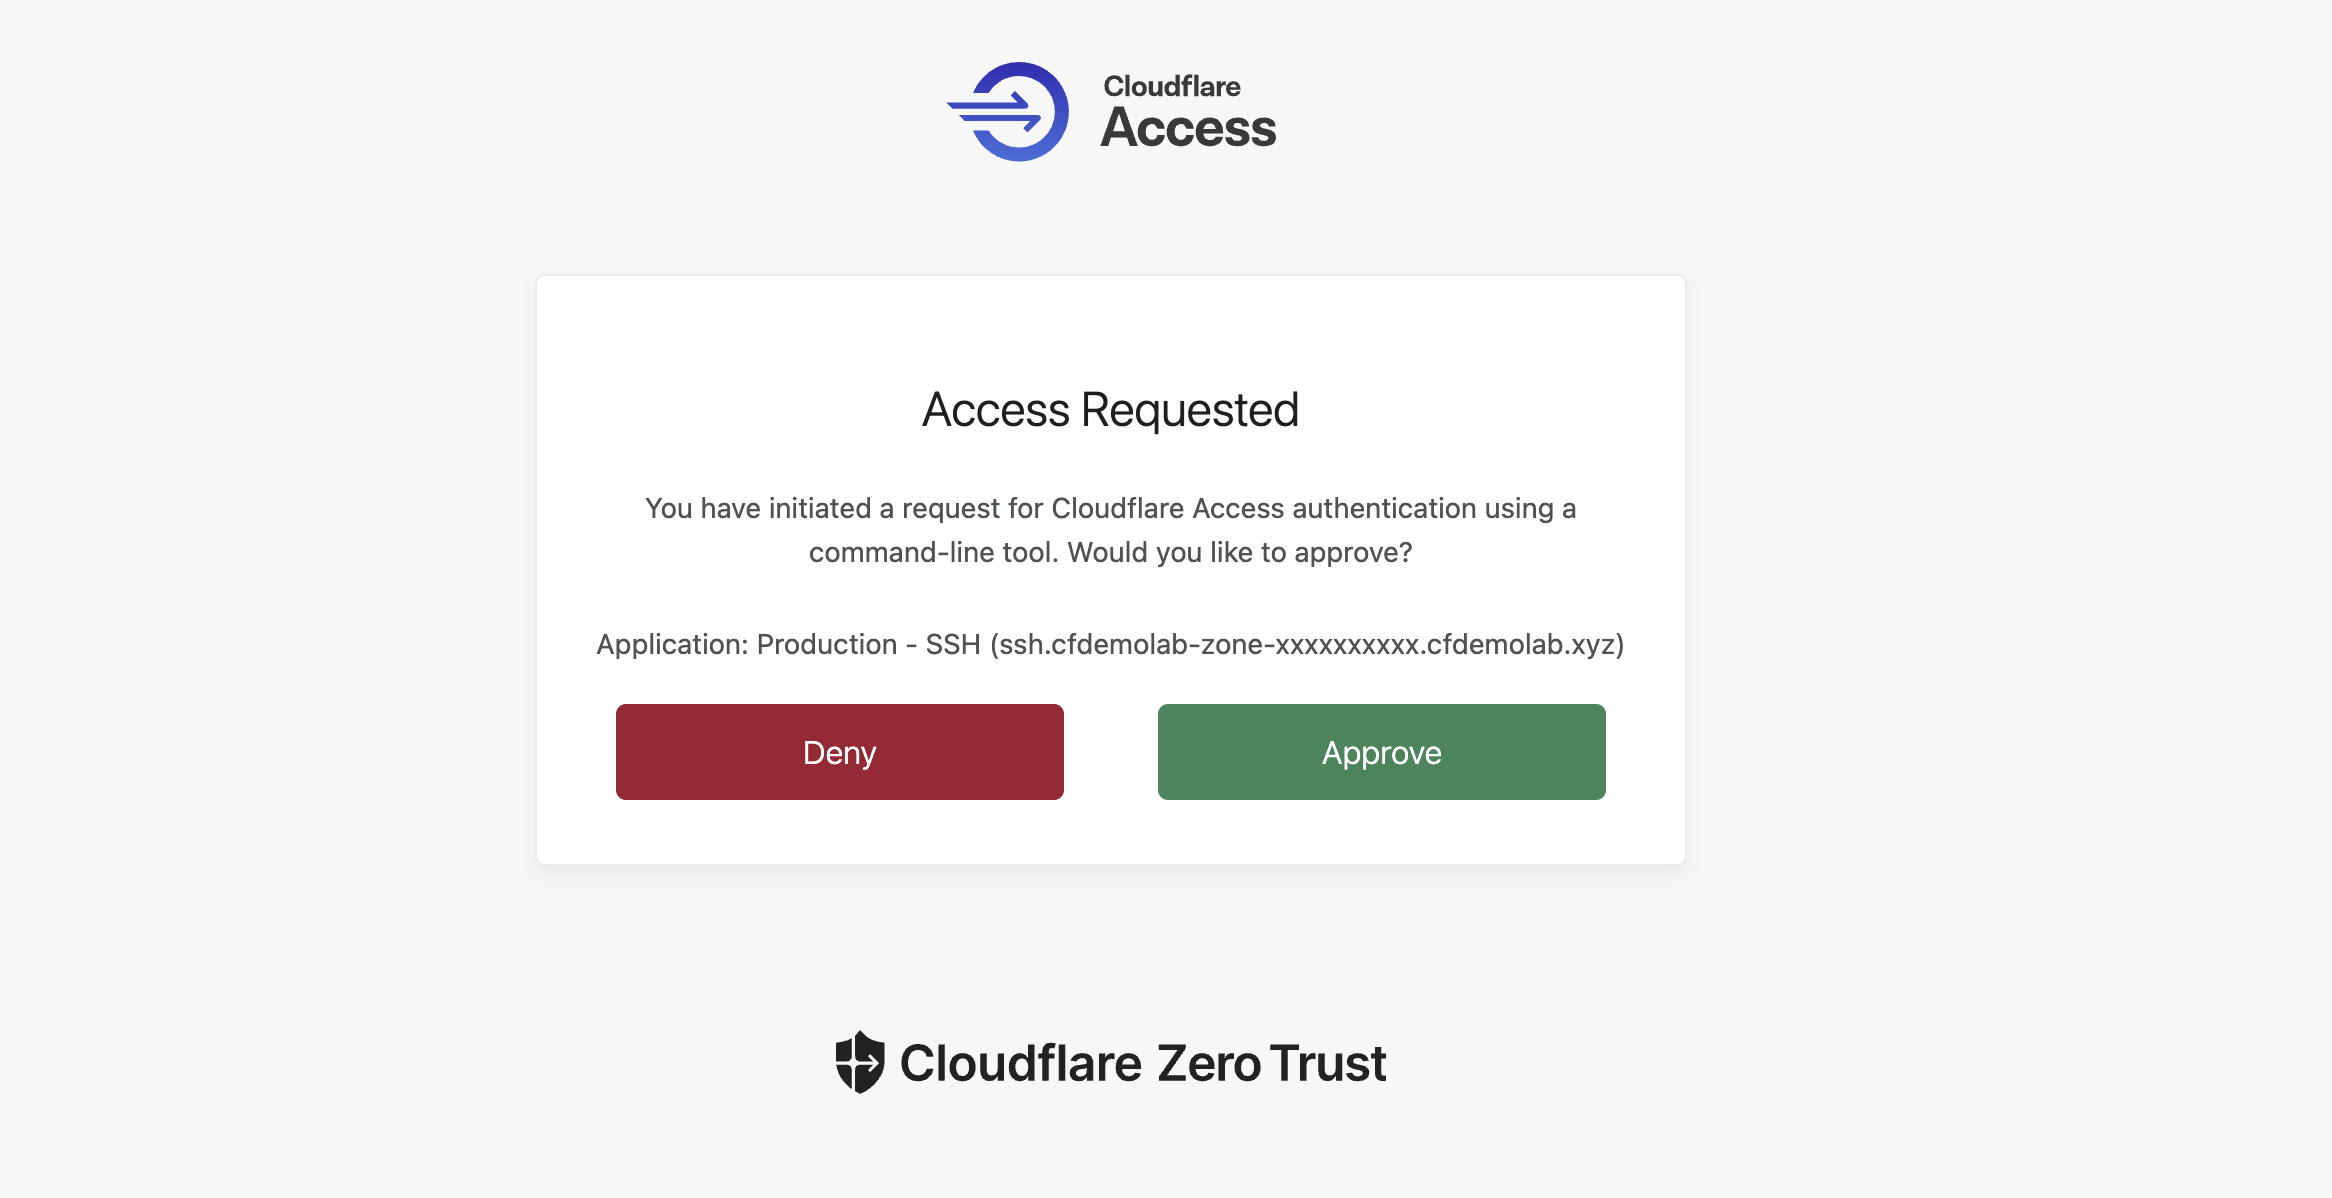
Once you click Approve, the ssh command in your Origin B console will log you in to Origin A:
2024-07-09T07:34:39Z INF Waiting for login...
Welcome to Cloudflare Labs origin server for Zero Trust enablement
...
cloudflare@origin-server-A:~$
Origin B
cloudflare user’s password.(optional) Alternatively, you can also open ssh.<your_lab_zone>.cfdemolab.xyz in your web browser and connect via that.
As a last step, let's log out of that SSH session and return back to Origin B:
logoutConnection to ssh.cfdemolab-zone-xxxxxxxxxx.cfdemolab.xyz closed.
cloudflare@origin-server-B:~/.cloudflared$Origin B (logged in to Origin A via SSH)
Back on Origin B, inspect the short-lived certificate that was issued:
ssh-keygen -L -f ~/.cloudflared/*-cf_key-cert.pubType: [email protected] user certificate
Public key: ECDSA-CERT SHA256:/...
Signing CA: ECDSA SHA256:... (using ecdsa-sha2-nistp256)
Key ID: "bb2aae778d7ed52b508f13610f39723f"
Serial: 4480933270599632177
🟨Valid: from 2024-07-09T07:34:09 to 2024-07-09T07:38:09
Principals:
itadmin
Critical Options: (none)
Extensions:
permit-agent-forwarding
permit-port-forwarding
permit-pty
permit-user-rcOrigin B
Note the validity period, as the feature name implies, this is indeed quite short.
That’s the end of this lab!
Lab section complete. Return back to the Zero Trust 401 e-learning course and continue there.