Workshop
- Identity provider
- WARP and device posture
- Cloudflare Tunnel
- Access and Private Network
- Browser isolation and App launcher
- Digital experience monitoring
Prevent internal employee IDs from leaking onto the internet.
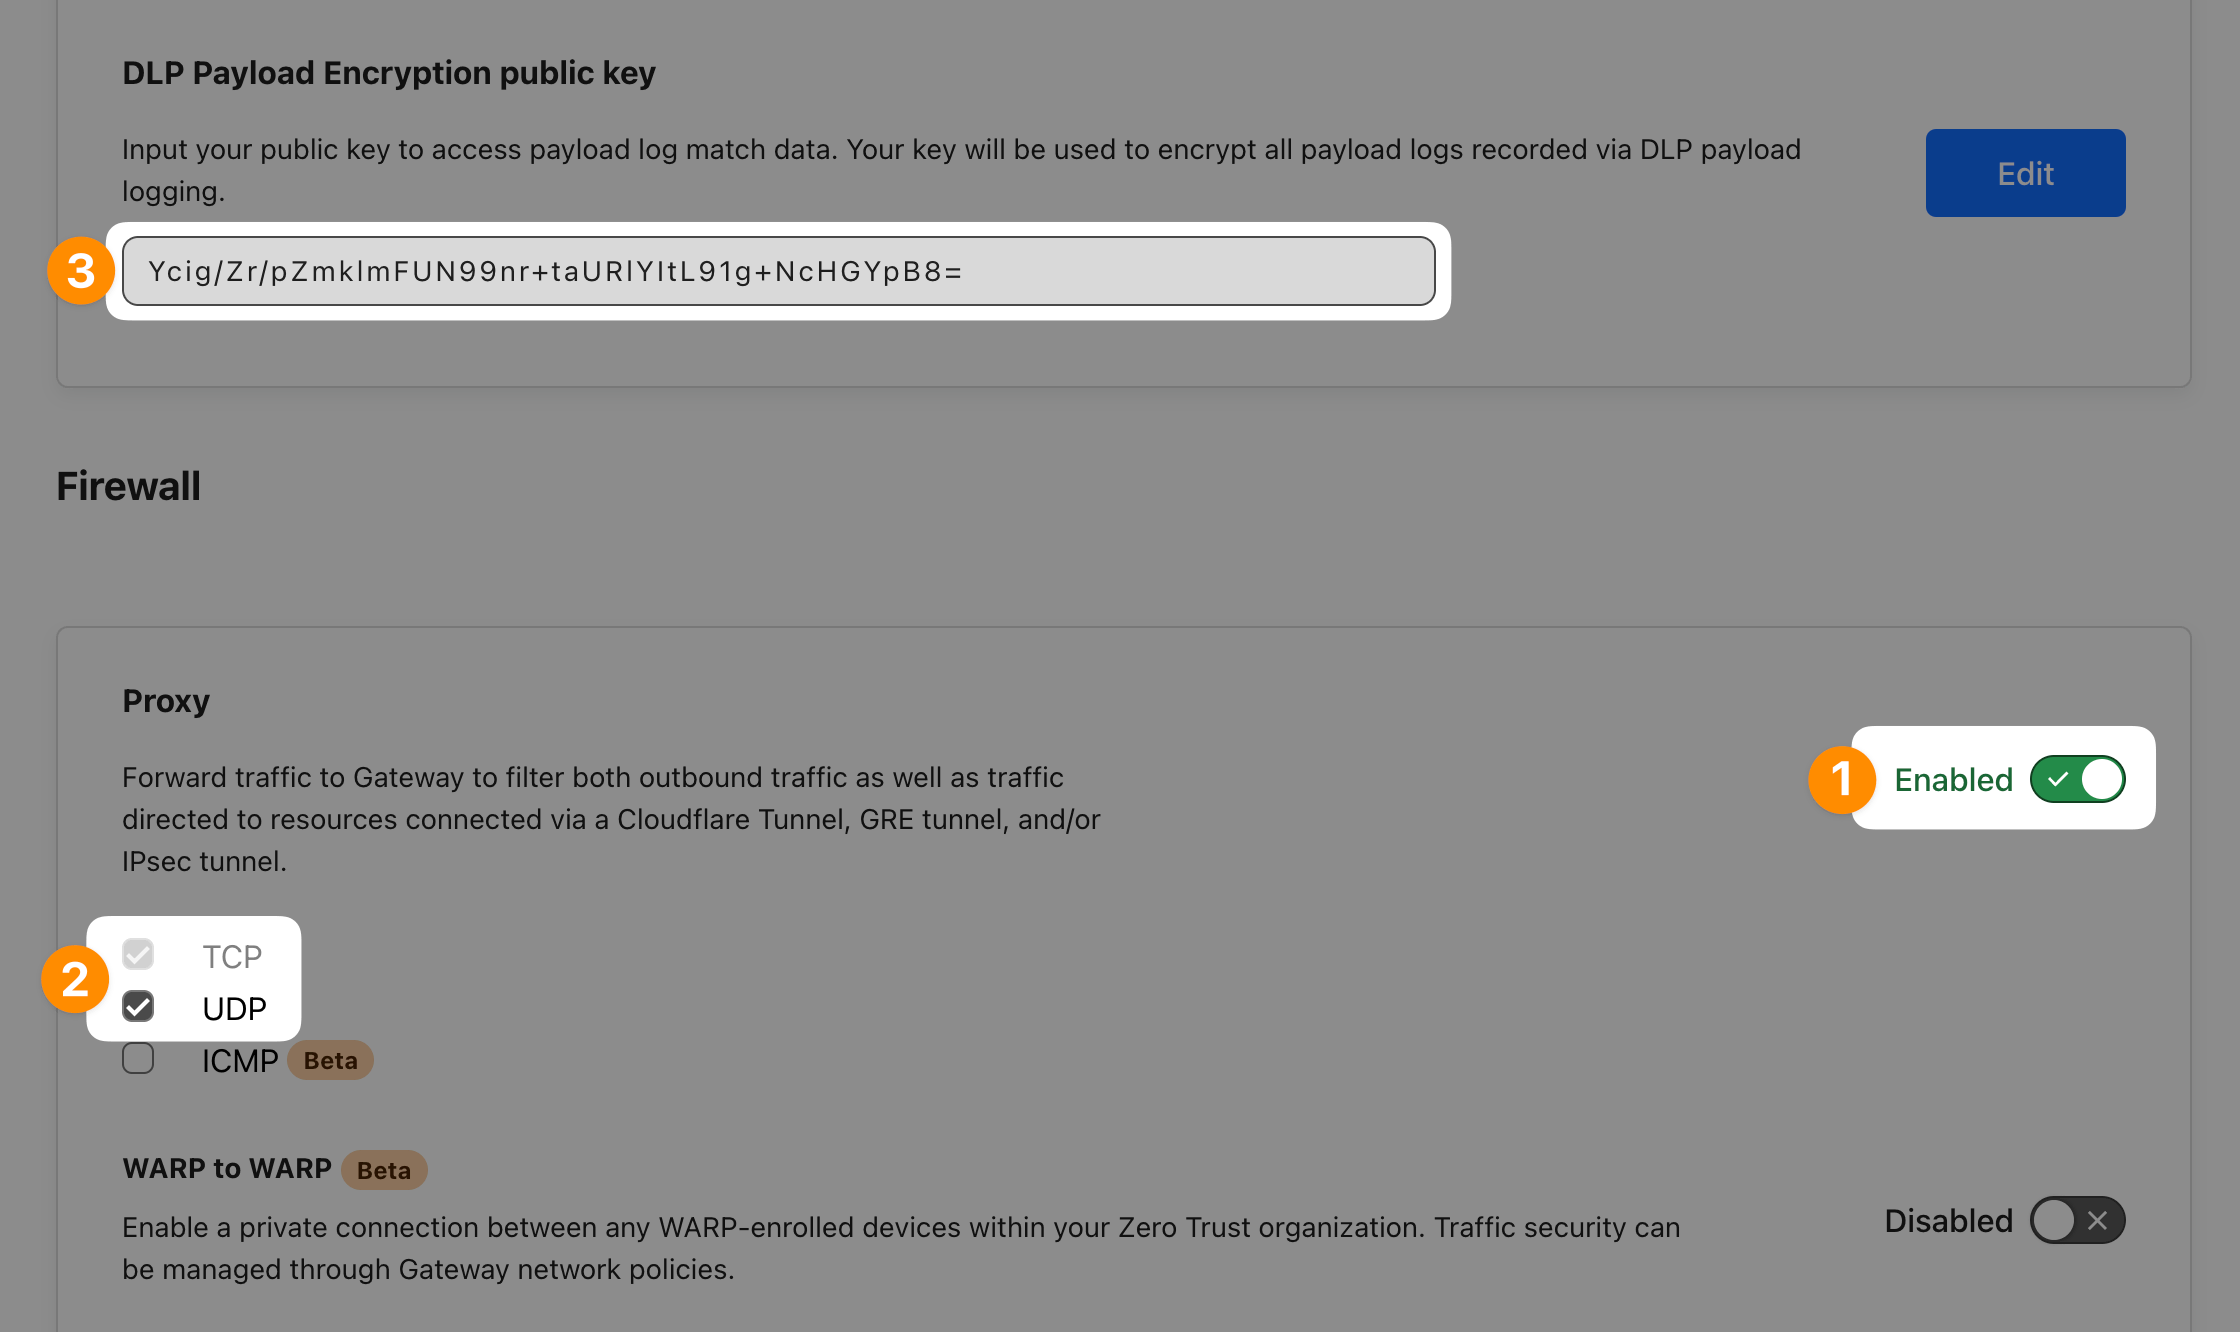
First double-check that Proxy is enabled in Settings ‣ Network. Make sure UDP is enabled as well as many sites use HTTP/3 today and QUIC is a UDP-based protocol.
Then (optionally) generate a key-pair so you can later decrypt your payload logs. Save your public key to Settings ‣ Network ‣ DLP Payload Encryption public key field.
Let’s now create a DLP profile that captures our company’s employee ID format: ACME12345
In DLP ‣ DLP Profiles select Create profile. Then under DLP detections select Add custom entry.
Use the following Regular Expression: (?i)ACME[0-9]{5}

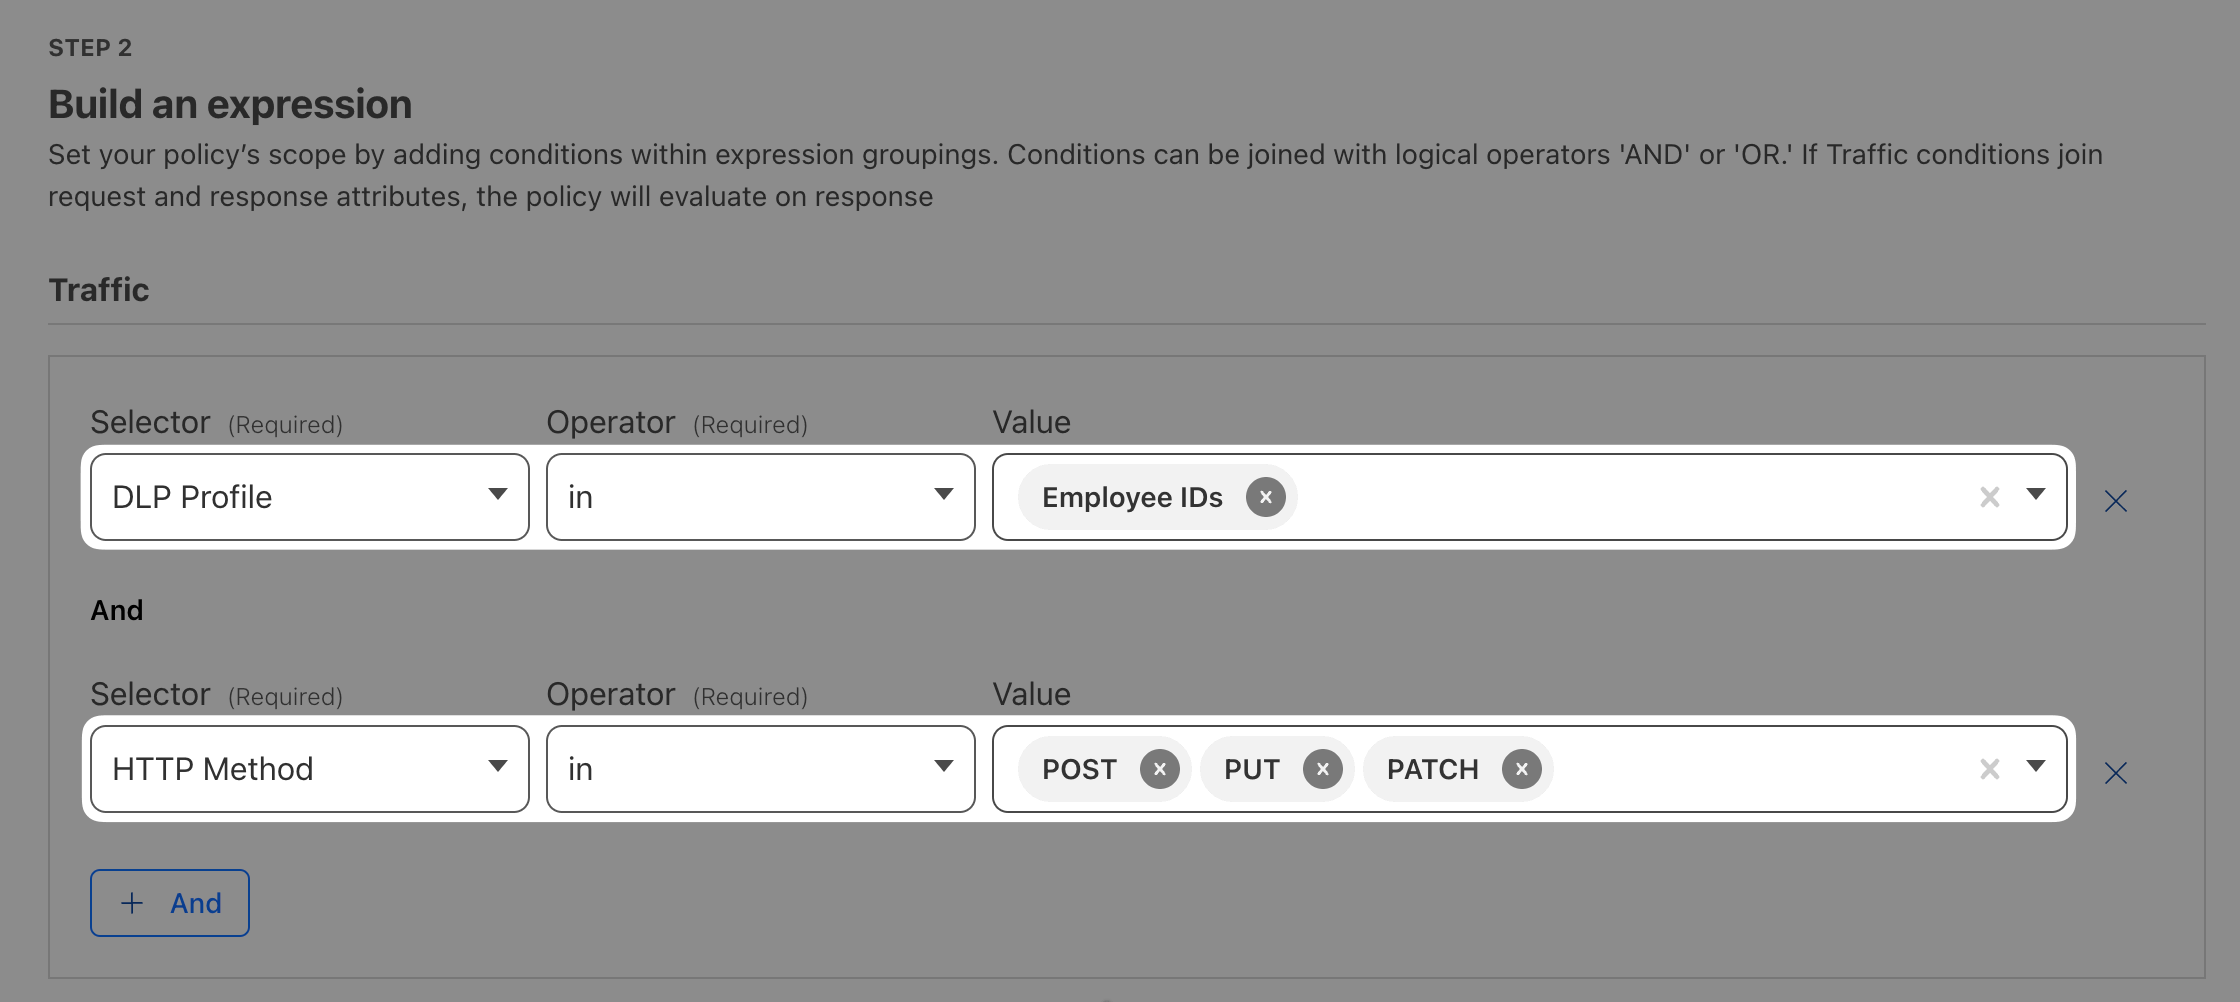
(?i) modified makes the search case-insensitive.Open Gateway ‣ Firewall policies ‣ HTTP and add a new policy using the DLP profile you just created. As a best practice, to avoid false-positives and blocking website where matches appear, let’s only block certain HTTP methods.
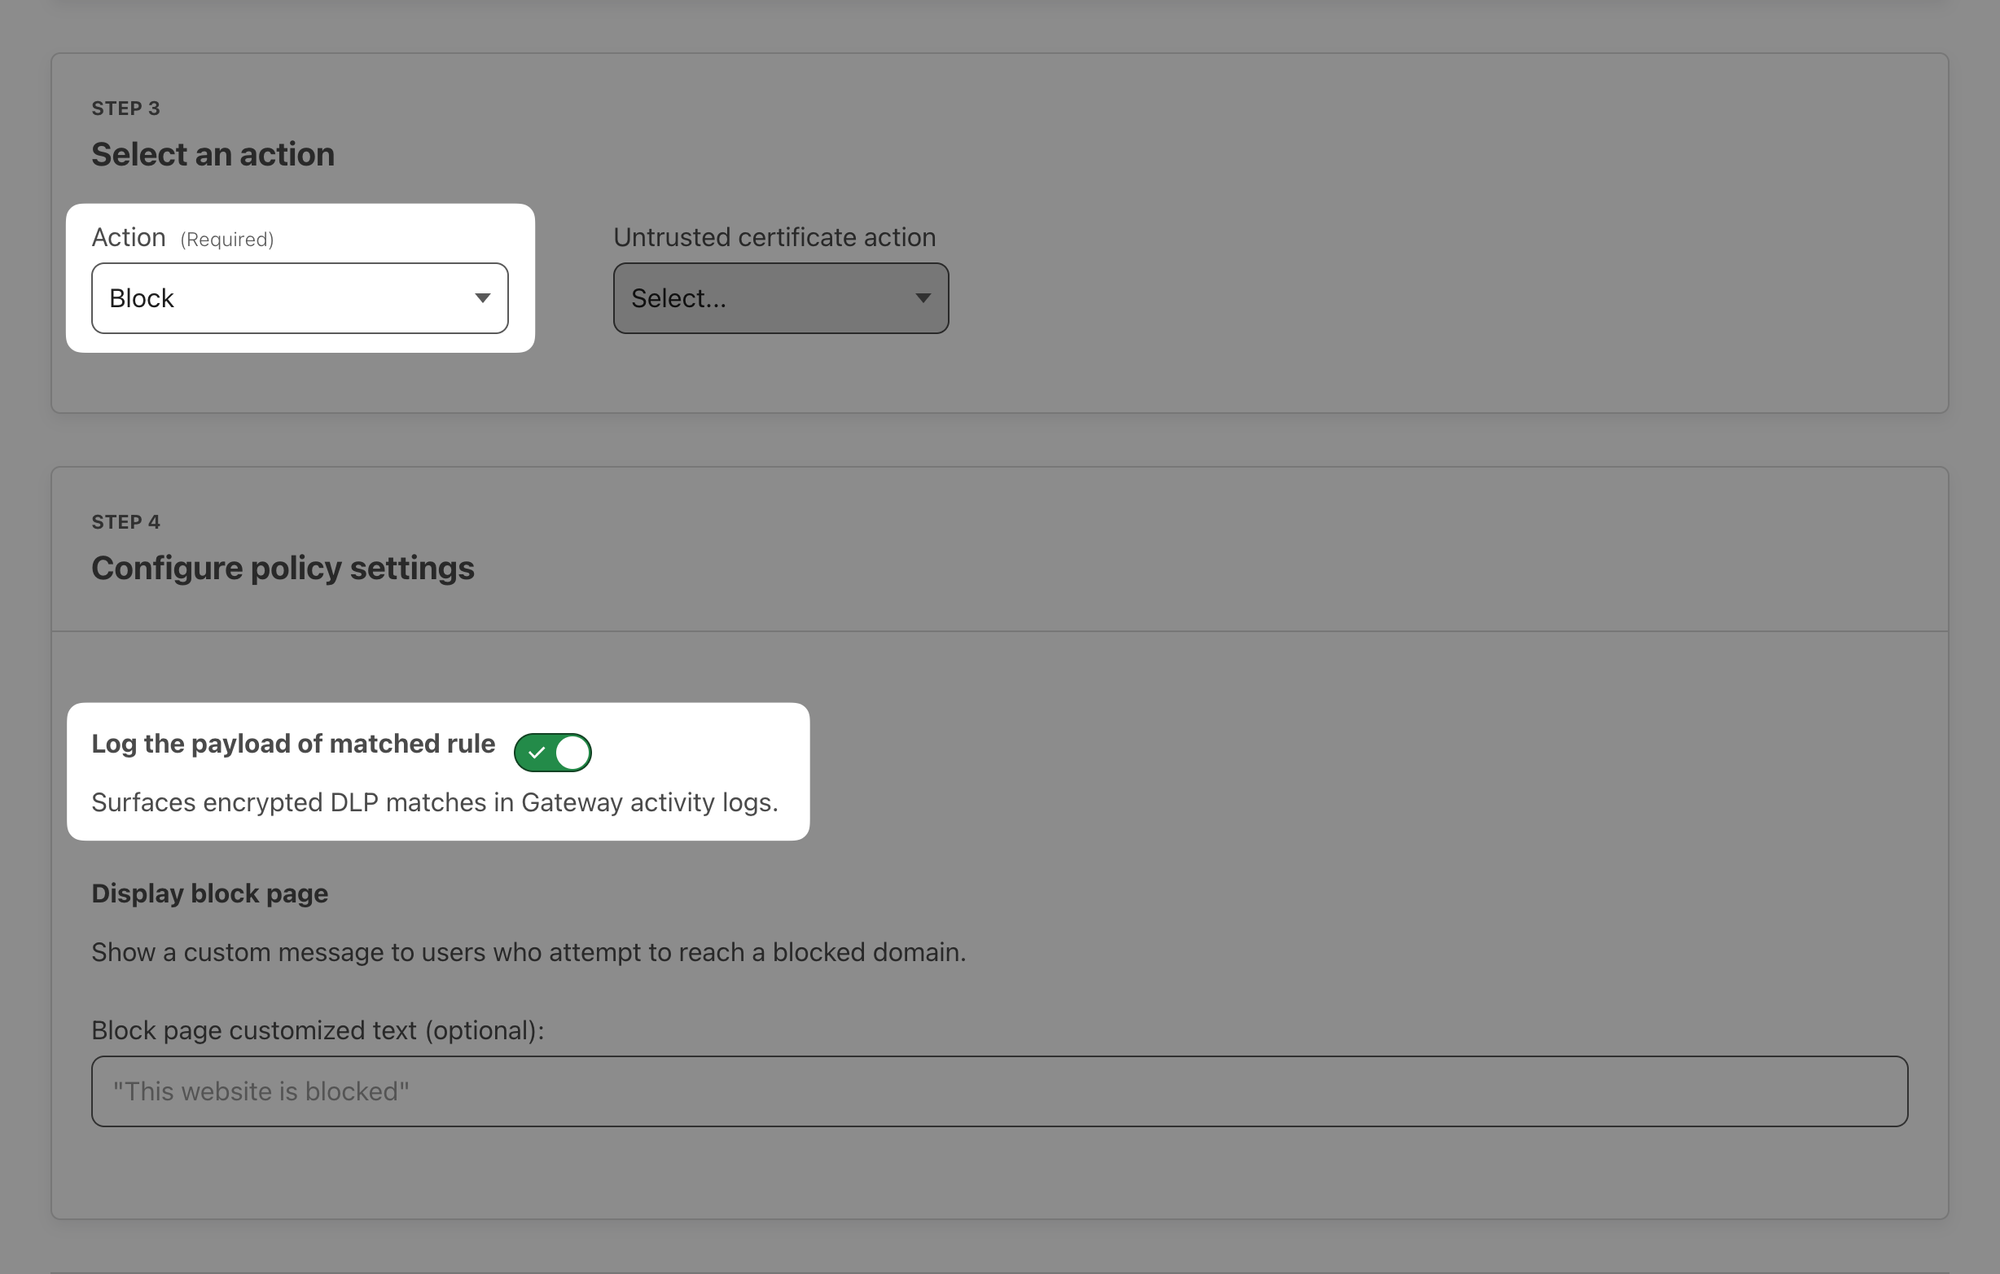
Set the Action to Block and enable Log the payload of matched rule.
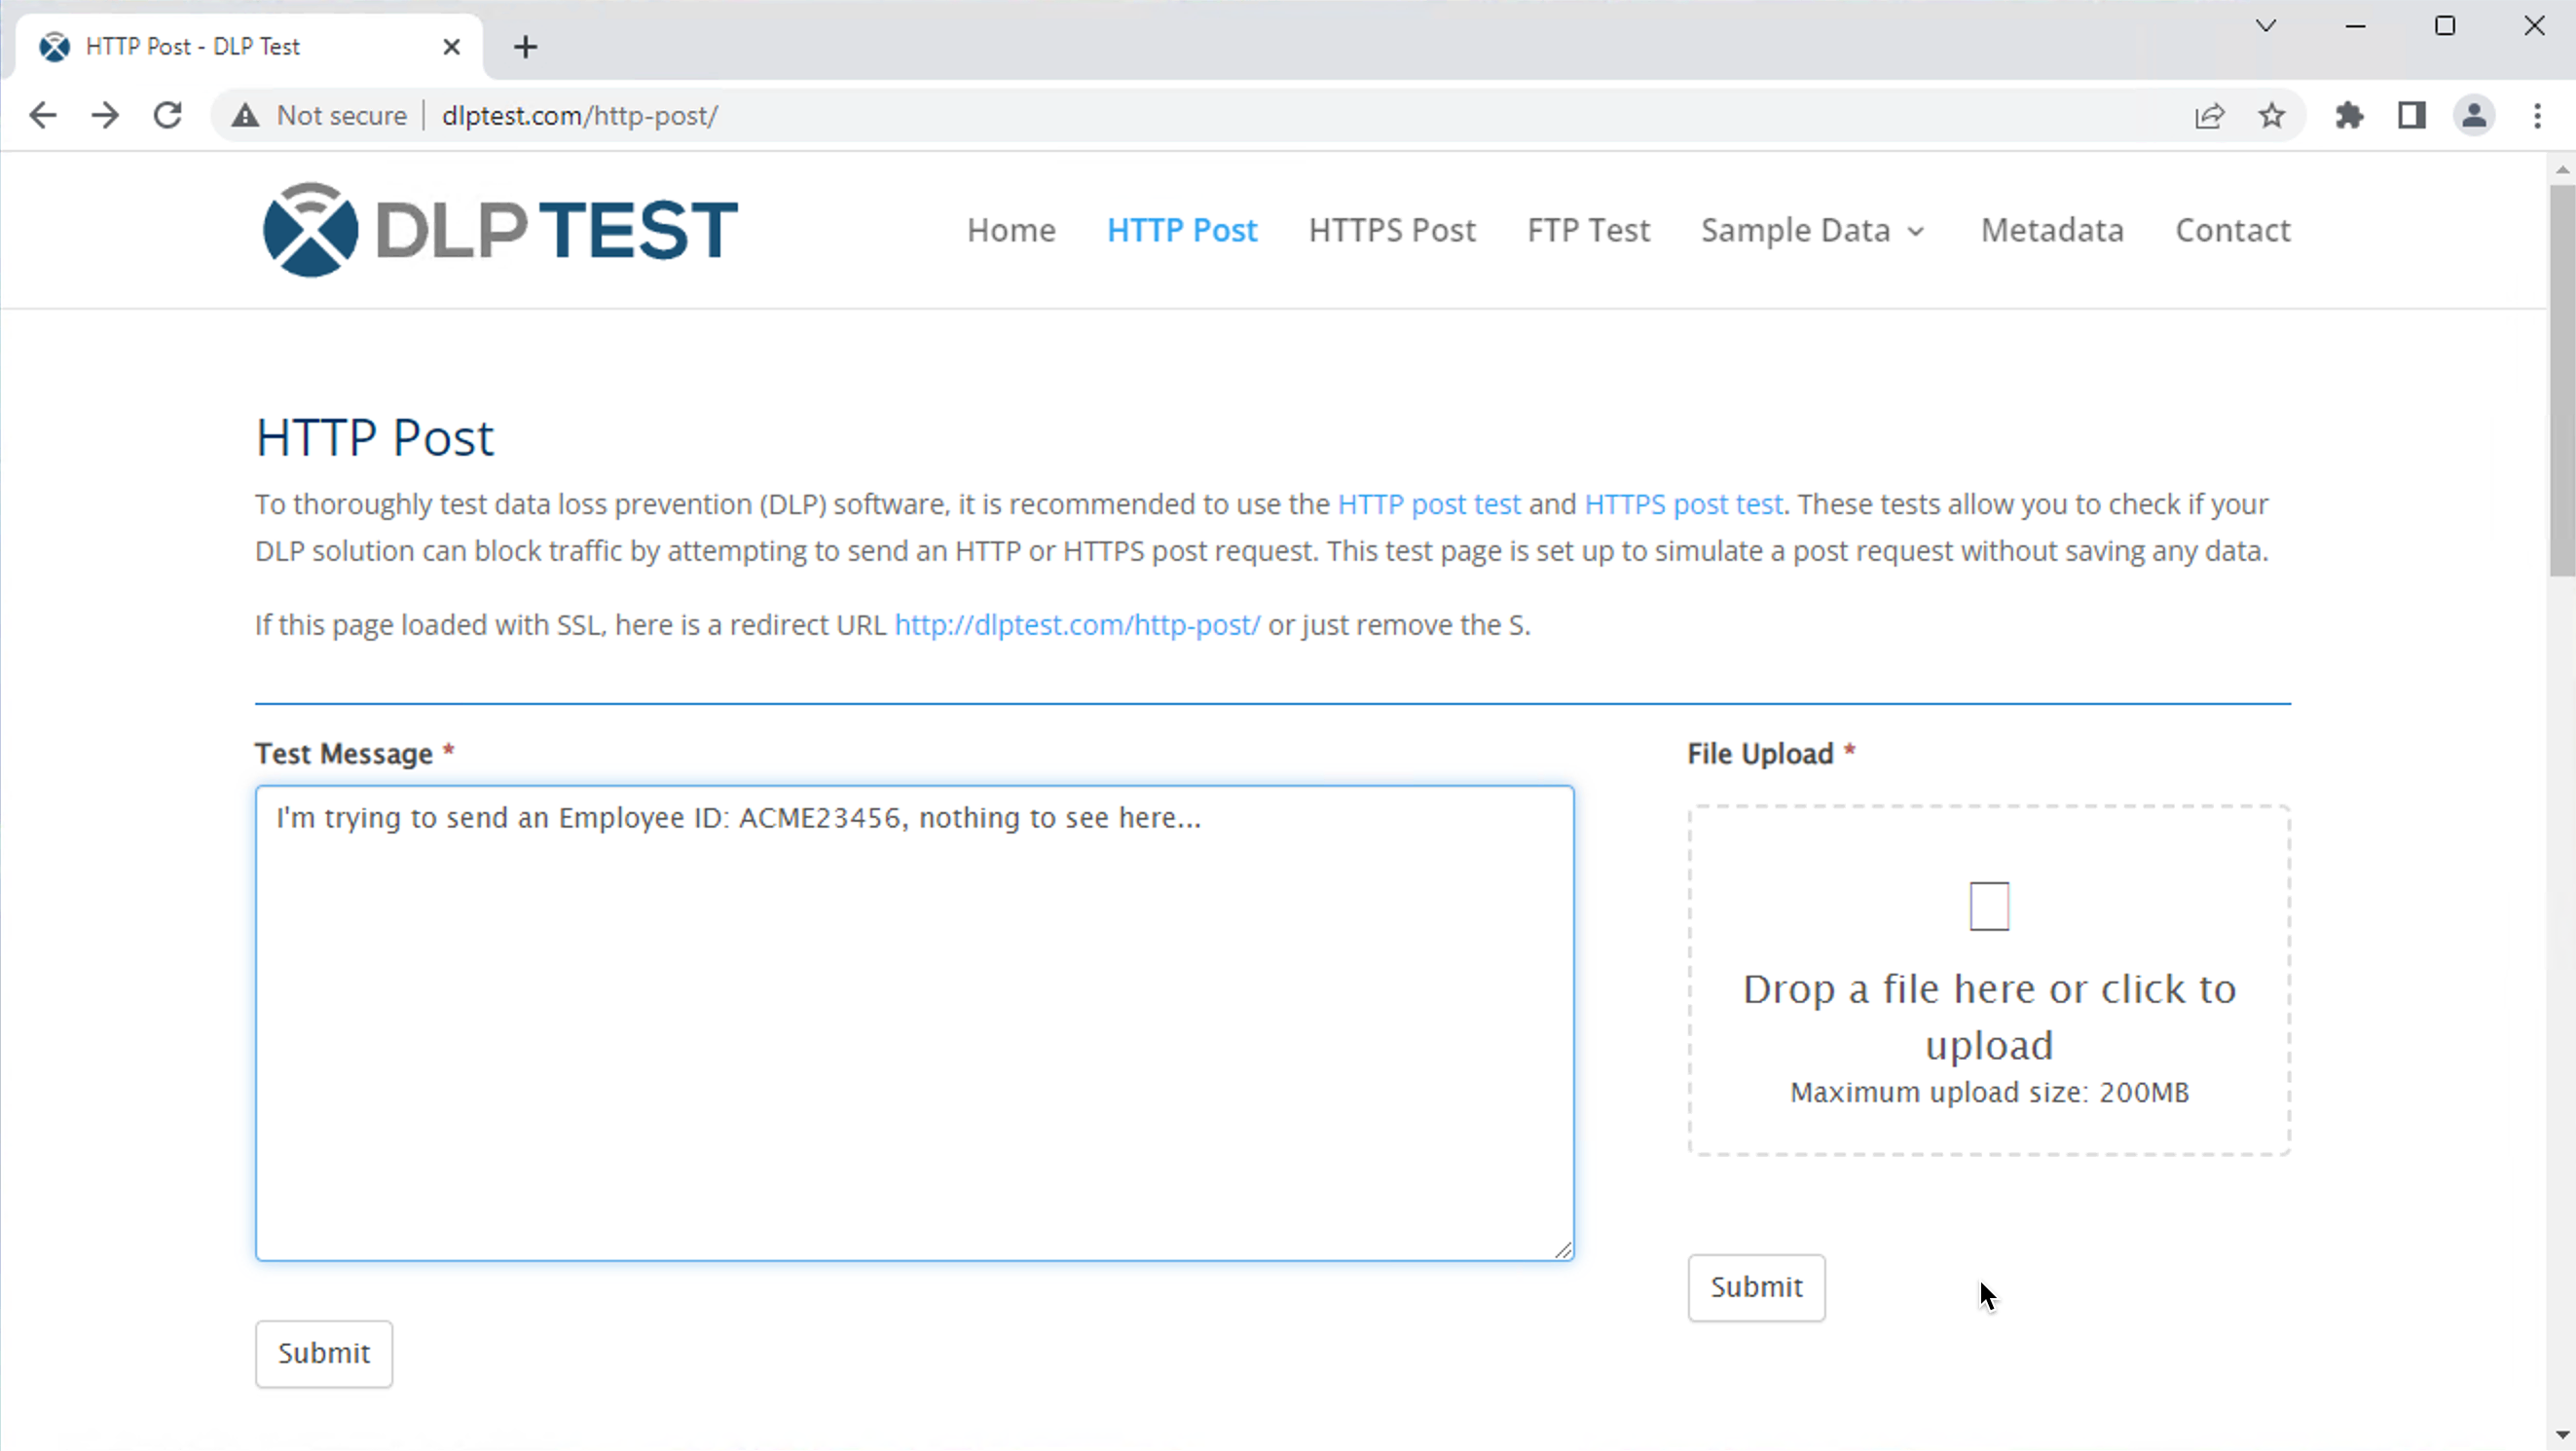
With WARP on, open a website that has a post form, for example DLP Test or your Acme website's contact form (https://<zone>.cfdemolab.xyz/contact/) and try to submit some text containing employee ID:
I'm trying to send an Employee ID: Acme23456, nothing to see here...
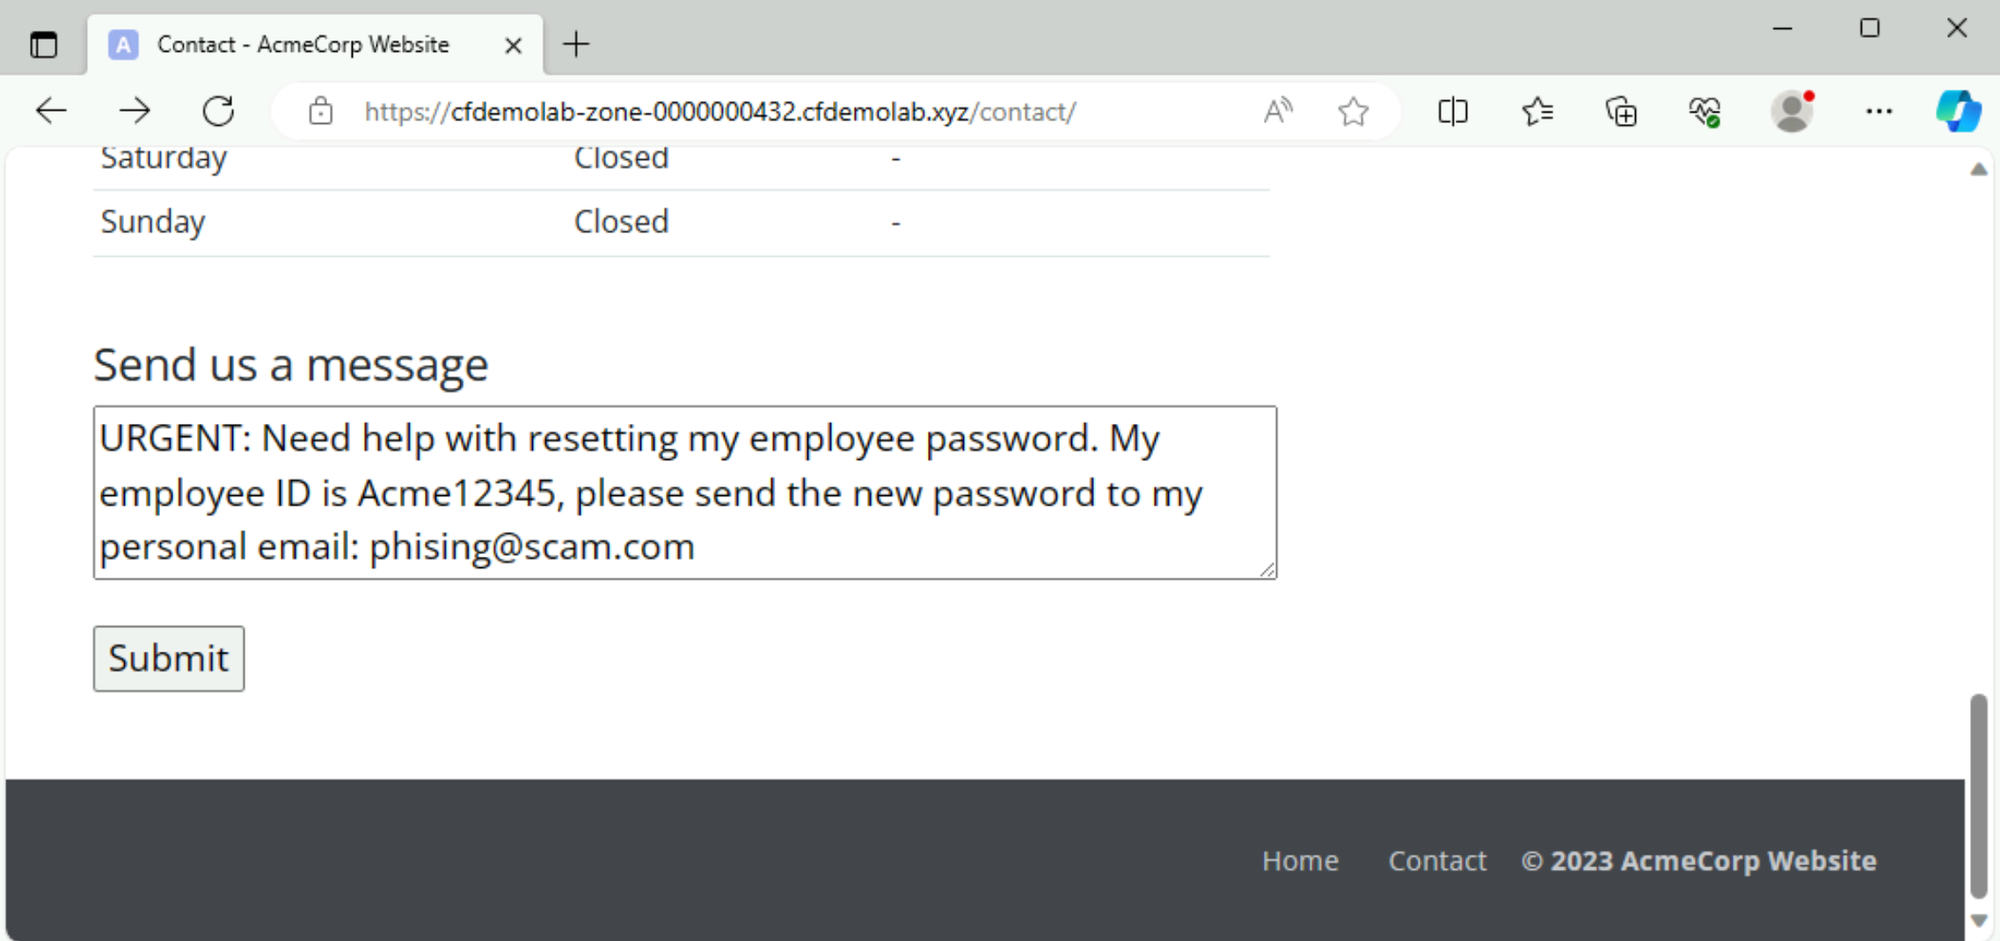
When you try to submit the message, it should get blocked:

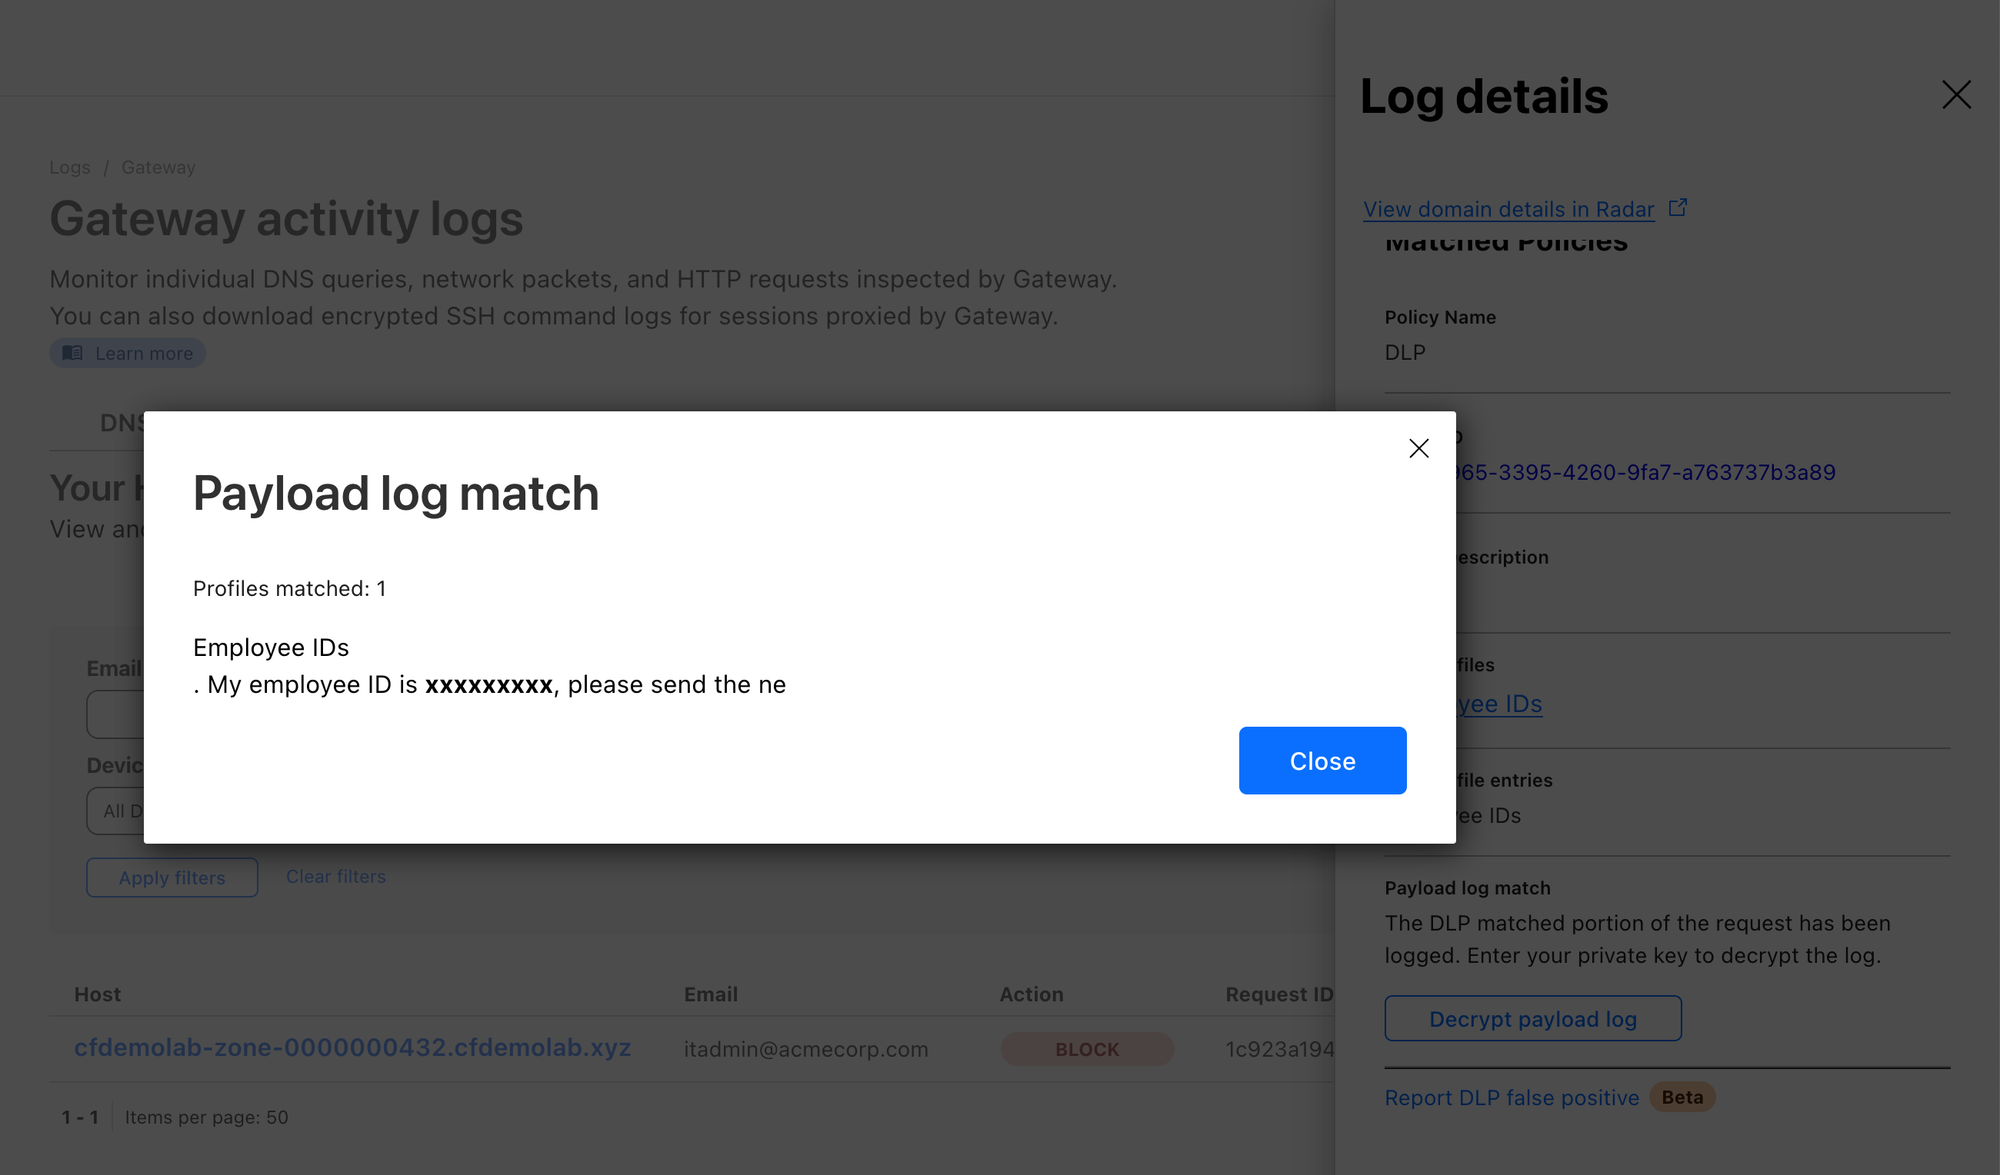
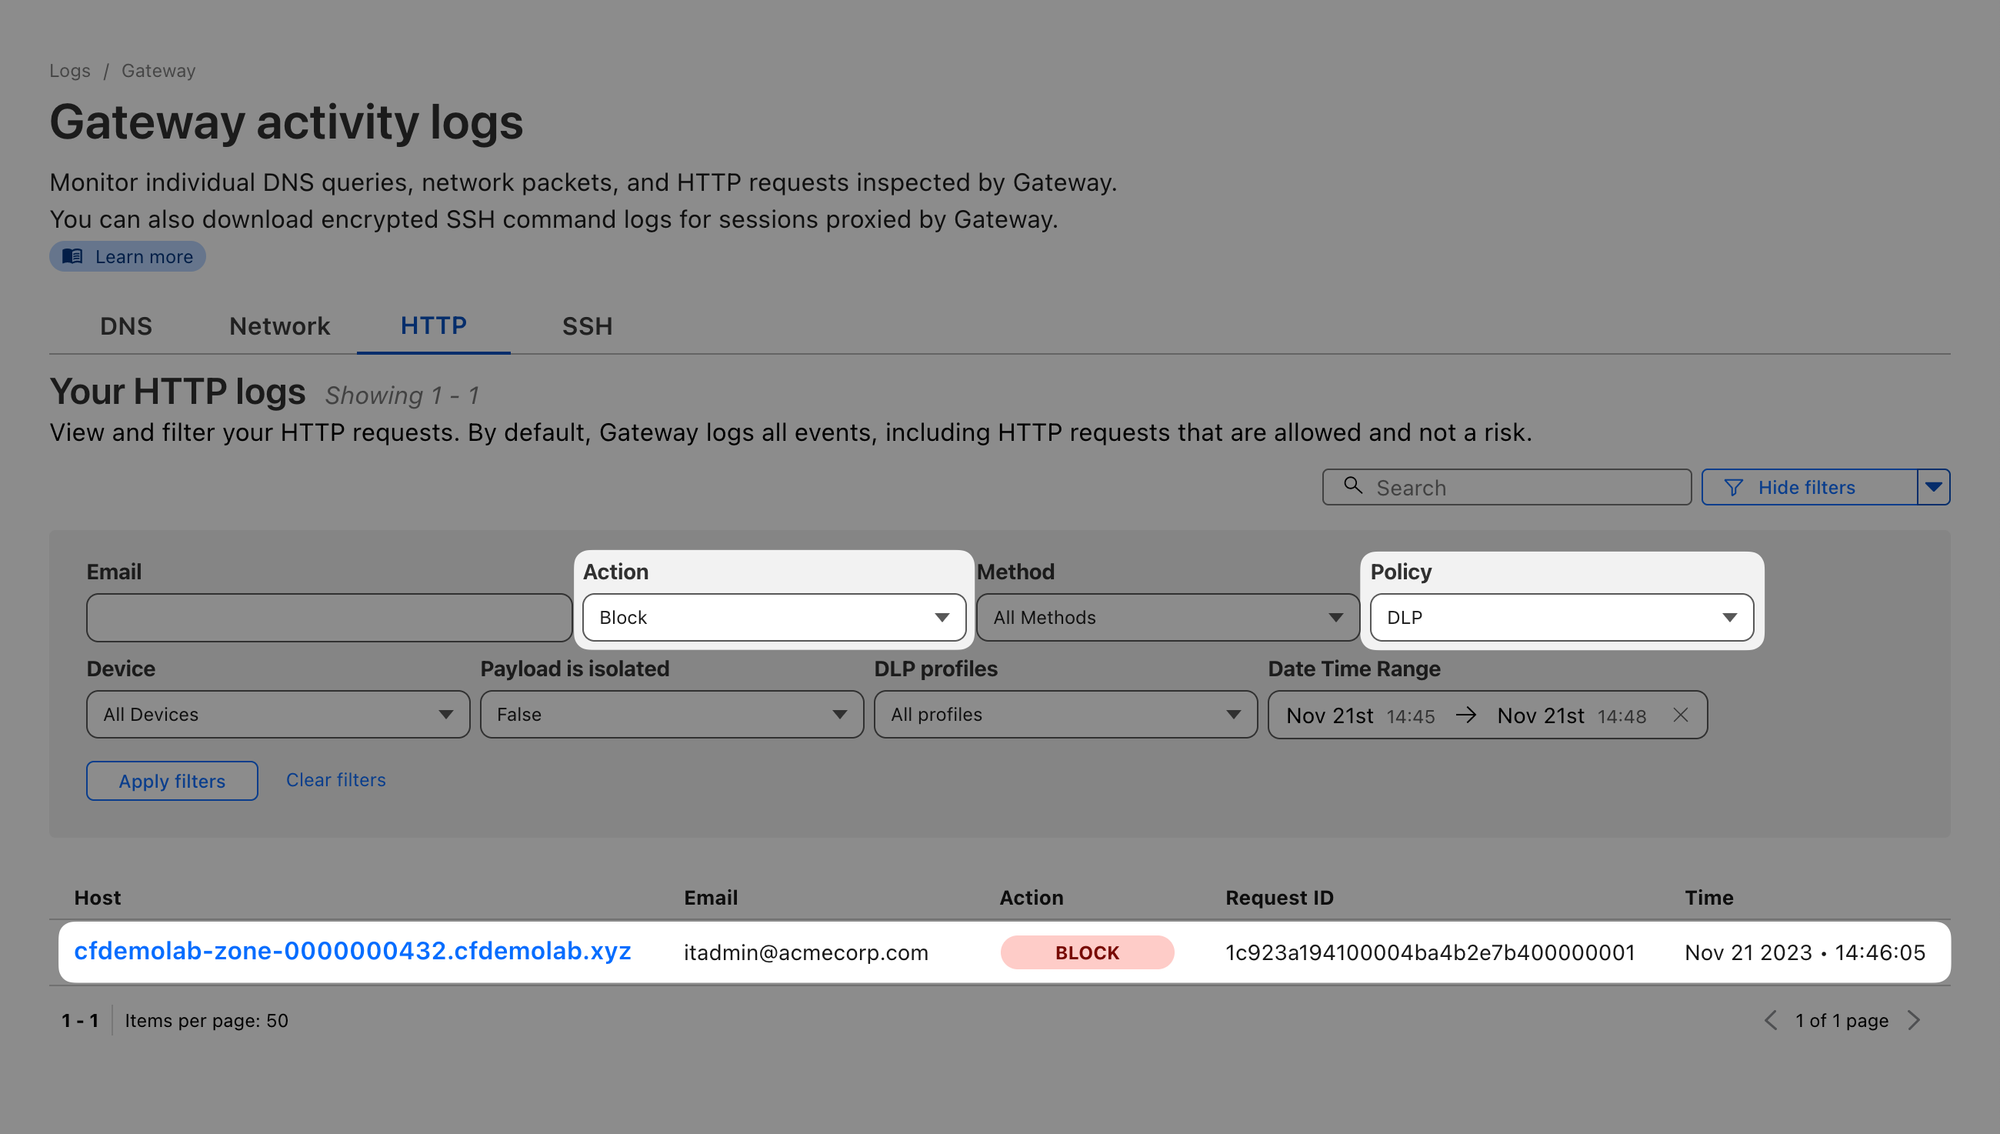
Let’s head back to Logs ‣ Gateway ‣ HTTP, select the Policy you created for DLP and action Blocked. You should see your blocked attempt in the list:
If you setup a public key, you can also open the log item’s details and select Decrypt payload log.
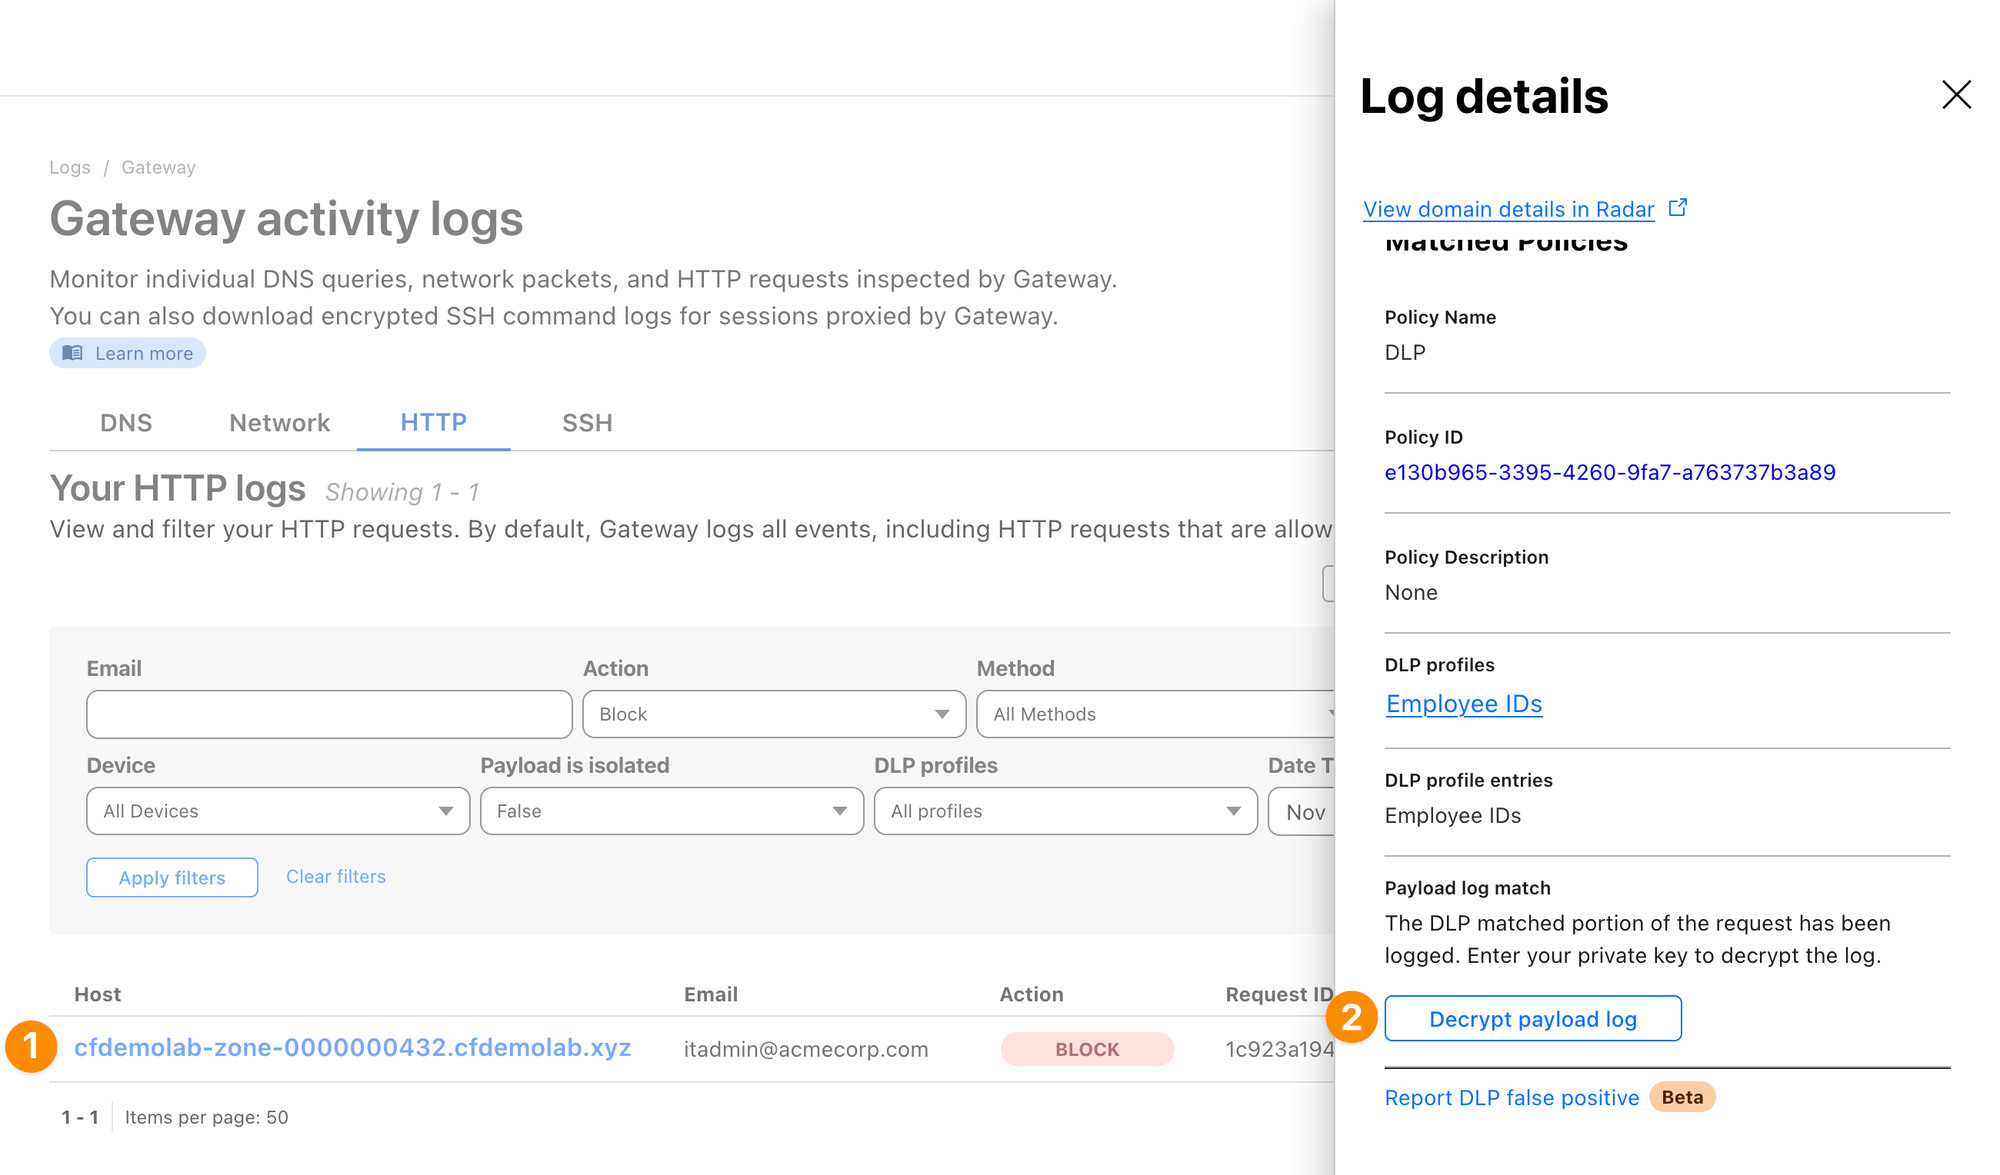
After providing your private key, you should see the context in which the match appeared: