Tunnel replicas
Cloudflare Tunnel also allows users to deploy additional instances of our connector, cloudflared, for availability and failover scenarios.
We refer to these unique instances as replicas.
Each replica establishes four new connections which serve as additional points of ingress to your origin, should you need them. Each of the replicas will point to the same tunnel; this ensures that your network remains up in the event a single host running cloudflared goes down.
In this lab, we are going to create a replica of our cloudflared from Origin A on Origin B, for a high-availability setup. The final architecture will look like this:

cloudflared, and then load balancers with a pool of origin servers sitting behind them.Task
Deploy two replicas of cloudflared, one on each origin server.
Why
- To provide additional points of availability for a single tunnel
- To allocate failover nodes within your network
- To update the configuration of a tunnel without downtime
Steps
1. Copy configuration to Origin B
In order to launch a replica of cloudflared from Origin A on Origin B, we need to copy its cloudflared configuration to Origin B.
What this means is that we need to copy the content of the ~/.cloudflared folder from Origin A to Origin B. The simplest way to do that would be just to use SCP, however, in our lab environment you aren't allowed to directly SSH between the origins, so that won't work.
Let's first see what we're dealing with:
Ctrl+C to stop your tunnel if it is still running.ls ~/.cloudflared/cert.pem
config.yaml
xxxxxxxx-xxxx-xxxx-xxxx-xxxxxxxxxxxx.jsonOrigin A
You could just copy these 3 files through clipboard, but we want to challenge you a bit. Can you use knowledge from the previous lab where you made web server running on Origin A accessible through a public hostname, and do the same for SSH, so we can use SCP after all?
Give it a try and feel free to have a look at our docs for inspiration. Proceed below when you're done of if you'd like an additional hint.
When you think you're ready, the SCP command to run on Origin B is:
scp -r -o ProxyCommand="cloudflared access ssh --hostname %h" ssh.<your_lab_zone>.cfdemolab.xyz:.cloudflared ~cloudflared access ssh ProxyCommand proxies that traffic through Cloudflare's Edge.cloudflare and password is #Savetheinternet.Hints
To make Origin A accessible via SSH through a public hostname, you'll need 3 things:
- Create a new hostname via the
cloudflared tunnel route dnscommand, something likessh.<your_lab_zone>.cfdemolab.xyz - Update your
~/.cloudflared/config.yamlconfiguration to include this new hostname, service should bessh://localhost:22 - Start your tunnel on Origin A
When you run the SCP command above on Origin B, your cloudflared config should be copied over:
scp -r -o ProxyCommand="cloudflared access ssh --hostname %h" ssh.cfdemolab-zone-XXXXXXXXXX.cfdemolab.xyz:.cloudflared ~The authenticity of host 'ssh.cfdemolab-zone-XXXXXXXXXX.cfdemolab.xyz' can't be established.
...
Are you sure you want to continue connecting (yes/no/[fingerprint])? yes
Warning: Permanently added 'ssh.cfdemolab-zone-XXXXXXXXXX.cfdemolab.xyz' (ED25519) to the list
of known hosts.
cloudflare's password:
xxxxxxxx-xxxx-xxxx-xxxx-xxxxxxxxxxxx.json 100% 11.7KB/s
cert.pem 100% 454.9KB/s
config.yaml 100% 51.0KB/sOrigin B
2. Start the replicas
Start cloudflared on both origin servers:
& will run the command in the background, so we can still use the console.cloudflared tunnel run test-tunnel &Origin A
cloudflared tunnel run test-tunnel &Origin B
To confirm your setup is working, run the following on either origin:
cloudflared tunnel info test-tunnelNAME: test-tunnel
ID: xxxxxxxx-xxxx-xxxx-xxxx-xxxxxxxxxxxx
CREATED: 2024-07-03 11:02:17.536959 +0000 UTC
CONNECTOR ID CREATED ARCHITECTURE VERSION ORIGIN IP EDGE
ea0c0333-8846-4933-9d08-072ed2b1e672 2024-07-04T09:22:38Z linux_amd64 2024.6.1 40.65.178.175 1xsin06, 1xsin07, 1xsin08, 1xsin11
6f92539e-5617-4096-b975-9f1636c4bbea 2024-07-04T09:26:52Z linux_amd64 2024.6.1 40.65.178.175 2xsin09, 1xsin13, 1xsin14 This will output your tunnel UUID as well as two Connector IDs, one for each cloudflared process running on each origin.
With this command, you can also see that your tunnel is now being served by eight connections - four on Origin A and four on Origin B.
Similarly, you can inspect your replicas from the dashboard:
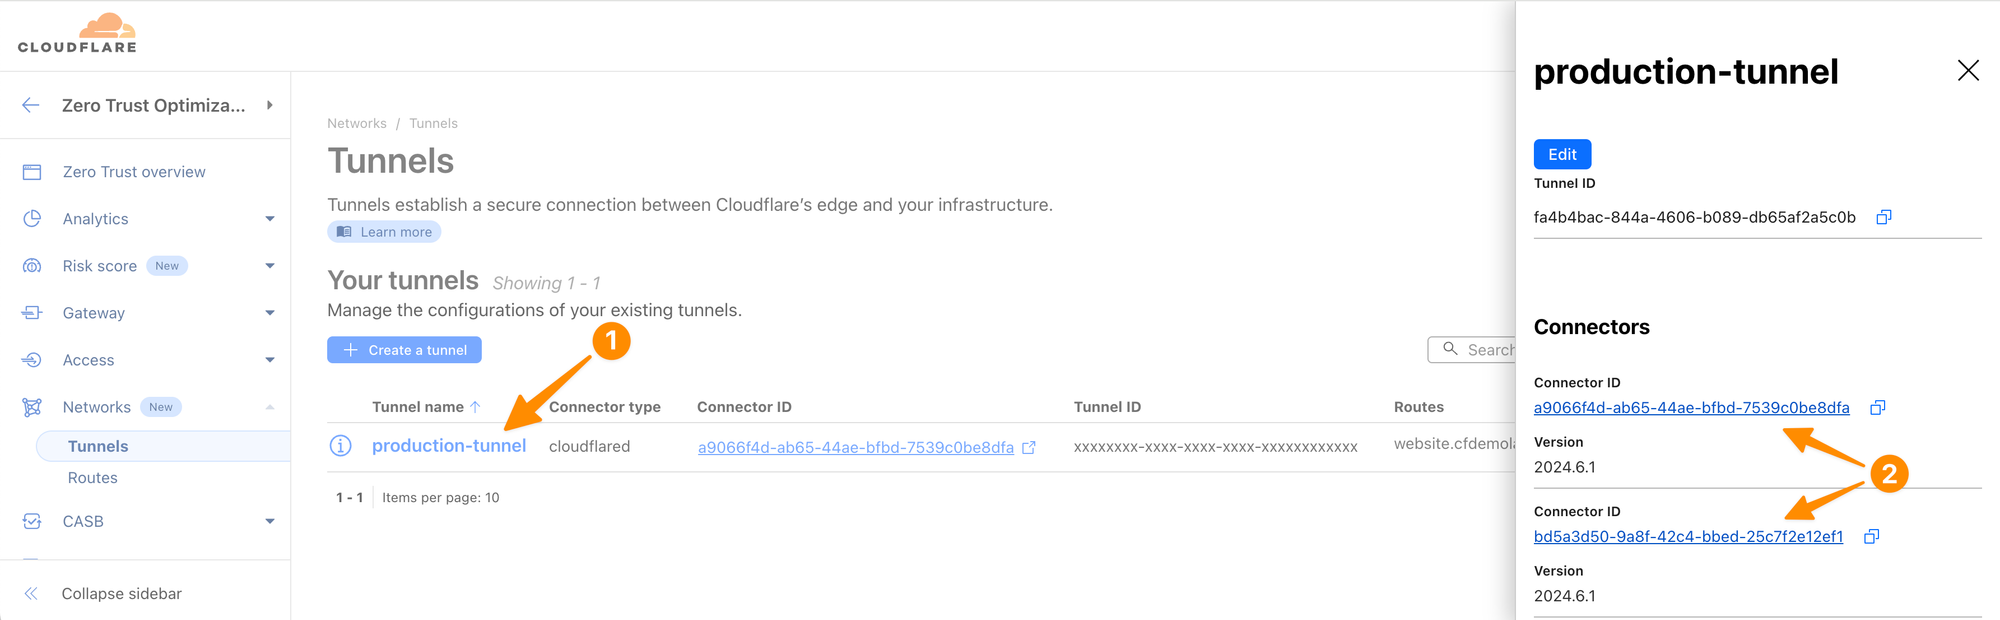
Open both Connector IDs in separate browser tabs.
Then click on Begin log stream in both tabs and visit your website at https://website.cfdemolab-zone-XXXXXXXXXX.cfdemolab.xyz from a third tab. You should see one of the replicas handling your request.
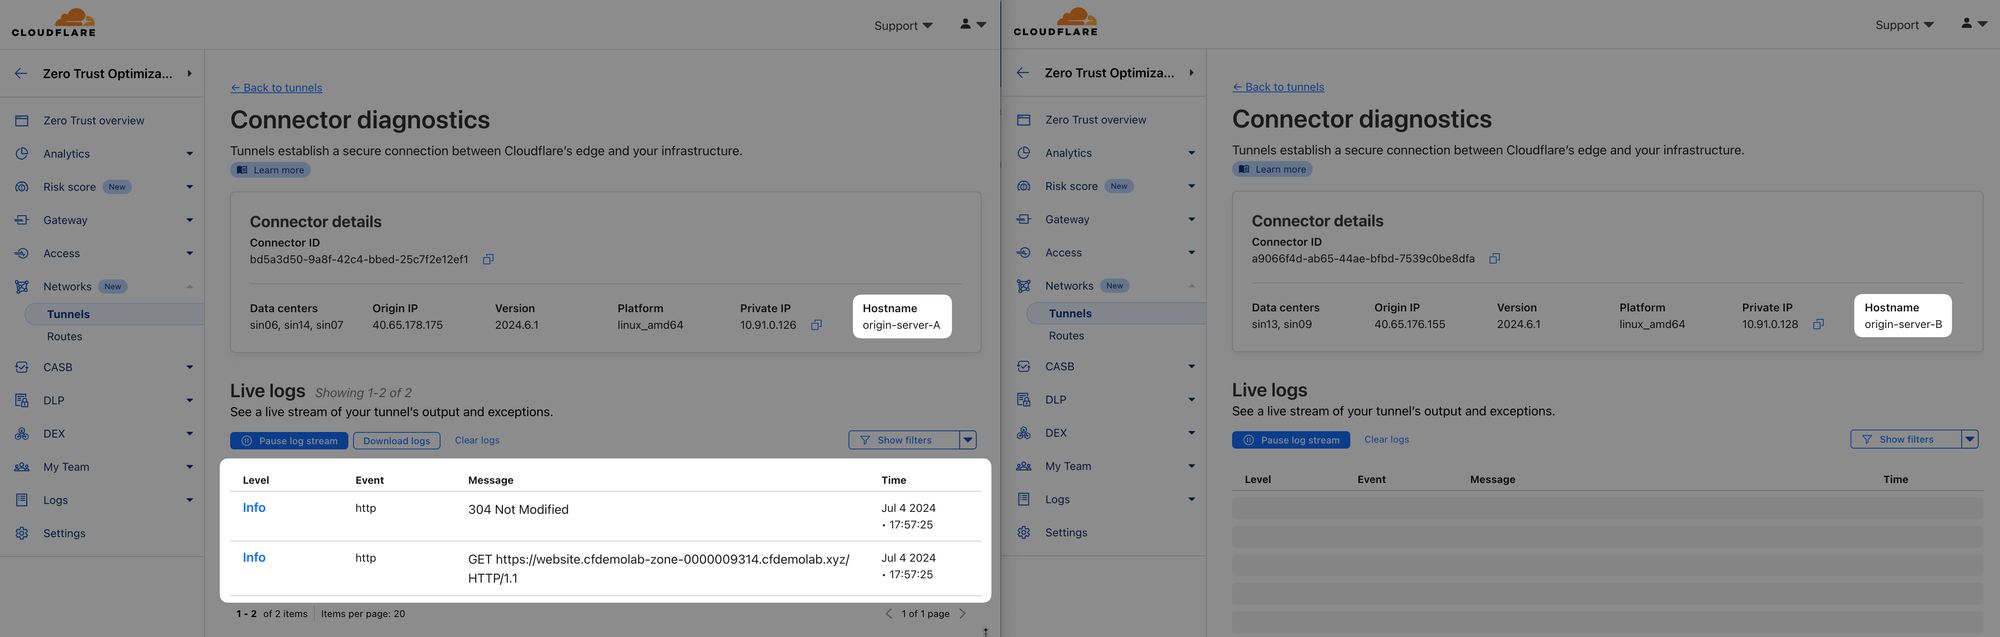
Try reloading the page multiple times, how is the traffic distributed between the replicas? Is it load-balanced or active-backup?
To stop cloudflared process on both origins, run:
killall cloudflaredOrigin A & B
3. Run cloudflared as System Service
So far, you have been running the tunnel as a non-privileged user. That is fine for testing, but generally we recommend running cloudflared as a service.
You can install cloudflared as a system service on Linux and Windows, and as a launch agent on macOS.
Let's do this as an exercise on Origin B. To install the service, let's first create a directory for its configuration:
sudo mkdir /etc/cloudflared/Origin B
And copy your tested configuration to it:
sudo cp /home/cloudflare/.cloudflared/* /etc/cloudflared/Origin B
Now install the cloudflared service, this will automatically start it as well:
sudo cloudflared service installOrigin B
To check its status, issue:
sudo systemctl status cloudflared● cloudflared.service - cloudflared
Loaded: loaded (/etc/systemd/system/cloudflared.service; enabled; vendor preset: enabled)
Active: active (running)
Main PID: 73625 (cloudflared)
Tasks: 8 (limit: 1051)
Memory: 19.9M
CPU: 262ms
...Origin B
Your cloudflared tunnel is now running and handling traffic.
If you add IP routes or otherwise change the configuration, you can restart the service to load the new configuration:
sudo systemctl restart cloudflared(optional) Origin B
For now, stop it again as in the next lab we will return to running it manually:
sudo systemctl stop cloudflaredOrigin B
And delete the config:
sudo rm -r /etc/cloudflared/Origin B
If you’re completing this lab virtually, run the following command to get the completion token:
curl "https://lab.cfiq.io/zt/v1/seed" -H "X-Get-Token: 3hvAlfoWNPwgYhkRNFbC"If successful, the output should look like this:
curl "https://lab.cfiq.io/zt/v1/seed" -H "X-Get-Token: 3hvAlfoWNPwgYhkRNFbC"⚙️ nocopy ⚙️
Enter this token in the 401 Zero Trust e-learning course:
🟨completion-token-will-be-hereLab section complete. Return back to the Zero Trust 401 e-learning course and continue there.