API Token Generation
Cloudflare is an API First platform. So, everything you can do in the dashboard, you can do via the API. During the labs, there will be examples of how to perform actions via the API as well as the dashboard.
There are two ways to authenticate to the API:
1) Global API key - Allows access to everything relative to the role the user is assigned, but is not recommended due to overly broad scope
2) API Tokens - Allows scoping of a token to specific permissions, with optional IP address locking and enforced expiry dates. This is best practice, and is the method we will leverage here.
To create your token, first navigate to My Profile (icon at top right) ‣ API Tokens ‣ Create Token
- Create a Custom Token (bottom option) with the following settings:
- Name: Labs-API-Token
- Permissions:
- Zone - SSL and Certificates - Edit
- Zone Resources:
- Include ‣ Specific Zone ‣ Select your Lab Zone
- Client IP Address Filtering: Leave empty
- TTL: Set the start day as today, and the end date 1 week from now
Your token should look like this:
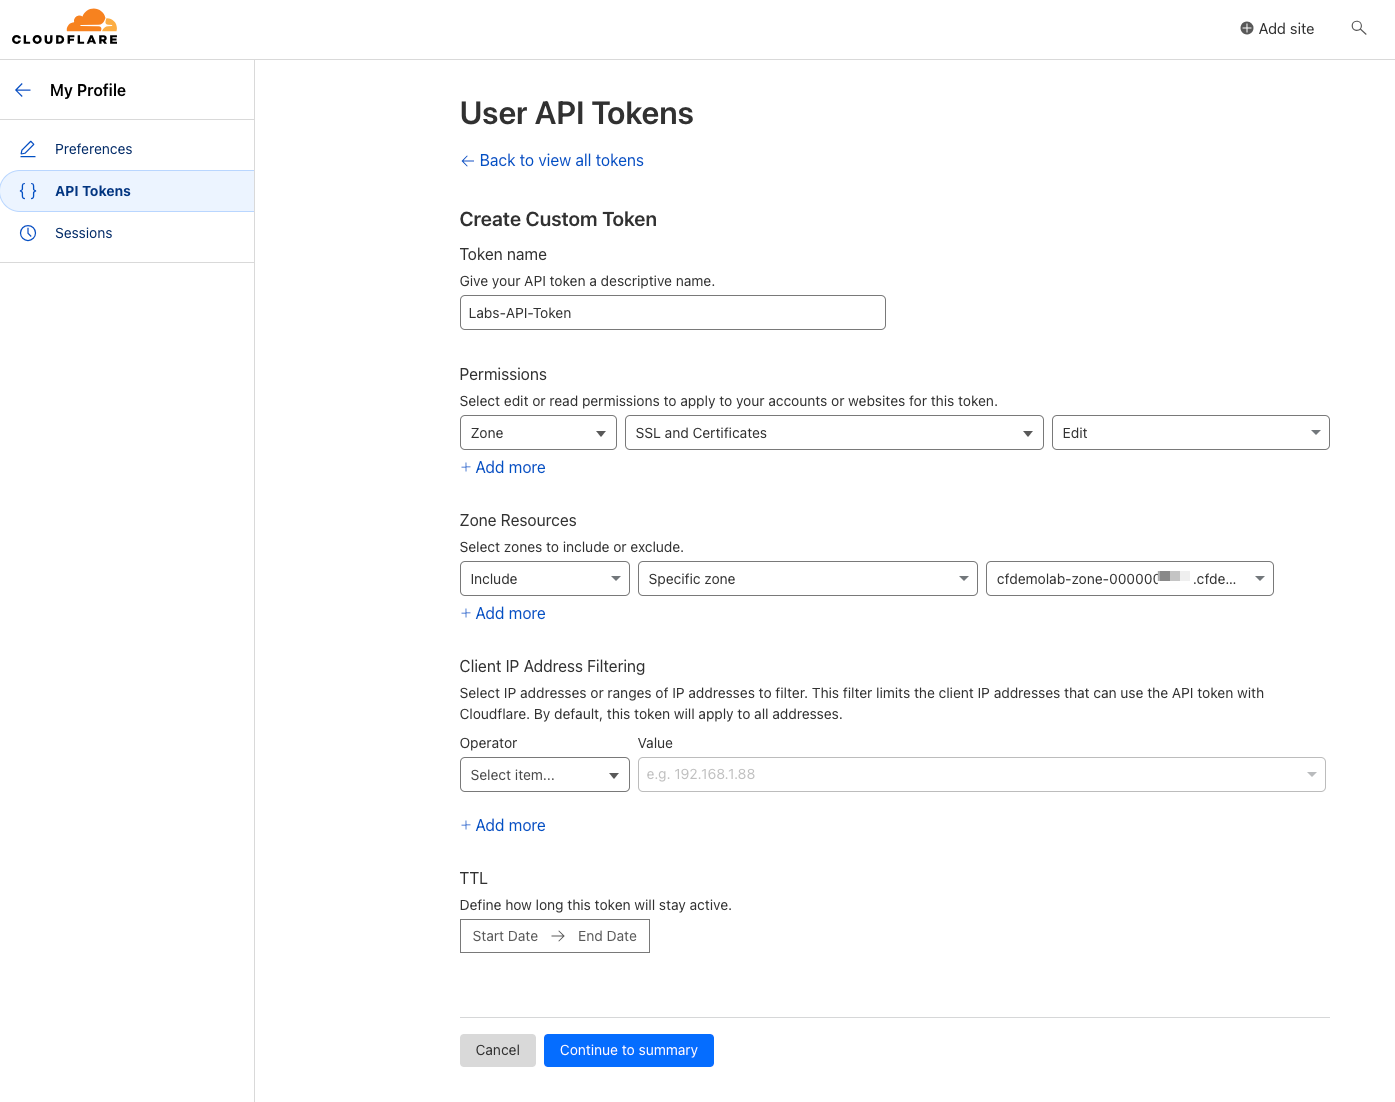
Click Continue to Summary, review the settings and then click Create Token
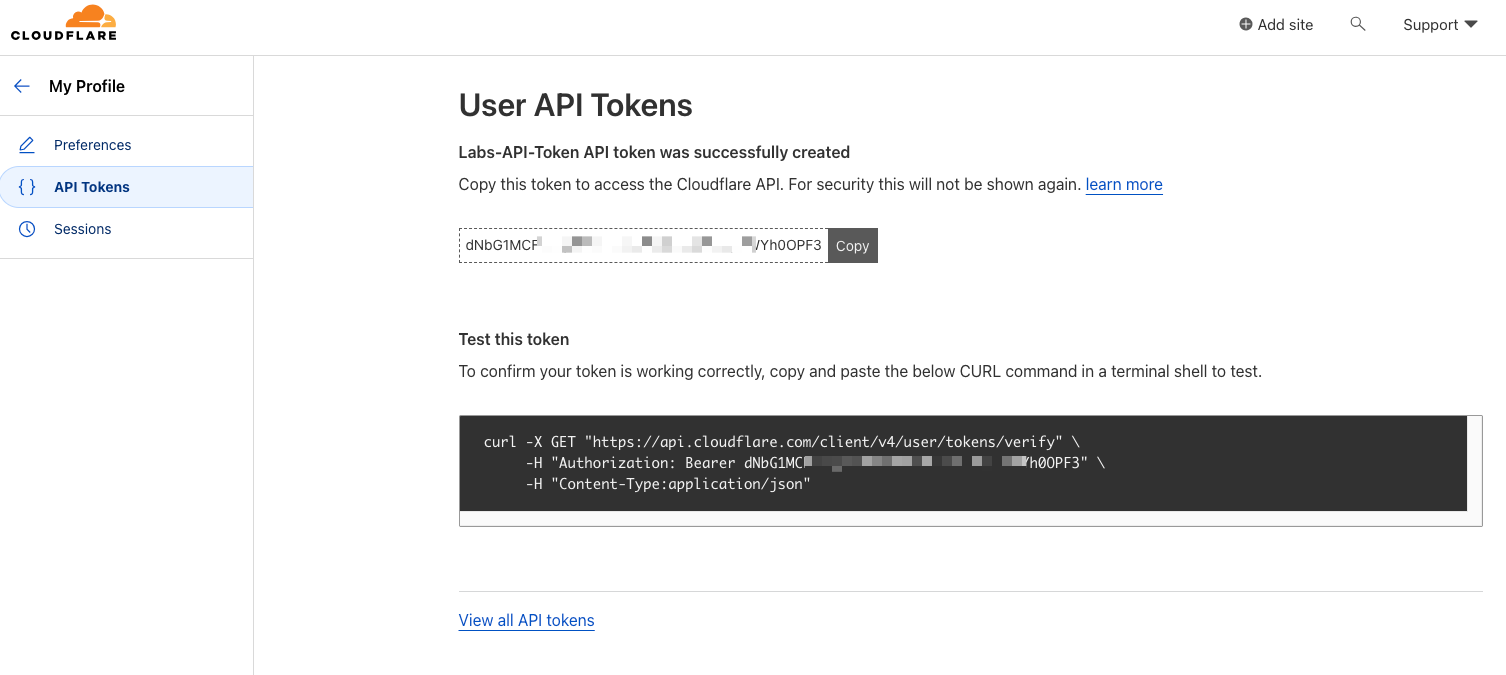
Make note of your token (note, this will only be shown once, so if you miss this step or lose your token, repeat the above to create a new one) and follow the exercise to verify it's working.
For further information on API Token Generation, see:
https://developers.cloudflare.com/fundamentals/api/get-started/create-token/
Congratulations! You have made an API token. Please proceed to the next task.