Advanced IdP
Task
Cryptographically sign all SAML requests from Cloudflare to the IdP.
Why
- Authenticity: Signature ensures the Service Provider's (SP) request is genuine, preventing impersonation attacks
- Mutual Trust: Establishes bidirectional trust between the SP and Identity Provider (IdP), enhancing overall security
- Data Integrity: Protects the SAML request from tampering during transmission, maintaining the integrity of authentication details
LAB_SLUG is the first segment of your Cloudflare Zero Trust Team domain.For Team domain
adjective-noun.cloudflareaccess.com, the LAB_SLUG is adjective-noun.Steps
In this lab, we'll add the highlighted "Signed SAML authentication requests" section below.

Signing the SAML requests coming from Cloudflare (SP) will give the IdP a cryptographic guarantee that the request comes from a trusted source.
Cloudflare will sign all SAML requests with your account's private key. If the IdP is to verify the signature is valid, it needs the corresponding public key certificate.
1. Retrieve your public key certificate
Your account's public key certificate can be obtained at the following URL (replace <LAB_SLUG> with your actual lab slug):
https://LAB_SLUG.cloudflareaccess.com/cdn-cgi/access/public-cert
You can navigate to that URL with a browser or use for example curl:
curl -s https://<LAB_SLUG>.cloudflareaccess.com/cdn-cgi/access/public-cert⚙️ nocopy ⚙️
# -----BEGIN CERTIFICATE-----
# MIIDUTCCAjmg ....Copy the public key certificate (including the BEGIN and END lines) to clipboard.
(optional) If you're curious about the content of the certificate, you can decode it with the following command:
curl -s https://<LAB_SLUG>.cloudflareaccess.com/cdn-cgi/access/public-cert | openssl x509 -text -nooutCertificate:
Data:
Version: 3 (0x2)
Serial Number:
39:c2:00:f0:f8:bd:03:6f:24:87:1c:12:e5:95:2d:91
Signature Algorithm: sha256WithRSAEncryption
Issuer: C=US, ST=Texas, L=Austin, O=Cloudflare, CN=cloudflareaccess.com
Validity
Not Before: Jun 25 11:21:39 2024 GMT
Not After : Jul 9 11:21:39 2025 GMT
Subject: C=US, ST=Texas, L=Austin, O=Cloudflare, CN=cloudflareaccess.com
Subject Public Key Info:
Public Key Algorithm: rsaEncryption
Public-Key: (2048 bit)
Modulus:
00:ab:f7:bb:27:5a:52:a7:02:12:ed:20:d1:8c:d2:
...2. Upload certificate to the IdP
Next, we need to upload your public certificate to the IdP so it can use it to verify the signature on the incoming SAML requests.
In your web browser, open the Lab SAML wizard:
https://lab.cfiq.io/registration/d669fe246bad551500469b17ff6a244a8dfae83a/saml
Scroll down to the Update SAML provider section and paste in your lab slug and certificate you obtained in step 1 above.
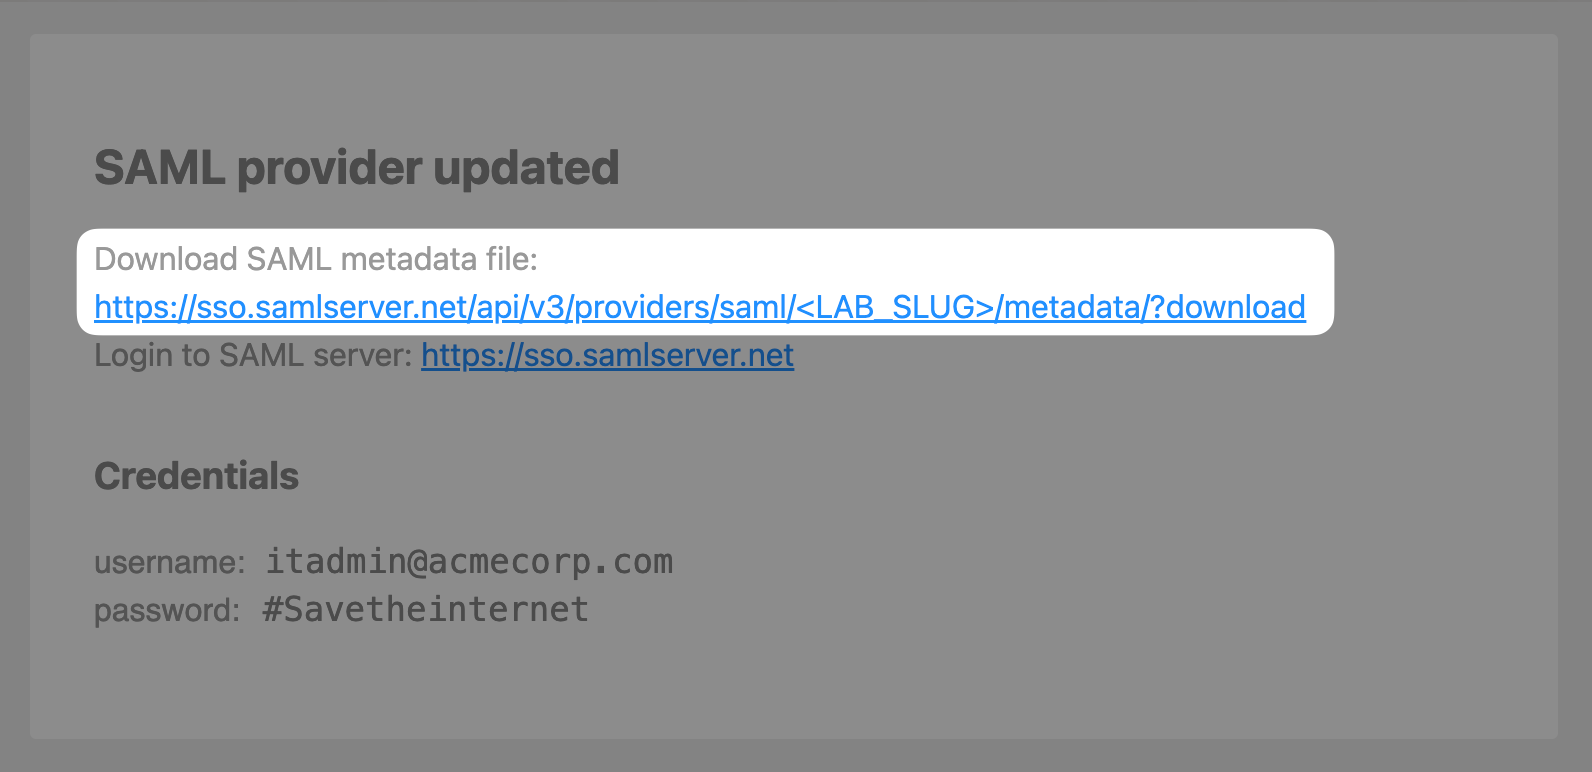
Click Update SAML Provider and on the next page, click on the https://sso.samlserver.net/api/v3/providers/saml/<LAB_SLUG>/metadata?download link to download the updated SAML metadata file.
3. Configure SAML attributes
Return to the SAML configuration in the Cloudflare Zero Trust dashboard by navigating to Settings ‣ Authentication. Click Edit on your SAML provider:

Upload your updated SAML metadata file, this will populate your certificate:
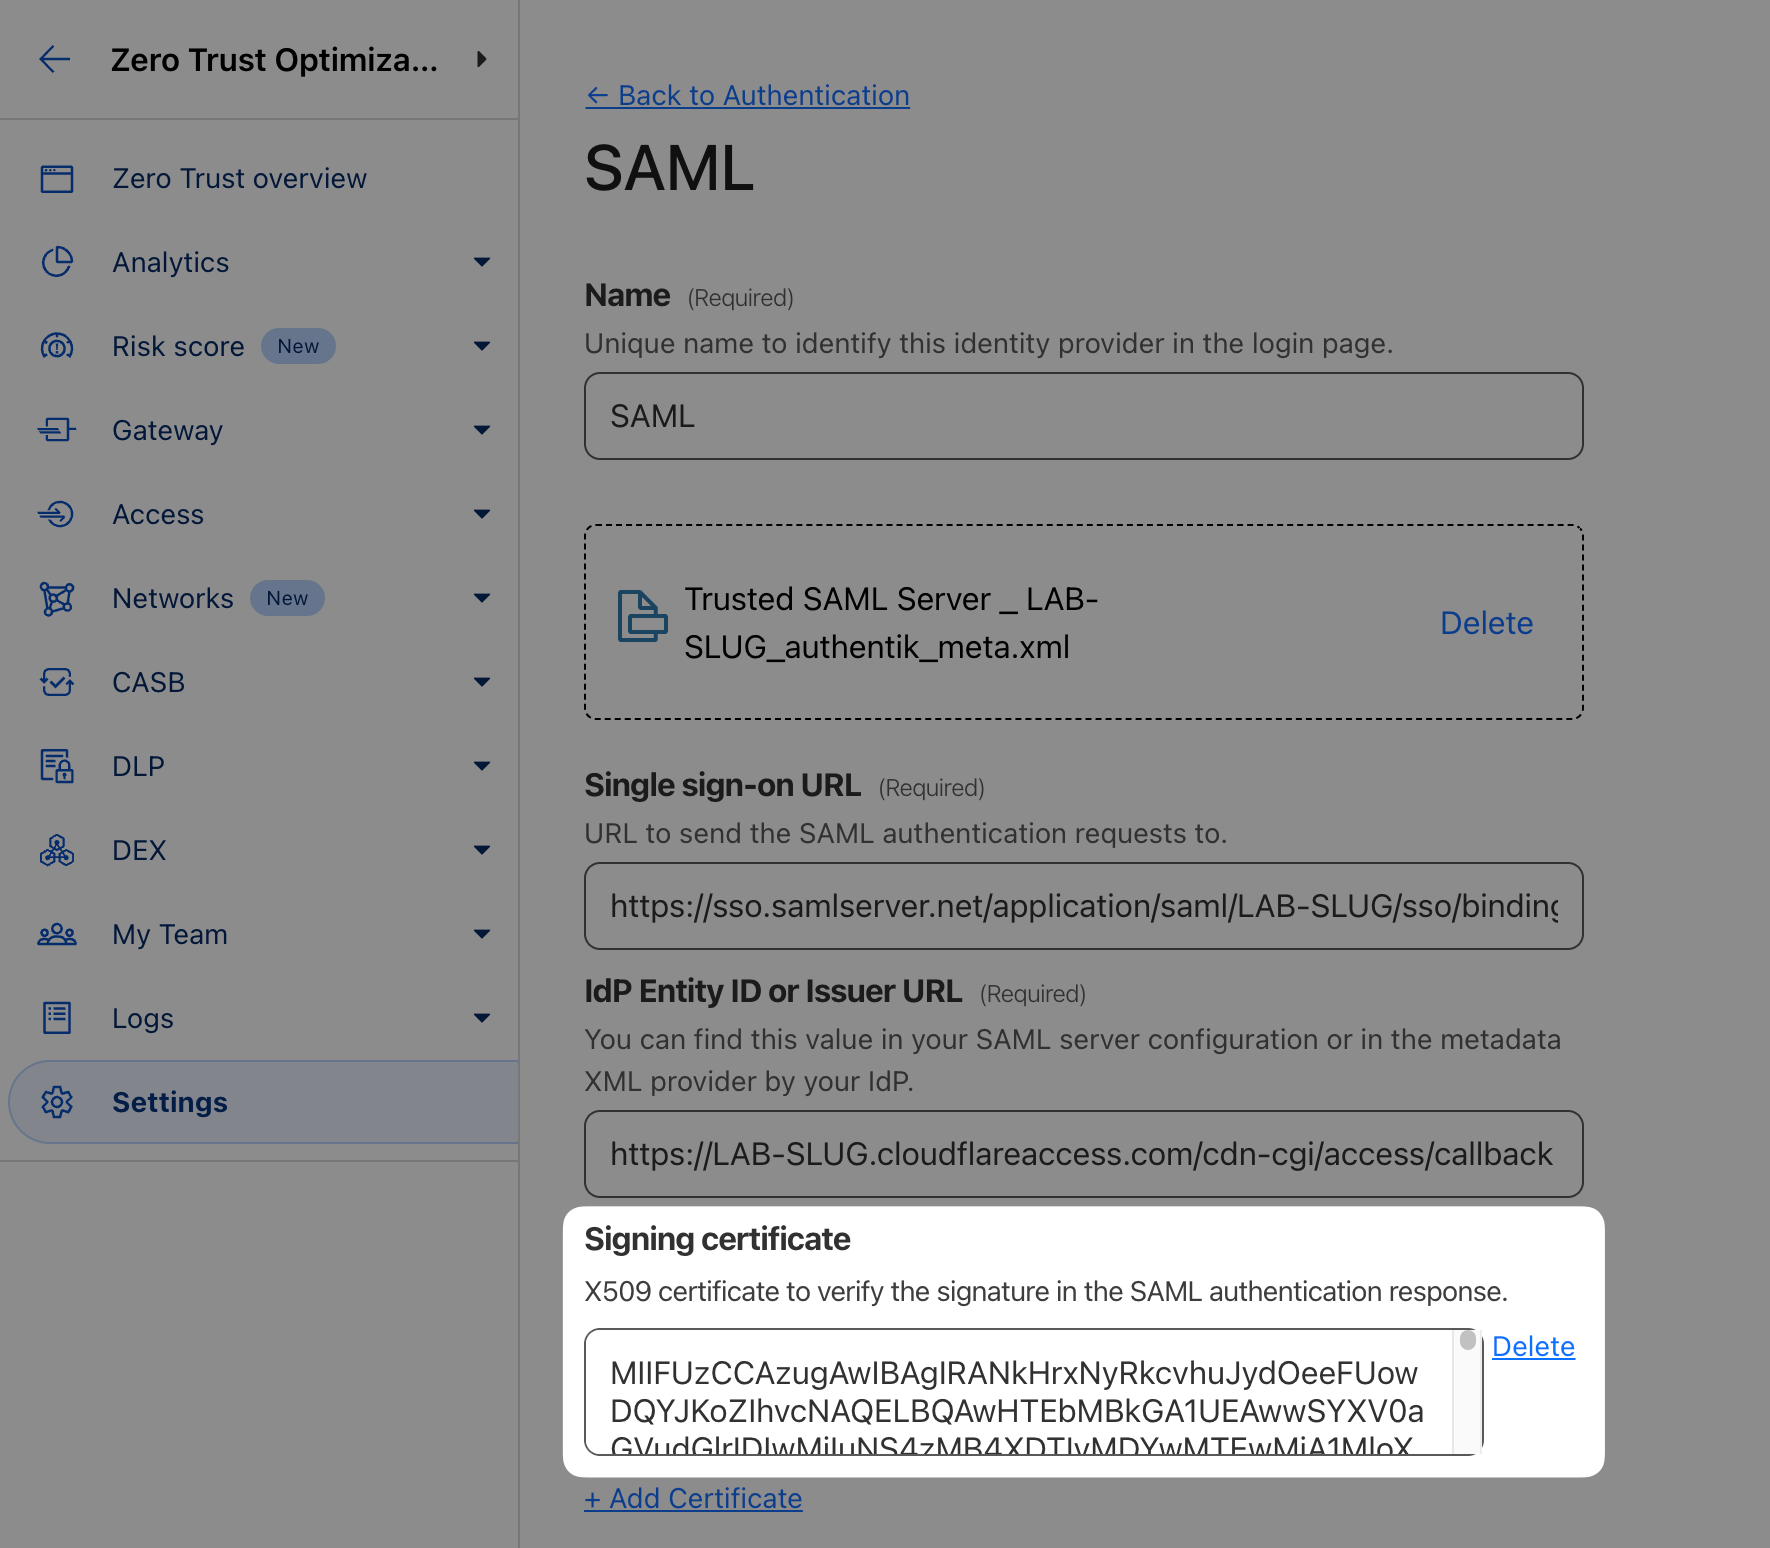
Then scroll to Optional configurations and make the following changes:
- Enable Sign SAML authentication request (see docs for more details)
- Double-check the Email attribute name is set to
email - Finally, add the following SAML attributes:
email,givenName,surName,User Group Email

Save and Test your SAML integration.
The response should include values for specified SAML attributes:
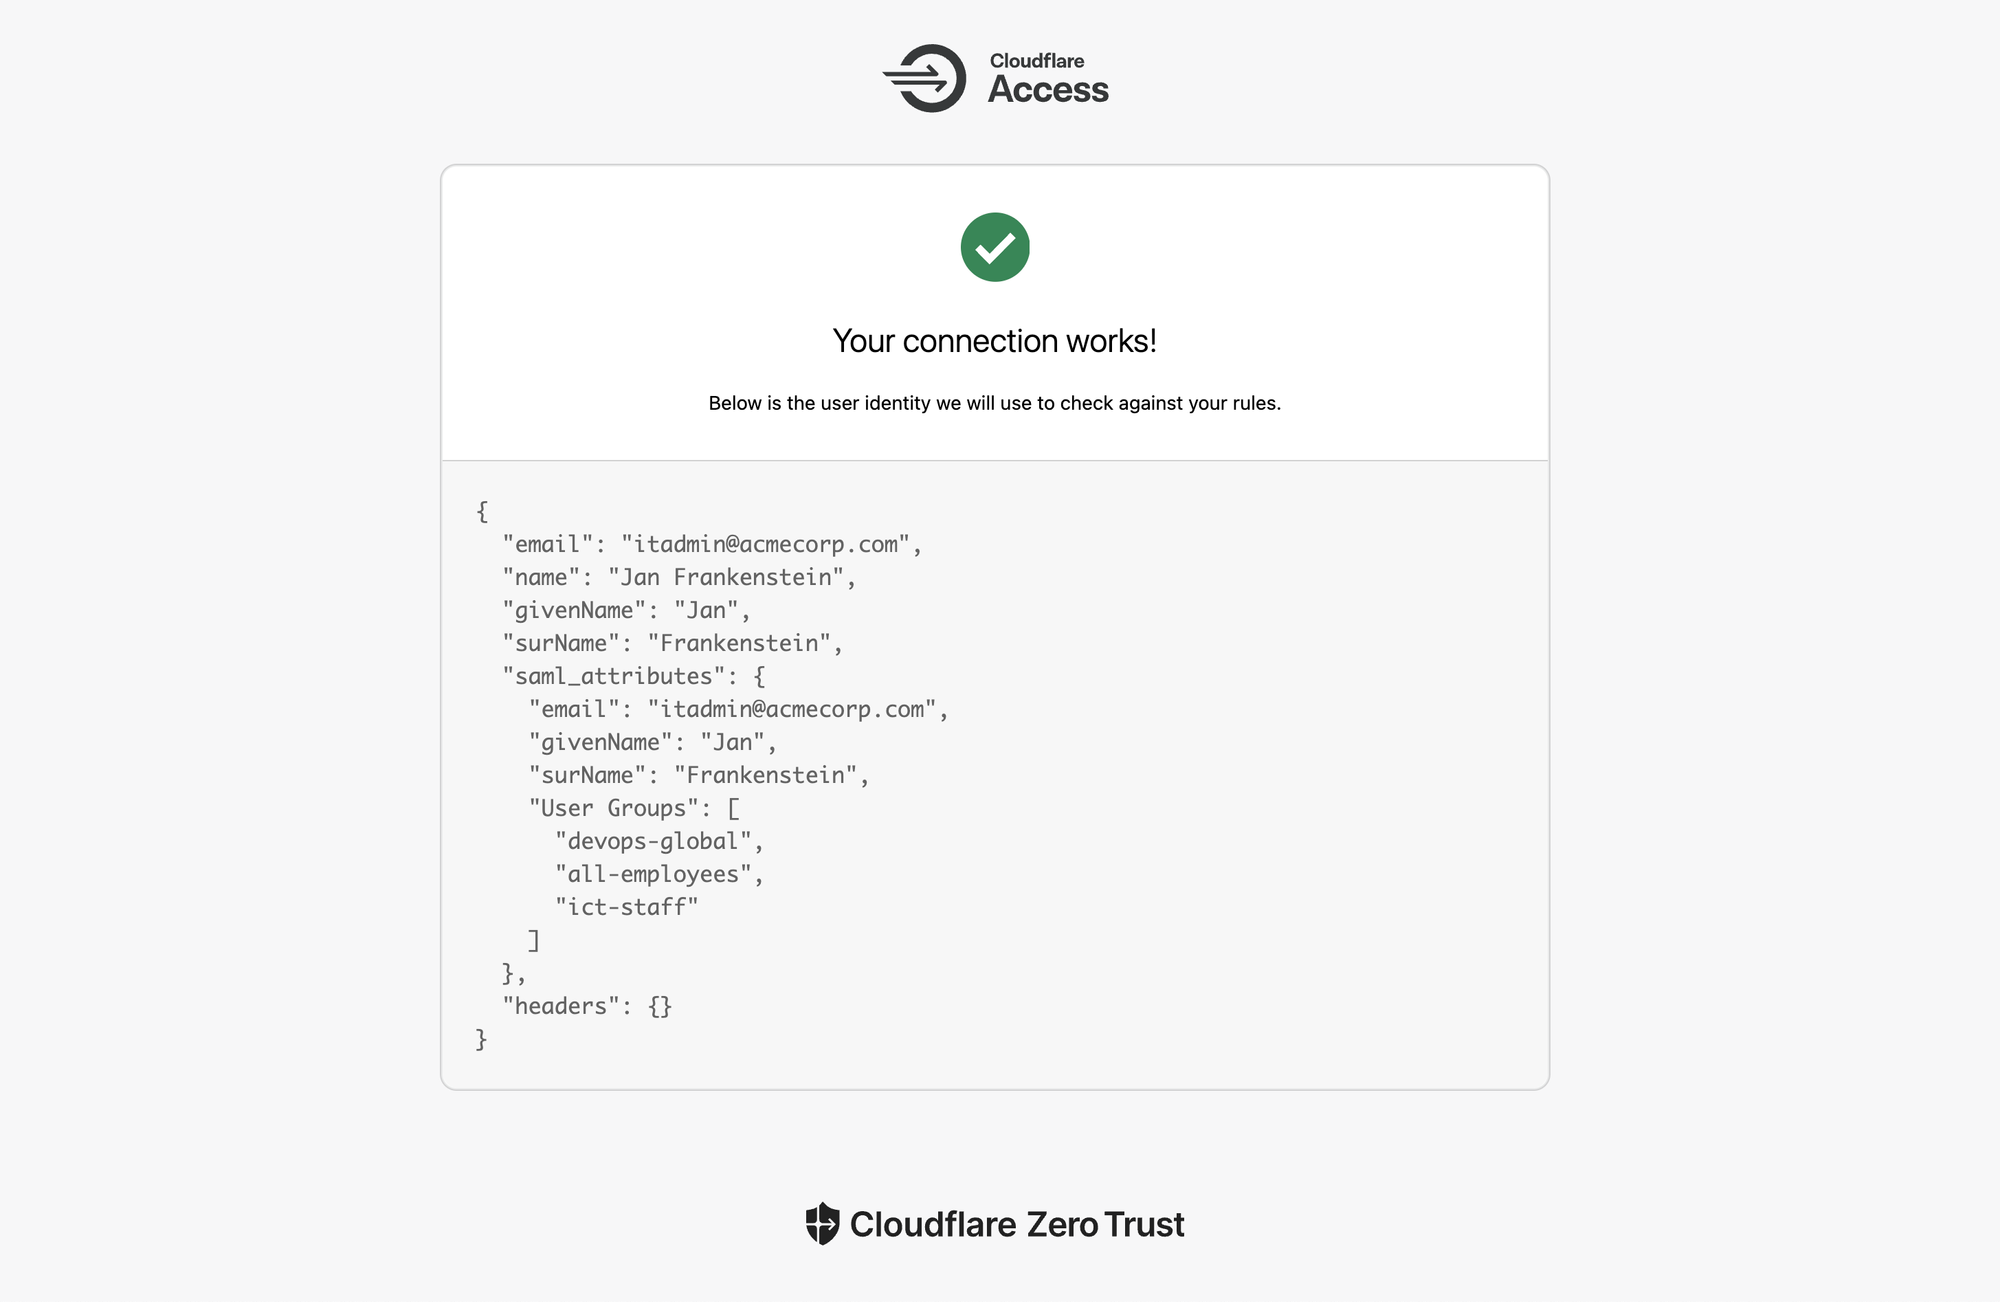
When your connection is confirmed working, you're done with this first lab!
If you’re completing this lab virtually, run the following command to get the completion token:
curl "https://lab.cfiq.io/zt/v1/seed" -H "X-Get-Token: tfz4hQnpG6eQuOP0c0Zr"If successful, the output should look like this:
curl "https://lab.cfiq.io/zt/v1/seed" -H "X-Get-Token: tfz4hQnpG6eQuOP0c0Zr"⚙️ nocopy ⚙️
Enter this token in the 401 Zero Trust e-learning course:
🟨completion-token-will-be-hereLab section complete. Return back to the Zero Trust 401 e-learning course and continue there.