Add DNS Records
Now that we have created and initialised our environment, along with adding an authentication token, lets deploy some configuration!
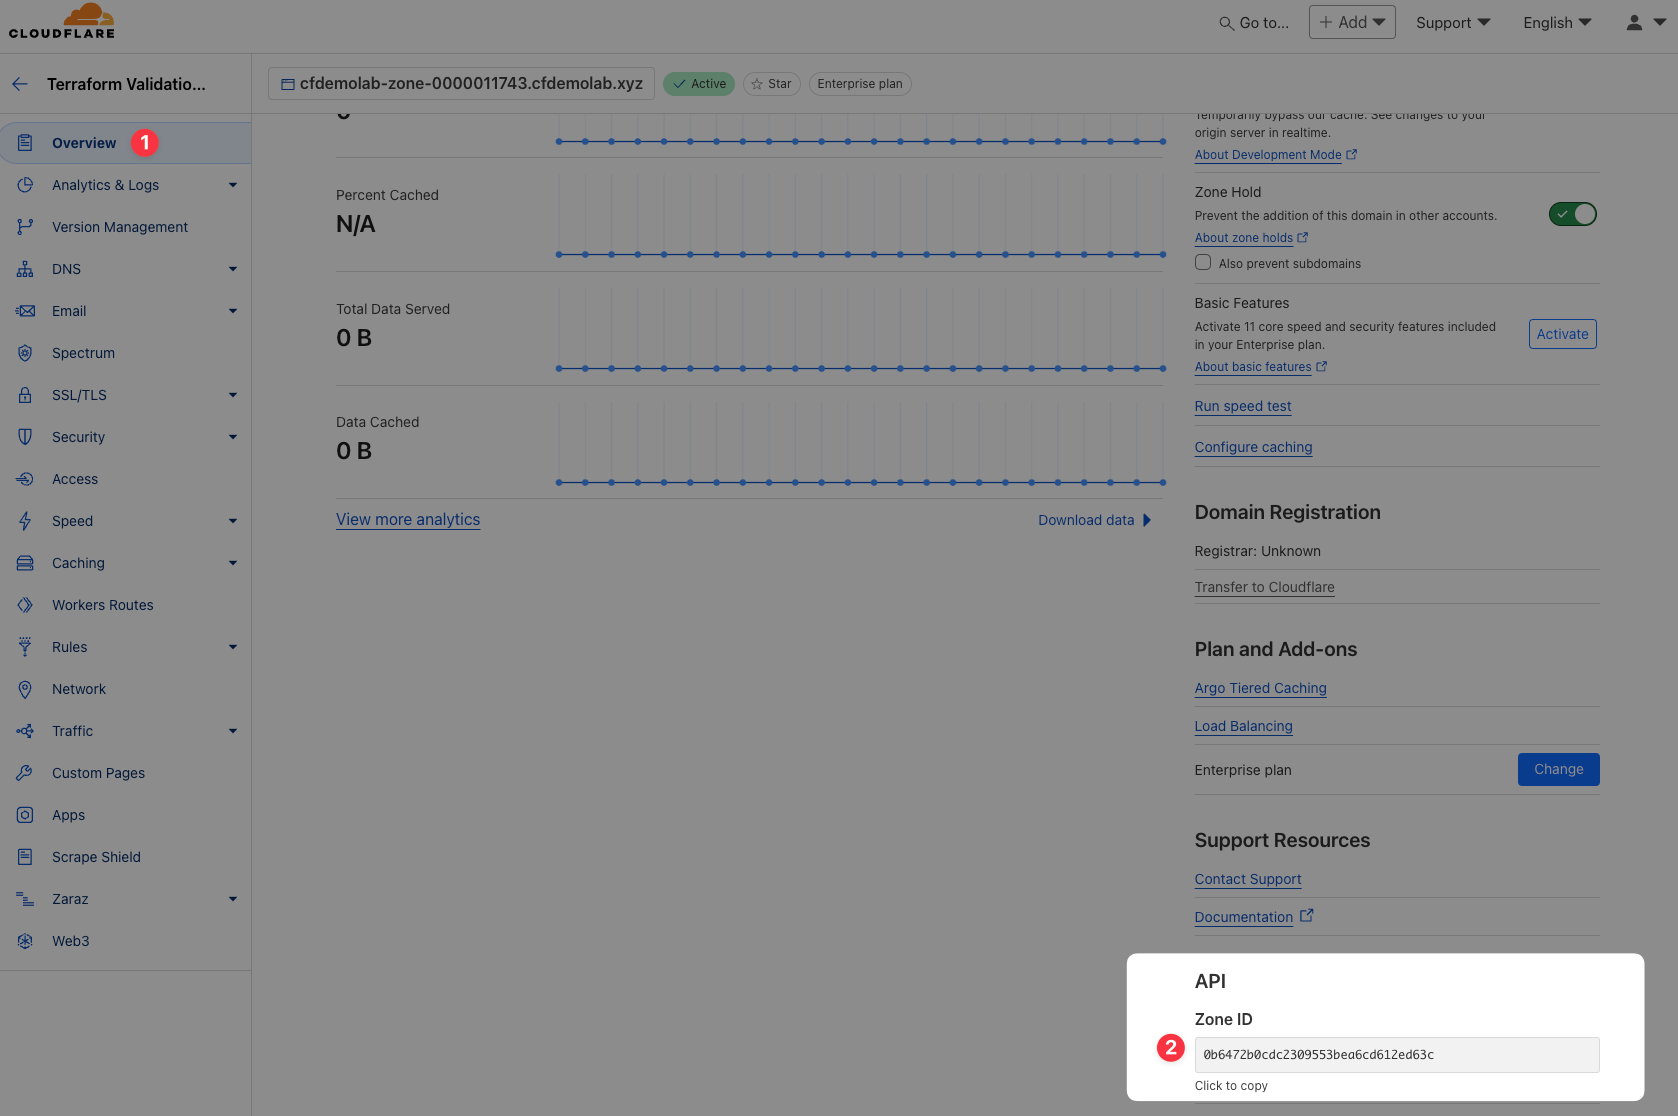
For this task, you will need to make a note of the Zone ID you are working on. To find this, open the zone you are using for this task in the dashboard:
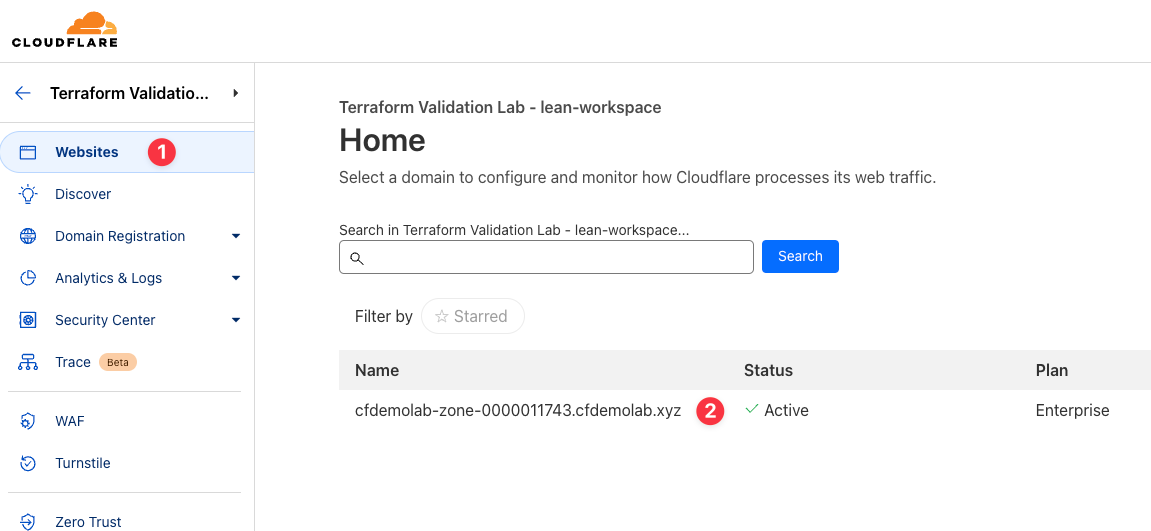
You can find the Zone ID on the overview page in the API Section:
Task
In this section we will deploy DNS records
Why
- This is often a key starting point when using or testing Terraform
Steps
1. Create DNS Configuration File
From the directory you have created, paste the following into a file called dns.tf and save it:
# Add a record to the domain
resource "cloudflare_record" "terraform1" {
  zone_id = "<your zone id>"
  name    = "terraform"
  content = "20.88.188.200"
  type    = "A"
  proxied = true
}
dns.tf
You will recall from the previous step that we noted that all files with a .tf extension are Terraform configuration files. These are all looked at when running Terraform commands.
2. Plan Your Change
On the command line type
terrafom planYou will see output similar to the below:
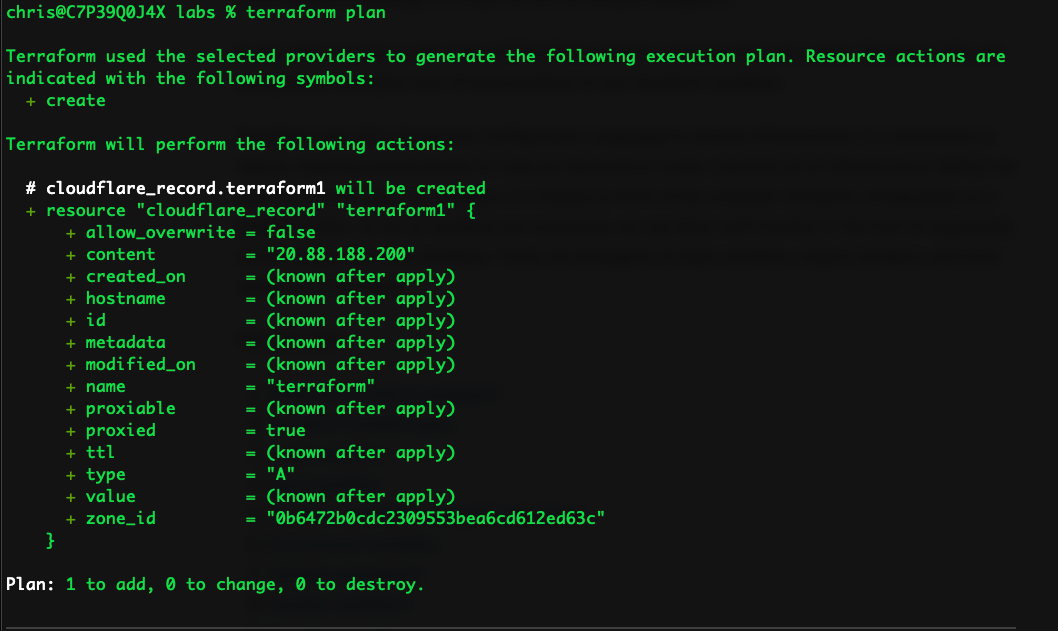
So, what does this command do, and what just happened?
The terraform plan command is a crucial part of the Terraform workflow. It allows you to preview the changes Terraform will make to your infrastructure before actually applying them. Here's a breakdown of its main functions:
- Generates an Execution Plan:
- It shows what actions Terraform will take to achieve the desired state as defined in your configuration files.
- It details which resources will be created, modified, or destroyed.
- Previews Changes Without Making Them:
- Running
terraform plandoes not make any changes to the infrastructure. It only presents what changes would be made if you ranterraform apply.
- Running
- Validates Configuration:
- Terraform checks whether the configuration is valid and if there are any errors or inconsistencies.
- Identifies Dependencies:
- The command also identifies resource dependencies and ensures they are handled in the correct order.
- Helps in Change Management:
- The plan output can be reviewed by a team before changes are applied, helping in collaboration and minimizing unexpected changes.
So, in this case, the output is telling us that it is going to create an Orange Clouded DNS A record called 'terraform' pointing to 20.88.188.200.
3. Apply Your Change
On the command line type
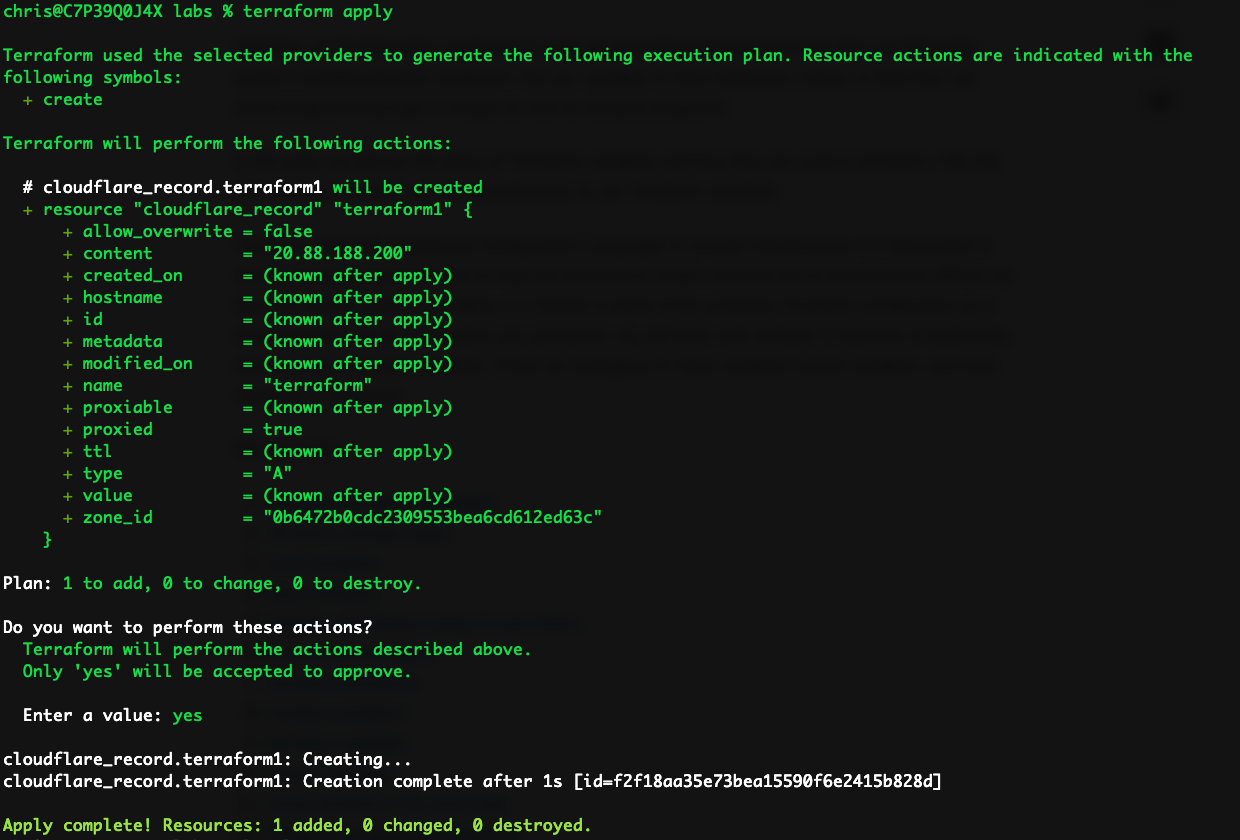
terrafom applyYou will see output similar to the below:
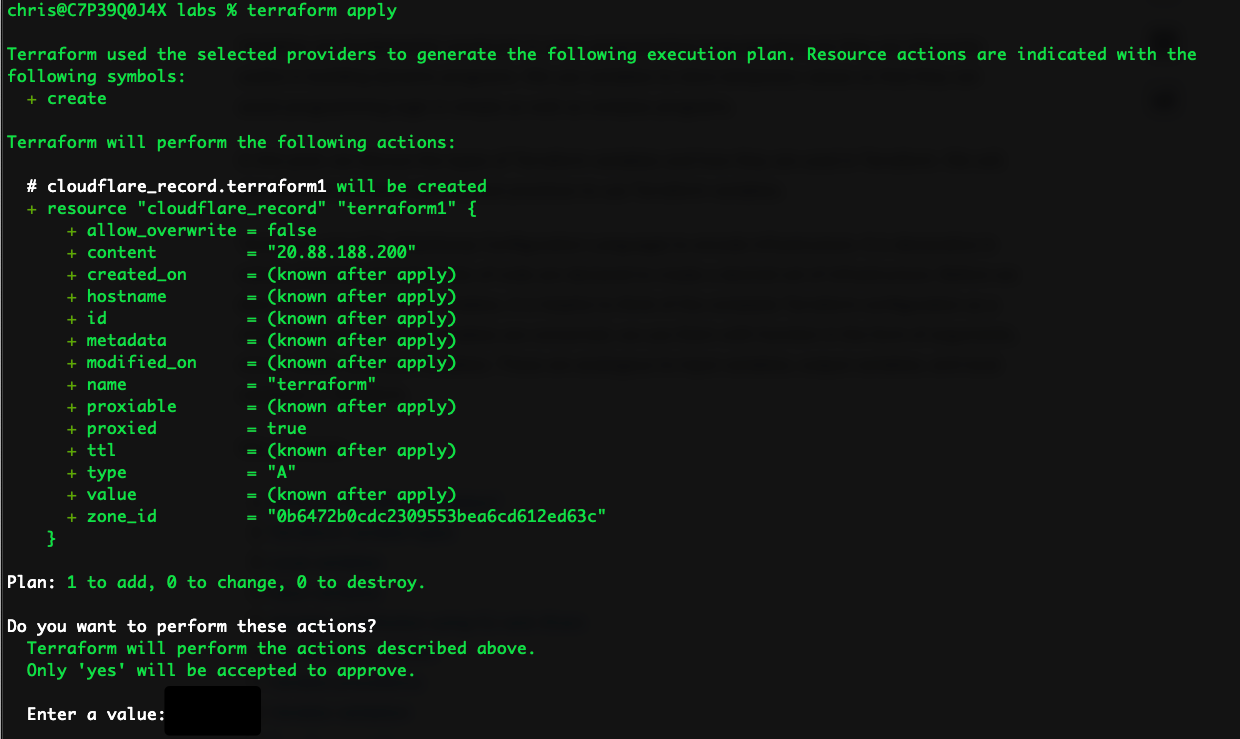
This looks just the same as the plan output; only this time it asks if you wish to perform the actions.
Type yes and hit enter. The change will be applied!
Done!
Here’s what terraform apply does:
- Applies the Execution Plan:
- It carries out the actions that Terraform determined necessary in the execution plan, which includes creating, modifying, or destroying resources to match the desired state defined in your Terraform configuration.
- Provisions/Modifies Infrastructure:
- Terraform will create or update resources such as VMs, databases, networks, etc., based on the infrastructure described in the
.tffiles.
- Terraform will create or update resources such as VMs, databases, networks, etc., based on the infrastructure described in the
- Asks for Confirmation (Interactive Mode):
- If run without a saved plan file, it will prompt you for confirmation before making any changes. This step is skipped if you provide a pre-generated plan file using
terraform apply <plan file>or if you force the apply with the-auto-approveflag (not generally advisable!!)
- If run without a saved plan file, it will prompt you for confirmation before making any changes. This step is skipped if you provide a pre-generated plan file using
- Saves the State:
- After the changes are applied, Terraform updates the state file (usually
terraform.tfstate) to reflect the current state of the infrastructure. This state file is essential for future operations like further plans or applies.
- After the changes are applied, Terraform updates the state file (usually
In summary, while terraform plan is a dry-run that shows what will change, terraform apply actually implements those changes on your infrastructure.
4. Check Your Changes
Head to the dashboard and to the zone you are working with. You will see the record there:
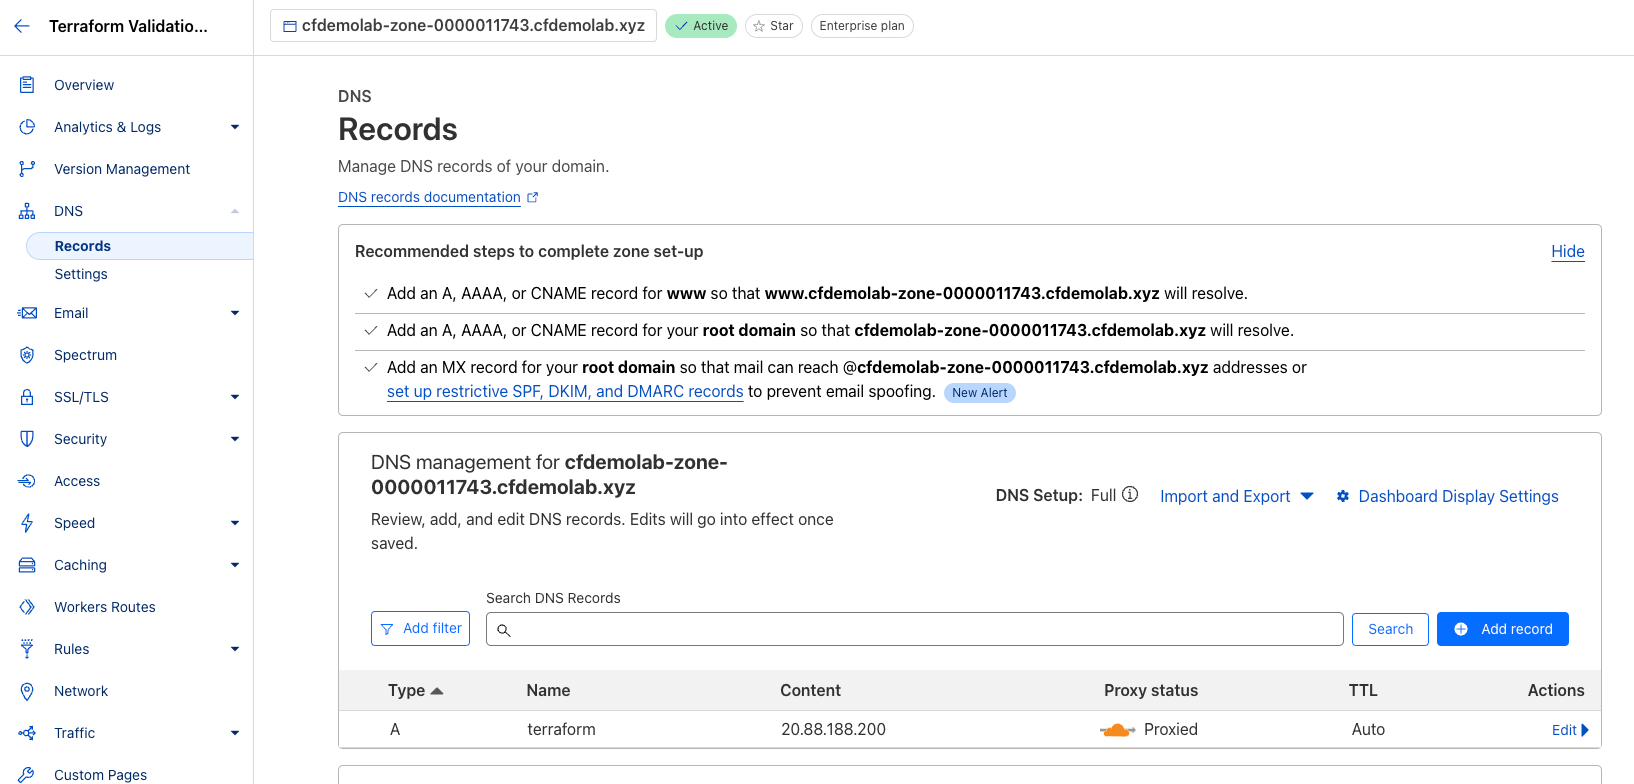
Feel free to browse to it, there's a real application behind it.
5. Analyse the State File
Now let's take a look at the state file.
On the command line type
more terraform.tfstateYou will see output similar to the below:
The Terraform state file (terraform.tfstate) is a crucial file that stores information about the current state of your infrastructure as managed by Terraform. It acts as a source of truth for Terraform, allowing it to track resource metadata (e.g., IDs, dependencies) and determine what changes need to be made when running terraform plan or terraform apply. The state file ensures that Terraform knows which resources it manages, compares the current state of your infrastructure with the desired state in your configuration, and updates itself after every successful apply. This file is essential for proper change tracking, dependency resolution, and managing large-scale infrastructure.
In the last exercise, you checked the contents of the directory. Now look again. What do you notice that wasn't there before?
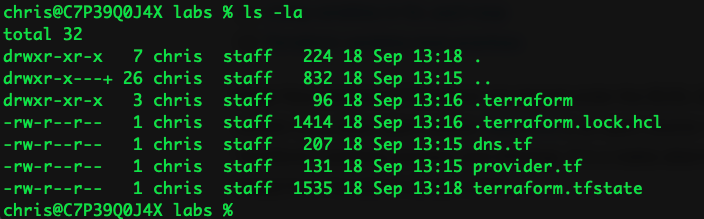
Take a look at terraform.tfstate
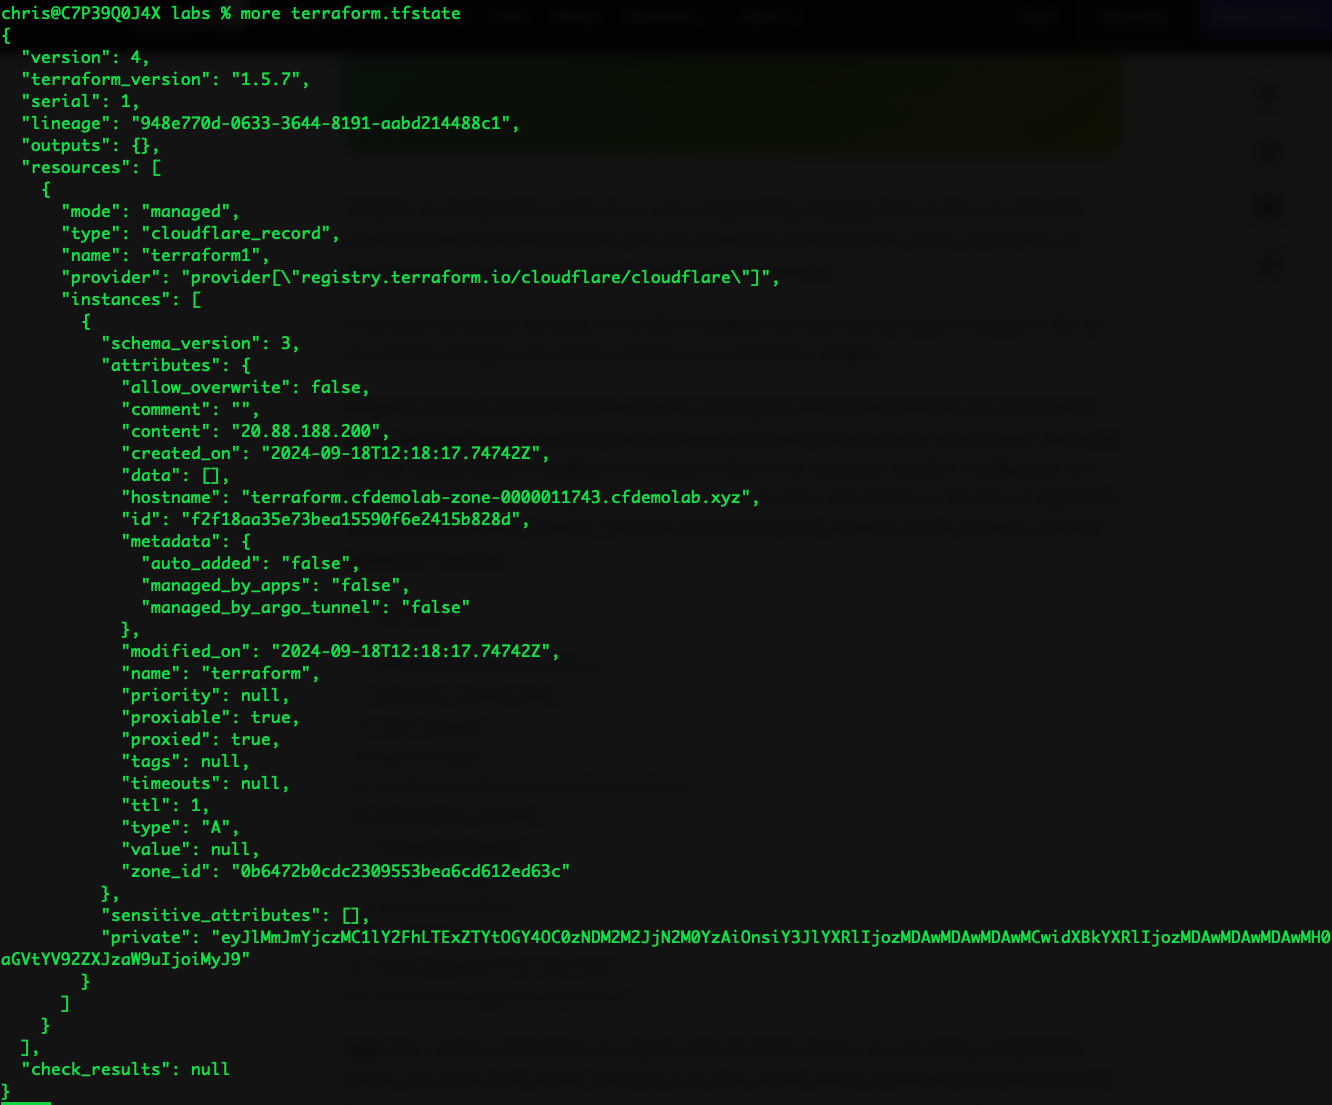
This is the source of truth for the configuration you just deployed. You will notice that there are a lot more attributes than you configured. This is normal - if you wish to understand why, spend a few minutes comparing what you see in the state file with the docs for the cloudflare_record resource in the Terraform provider.
6. Bad Practice Example: Modify the DNS Record via the Dashboard
Go back to the dashboard and change the value (IP Address) of the DNS record. This can be to anything you wish. Then go back to your command line and run terraform plan
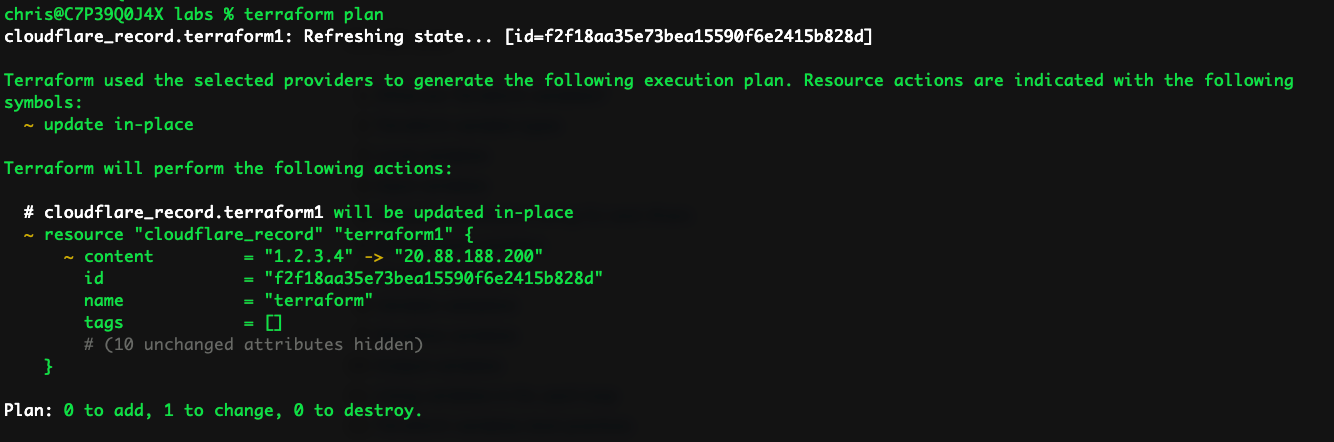
In this plan, you can see the first action it takes is Refreshing state - let's cover this in more detail and then we'll discuss what the rest of the output is telling us.
When Terraform displays "refreshing state" during a terraform plan command, it is synchronizing the state file with the actual infrastructure. Here's what happens:
- Fetching Current Infrastructure State: Terraform reaches out to the infrastructure provider (Cloudflare in this case!) and retrieves the current state of all the resources it manages.
- Comparing with State File: It compares the real-world state of these resources with the information stored in the local or remote state file. This ensures Terraform has the most up-to-date information about the infrastructure.
- Identifying Differences: Any discrepancies between the actual infrastructure and the state file are noted, and Terraform updates its internal understanding of the state.
This process ensures that when Terraform creates a plan, it uses the latest information from both the state file and the actual infrastructure, allowing it to accurately determine what changes (if any) are needed.
So essentially it's checking what it has in state against the API and checking that the configuration files are the same. However...we changed it.
Terraform considers its own state file as the source of truth. It will therefore overwrite changes made in the dashboard to resources it has under it's control,
In this case, the output of terraform plan tells us that Terraform will change the IP address back to what it was, because it manages the DNS record 'terraform1'
Go ahead and apply the configuration again to revert the change made in the dashboard.

If you wish, repeat the process, but this time delete the record in the dash. What happens then? What advantages and disadvantages can you think of from a customer perspective?
We'll explore this in more detail later, along with some examples of how this might impact a customer for the better and worse.
Before continuing, ensure that the dashboard is reflective of your Terraform config.
Summary
In this section we have covered the basic Terraform commands and created a configuration file to deploy a DNS record, and deployed it successfully.
Congratulations, you have deployed your first configuration with Terraform! Please move on to the next task.